To configure the Group Email Web Part:
- Select Modify Shared Web Part from the menu accessed at the upper right corner of the Web Part. This menu is only accessible by users with authority to modify the page.
-
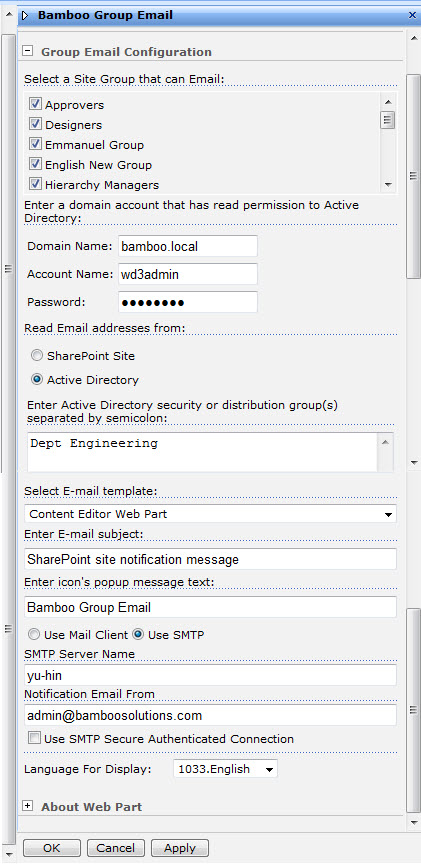
The configuration page for the Group Email Web Part is displayed on the right side of the screen (see Figure 3). See the Configuration section to configure the following properties:
-
Select a Site Group than can Email. Select site group(s), including custom and default SharePoint site groups that can send email by clicking on the mail icon of the Web Part. If a user does not belong to the selected groups in the property setting, the mail icon is disabled.
- Enter a domain account that has read permission to Active Directory. An Active Directory domain, account, and password are required to ensure that the currently logged in user belongs to the applicable AD security group.
- Read Email addresses from. Select whether you want to read email addresses from SharePoint Site users or Active Directory users.
- Select e-mail address from list. Select this check box to activate the Select List source, Select View and Select E-mail column selection boxes below. If this check box is left un-checked, the Web Part will send email to all users in the current site, by using the email addresses in their user profile.
- Select List Source. Select a SharePoint list in the current site that has an email address column.
- Select View: Select a list view which includes the Email address column.
- Select E-mail column. Select a column which contains user email address.
- Enter E-mail subject. Enter the outgoing email subject.
- Select E-mail template. Select a content editor Web Part installed on the site which contains the email body text.
- Enter icon’s popup message text. This is the text that will appear when user does a mouse over the icon.
- Use SMTP. Select this option to specify the SMTP server name and the email address that will appear in the “From” field. Contact your IT system administrator for the proper use of SMTP server. (Note: SMTP Secure Authenticated Connection option is available. It is optional. Click the checkbox if you want to use this option.)
-
Use Mail Client. Select this option if you want to use your default mail client to send out email.
-
To use a Distribution List in Active Directory, do the following:
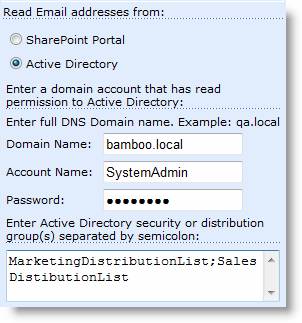
- Select the Active Directory option.
- Select a Security group or a Distribution group in AD to send email. The web part will send the email for the group.
- You must enter an access account that has the correct permission to read the AD store and the distribution or security group objects.
- Save your configuration settings by clicking Apply and then OK.
See Also: Configuring Content Editor Web Part for Email Template