Select the Included Lists for your Schema-based List Rollup
 IMPORTANT: The discovery modes avilable for schemas that use the Bamboo Aggregation Service (BAS) are slightly different than the modes available for schemas using the SharePoint Aggregation Service (SAS). The differences are described in detail in this article.
To select the lists or libraries to include in your schema-based List Rollup, follow these steps:
| Step |
Action |
| 1. |
Included Lists, Step 1: Discovery Mode. Click the Configure Discovery Mode button to select a method to identify lists to include in your schema. The Discovery Modes available will depend on the Aggregation Service you selected.

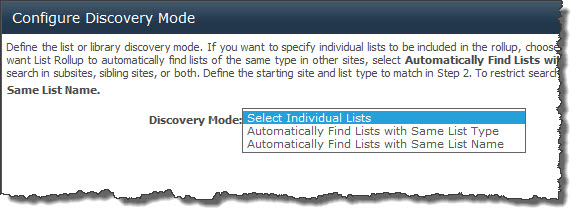 If you are using the Bamboo Aggregation Service (BAS), the available Discovery Modes are: If you are using the Bamboo Aggregation Service (BAS), the available Discovery Modes are:
- Select Individual Lists. Choose this option if you want to individually identify the specific lists/libraries that you want to aggregate.
- Automatically Find Lists with Same List Type. Match by list name will automatically find all the lists that have the same display name as the list selected in Step 2.
- Automatically Find Lists with Same List Name. Match by list name will automatically find all the lists that have the same display name as the list selected in Step 2.
 Automatically finding lists, whether by type, name or in subsites or the site collection, means that you won’t have to edit your schema to include new lists as they are created. List Rollup is capable of automatically discovering new lists, minimizing the need for future schema modifications. Automatically finding lists, whether by type, name or in subsites or the site collection, means that you won’t have to edit your schema to include new lists as they are created. List Rollup is capable of automatically discovering new lists, minimizing the need for future schema modifications.
If you choose to automatically find lists while using the BAS, you will then be asked to define the scope of where to look for those lists. The scope choices are the same regardless of whether you choose to match by List Type or List Name.
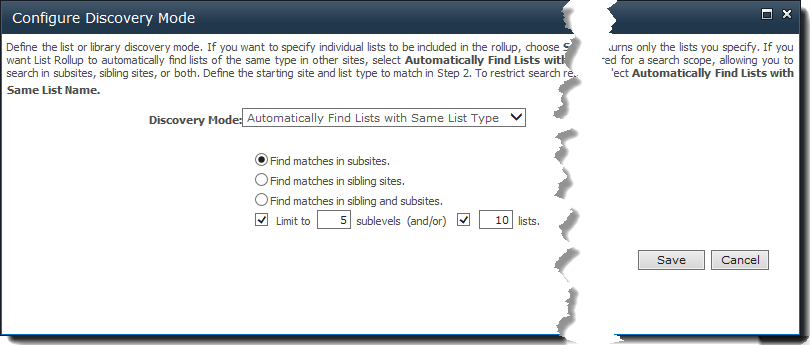
Choose to:
- Find matches in subsites. Subsites are the sites beneath the site where the list selected in Step 2 resides.
- Find matches in sibling sites. Sibling sites are sites at the same level as the site where the list selected in Step 2 resides.
- Find matches in sibling and subsites.
- Find matches in current site (exclude subsites). This option can be used to find lists of the same type on the current site, without including lists of that type found in subsites.
NOTE 1: If you choose to discover matches in subsites OR sibling and subsites, you can limit the search scope to a specific number of sublevels or lists. When the specified number is reached, the List Rollup will look no further. It is recommended that you limit the scope this way in order to improve performance. The more sites that are included in the discovery scope, the longer the rollup will take to display.
NOTE 2: When looking for lists in subsites and/or sibling sites, the site where the selected list resides is also included in the search.
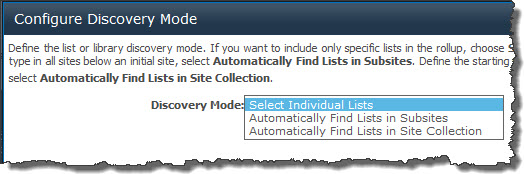 If you are using the SharePoint Aggregation Service (SAS), the available Discovery Modes are: If you are using the SharePoint Aggregation Service (SAS), the available Discovery Modes are:
- Select Individual Lists. Choose this option if you want to individually identify the specific lists/libraries that you want to aggregate.
- Automatically Find Lists in Subsites. Choose this if you want to have List Rollup automatically find lists of the same list type in the site where the list selected in Step 2 resides and all its subsites.
- Automatically Find Lists in Site Collection. Choose this if you want to have List Rollup automatically find lists of the same list type in all the sites of the site collection where the list selected in Step 2 resides.
Automatically finding lists, whether in subsites or the site collection, means that you won’t have to edit your schema to include new lists as they are created. List Rollup is capable of automatically discovering new lists, minimizing the need for future schema modifications.
Once the Discovery Mode is selected, click Save to save it and close the dialog. Otherwise, click Cancel to close the dialog without saving.
NOTE: When looking for lists in subsites, the site where the selected list resides is also included in the search.
IMPORTANT: It is not possible to limit the discovery scope when using the SharePoint Aggregation Service (SAS). With SAS you can auto-discover within a site or site collection only. You cannot auto-discover sibling or subsites like you can with Bamboo Aggregation Service (BAS).
|
| 2. |
Included Lists, Step 2: Select a List. Click the Select a List button.

Depending on the aggregation service you picked, the Select a List dialog will look slightly different. If using the SharePoint Aggregation Service(SAS), you will see:
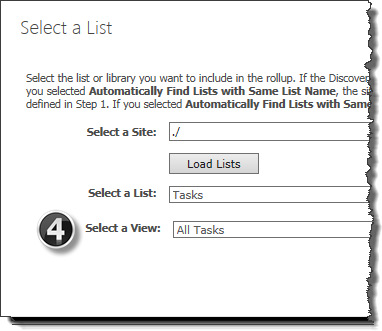 If using the Bamboo Aggregation Service (BAS), you will see an extra selection, the Select a View. Choose a view of the selected list. The selected view will determine the columns to be included in your roll-up and may also determine the filter of your rollup (or this list in your rollup). If using the Bamboo Aggregation Service (BAS), you will see an extra selection, the Select a View. Choose a view of the selected list. The selected view will determine the columns to be included in your roll-up and may also determine the filter of your rollup (or this list in your rollup).
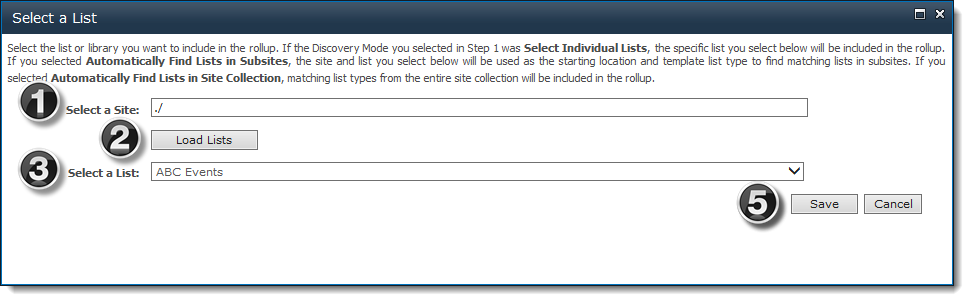
On the dialog that appears:
-
Enter the URL of the site that contains a list you want to add to the schema.
NOTE: Site URLs can be absolute (http://domain/site) or relative (./site). Relative URLs should be used for SharePoint Web applications containing multiple Alternative Access Mappings (AAM), if the Web Part is part of a site template, or if you plan to migrate the content database to another environment in the future.
- Click Load Lists to populate the Select a List drop-down with available lists in the site.
- Choose a list or library from the Select a List drop-down selection.
-
If using BAS, choose a view of the selected list from the Select a View drop-down.
NOTE: The View will determine the columns included in your rollup and potentially the filter of the items from this list.
- Click Save to save your list selection and close the dialog. Otherwise, click Cancel to close the dialog without saving anything.
|
| 3. |
Included Lists, Step 3 (only if using BAS): Filter. After selecting a list, you can then choose to filter the list. To filter, click Define a Filter
NOTE: If using SAS, the filter is defined after selecting columns.

In the Define a Filter dialog, choose to use the filter defined in the list view selected by picking Items in a List View.
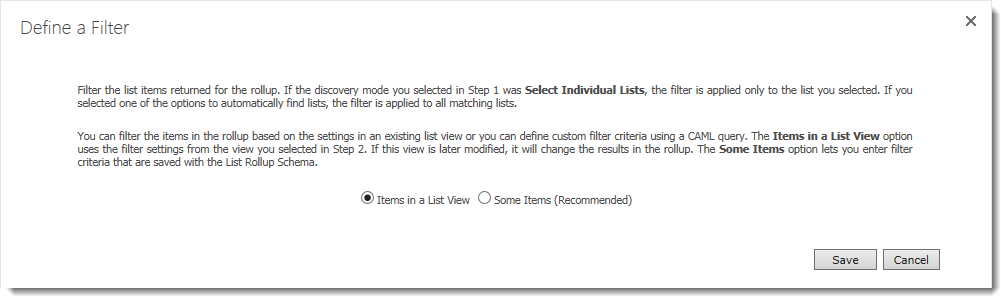
Otherwise, pick Some Items (Recommended) to build a filter specifically for this schema using the CAML Query Builder.
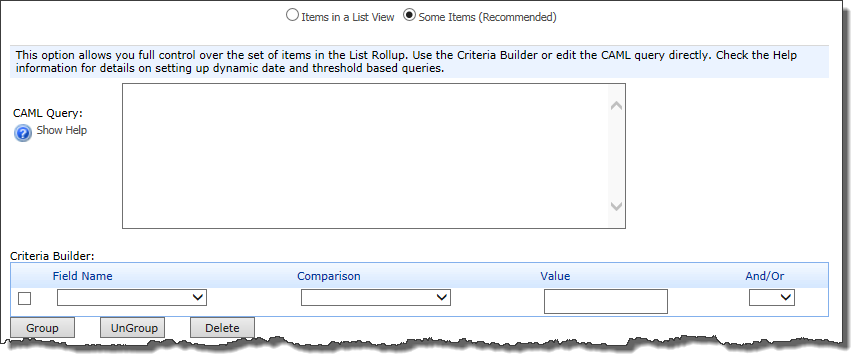
See Select the Filter for your Schema-based Rollup for more information about building a filter with the CAML Query Builder.
|
| 4. |
Included Lists, Step 3 (if using BAS, this is Step 4): Include List. After you select a discovery mode and a list, click the Include List in Rollup button to add the list to the Included Lists table.
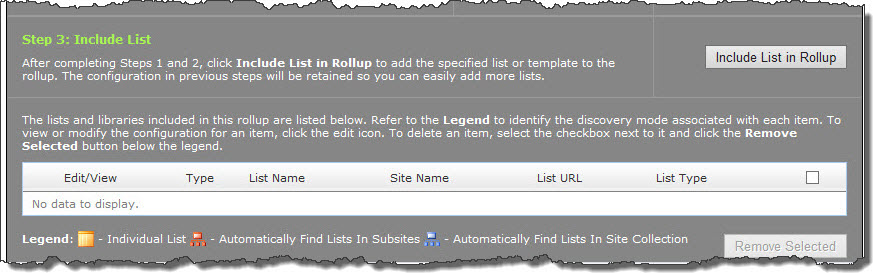
IMPORTANT: The FIRST list that you include is known as the master list. When using the SharePoint Aggregation Service, all subsequent lists included MUST be of the same type as the master. When selecting columns to be included in a rollup using the SharePoint Aggregation Service (SAS), they are selected from the master list.
|
| 5. |
If desired, choose another list from another site collection and include it in your rollup. After clicking Include List in Rollup, two lists will be shown in the Included Lists table.
NOTES:
- When choosing a second list, the list of available lists/libraries in the selected site will be shorter if using the SAS, as it will include only those lists/libraries of the same type as your MASTER list (the first list chosen).
- When auto-discovering items, the more lists/libraries you include in the Included Lists table, the longer it will take to display the contents of your rollup.
|