| Return to Configuration Overview |
|---|
You can connect Mini-Calendar to a SharePoint list view to provide a date filter for displaying list items. When you do this, clicking on a date in Mini-Calendar will filter the list items to display only those items that are relevant for the selected date.
NOTE: If you attach the Calendar to the Events list, you will not be able to filter for columns Begin and End via Web Part connection since those SharePoint columns are not filterable.
| Step | Action | Result |
| 1. |
Add Mini-Calendar to a page that also contains a web part that displays a SharePoint list view. Configure Mini-Calendar to display items using the instructions provided in Configuring Mini-Calendar.
|
|
| 2. | Select Edit Web Part from the upper right drop-down arrow on Mini-Calendar or edit the web part page by clicking Edit Page in the Page ribbon. | |
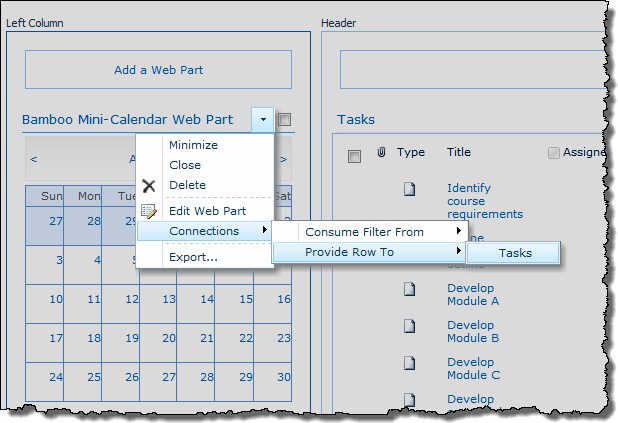
| 3. |
In the Mini-Calendar edit menu, select Connections > Provide Row To and select the SharePoint list you want to filter. You can only select from lists that are on the same page where Mini-Calendar resides. In the example below, we will be filtering a list called Tasks. |
 |
| 4. | In the Choose Connection tab, make sure the option Get Filter Values From is selected. | 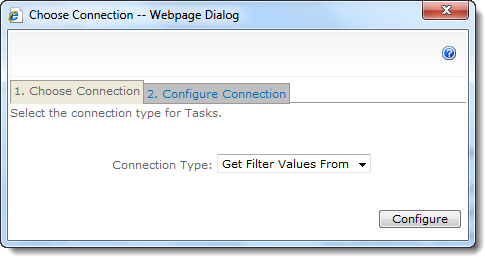 |
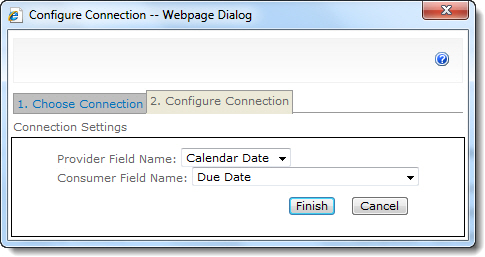
| 5. |
In the Configure Connection tab, select the Provider Field Name Calendar Date. For the Consumer Field Name, select a column in the list that contains the date you want Mini-Calendar to filter on.
Click Finish to complete the Mini-Calendar connection to the selected SharePoint list.
|
 |
| 6. | Click Stop Editing in the page to return to the shared view of the page. When you click a date in Mini-Calendar, the list items will be filtered to only display items due on the selected date. | 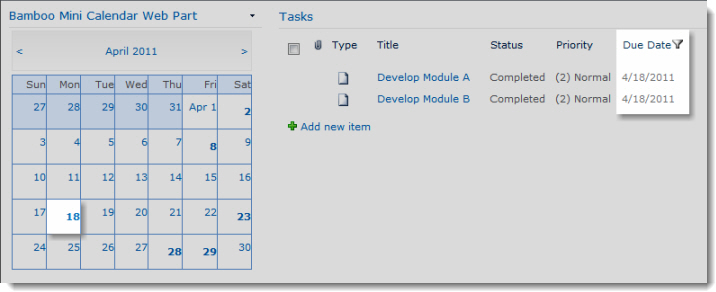 |
To remove the connection, follow steps 2 and 3 above to edit the Web Part connection, and then click the Remove Connection link in the Configure Connection screen.