Import Data from Excel or Delimited Text File to SharePoint List
To import data from a delimited text file or Excel spreadsheet, follow these steps:
| Step |
Action |
| 1. |
Connect to the Target Site. If you aren’t connected to the desired site, see Reset the Connection to the Target SharePoint Site. |
| 2. |
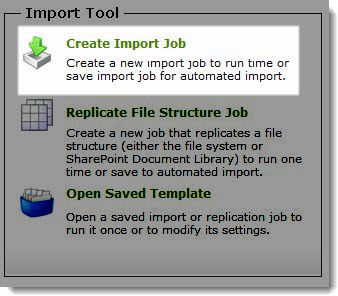 In the Import Tool section of the dashboard, select Create Import Job. In the Import Tool section of the dashboard, select Create Import Job. |
| 3. |
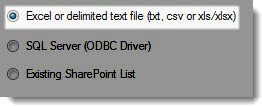 Select Excel or delimited text file and click Next. Select Excel or delimited text file and click Next.
NOTE: To import a Microsoft Excel File, Microsoft Excel must be installed on the PC. If your computer is running 32-bit Windows, List Bulk Import supports the 32-bit version of Excel 2007 or Excel 2010. If your computer is running 64-bit Windows, List Bulk Import supports the 64-bit version of Excel 2010 only.
|
| 4. |
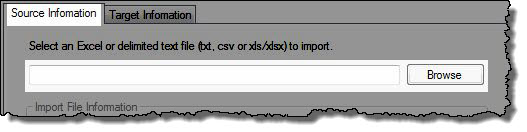
On the Source Information tab, enter the file path in the text box or click Browse to browse to the file containing the file to be imported.
 Choosing a Microsoft Excel file (*.xls or *.xlsx) requires the following Import File Information: Choosing a Microsoft Excel file (*.xls or *.xlsx) requires the following Import File Information:
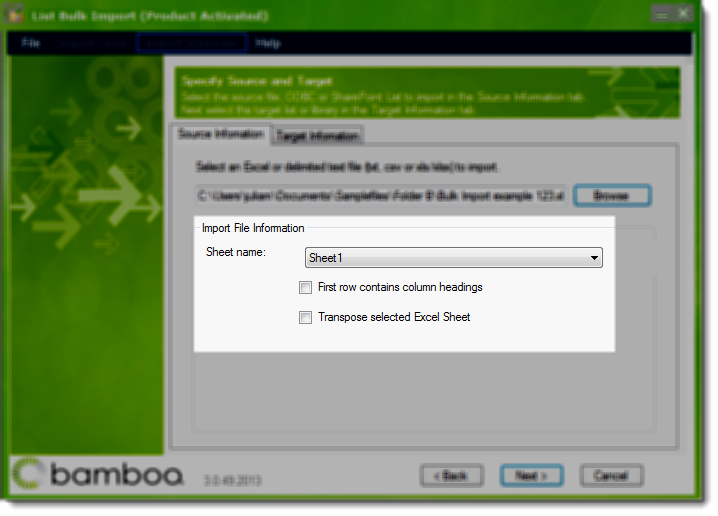
- Sheet Name – Users must choose the Sheet in the Excel workbook that contains the data to import
- First row contains column headings – Check this box to indicate that the first row contains column headings and not data
- Transpose selected Excel Sheet – Check this box to transpose the previously referenced Excel sheet. Users are prompted to enter the Starting Cell and Ending Cell when this option is selected.
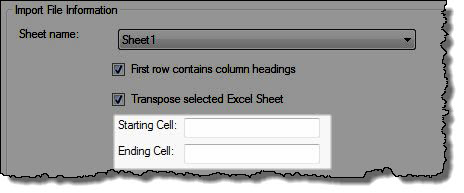
NOTE: Choosing to transpose the Excel Sheet rotates the selected Excel Sheet (i.e. Column A will become Row 1, Column B will become Row 2 and so on) prior to the import process. The pivoting cell is defined by the Starting Cell; thus, if D4 is the Starting Cell, Column D becomes row 4.
Choosing a Comma Separated Variable (CSV) or Text (.txt) File requires the following Import File Information:
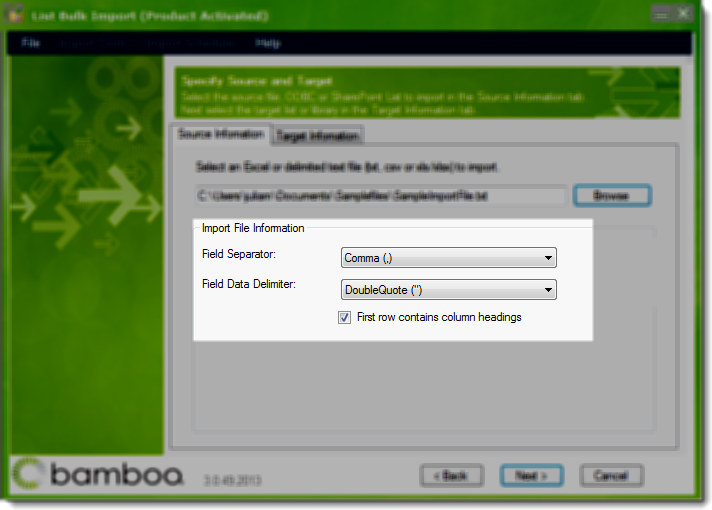
- Field Separator – If the file selected is a CSV file, this is set to Comma(.) by default. Otherwise, select the appropriate choice for your data
- Field Data Delimiter – Select the delimiter used in your data file. This option is especially useful with CSV files because data often has commas in numeric values and using a delimiter will ensure that the comma is included in the data rather than used as a field delimiter.
- First row contains column headings – Check this box to indicate that the first row contains column headings and not data.
|
| 5. |
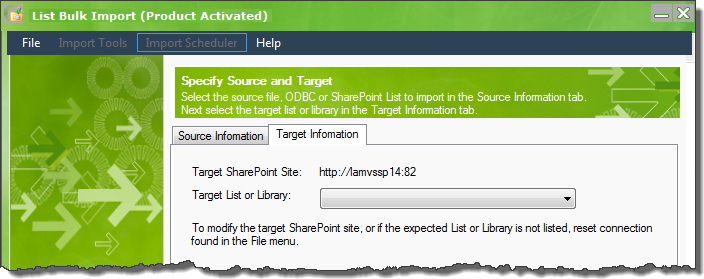
Once the Source Information is specified, click the Target Information tab and select the list or library in the Target Site to import to. All available lists and libraries are shown in the drop-down menu. Once selected, the menu is populated with available lists and libraries found within the specified site.
NOTE: If the list or library is not shown, see Reset the Connection to the Target SharePoint Site to refresh the list.
 |
| 6. |
Map the Source and Target Columns. After selecting the Source Information and Target Information, click Next to begin mapping source columns to the target site.
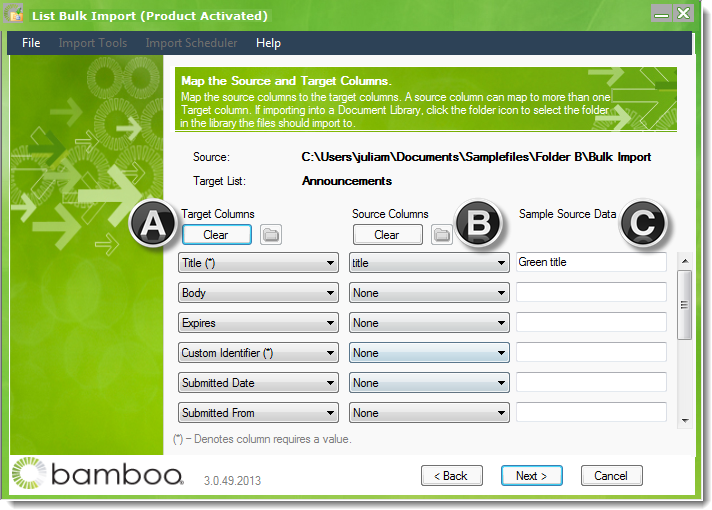
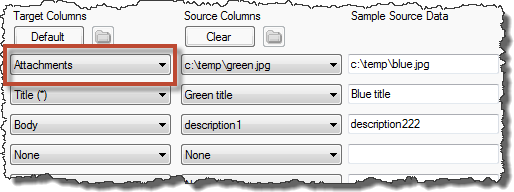
- All the fields from the selected target list are shown in the Target Columns column. Required columns are marked with an (*). Click Clear to clear all the selections in this column if you prefer to select them individually.
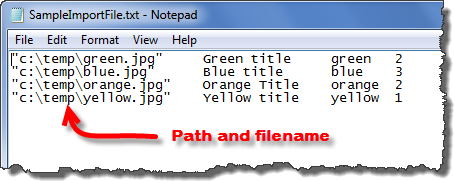
If you want to import a file as an attachment to a list item, select the Target column called Attachments and map it to the column in your source data that includes the filename AND path.
-
The Source Columns column shows the fields from the source data file. If you have noted that the first row contains column headings, you will see the heading name. Otherwise, you will see generic names for the fields. Choose the Source Column from the drop down that you want imported to the corresponding Target Column.
NOTE: If you do not have data for a particular Target Column, leave the selection set to None. List Bulk Import will map fields with the same names automatically (see the Title column in the screen shot above). You can choose to keep these maps or change them.
-
The Sample Source Data will show the Source Column value for the first row to be imported. Use this information to ensure that you chose the correct Source Column.
NOTE: This page usually has a vertical scroll bar to accommodate all the fields.
When finished, click Next.
|
| 7. |
If you are importing any data to a Lookup column, the next page will allow you to map values from your source data to the available choices in your target list. See How to Map Values to Lookup or Choice Columns. |
| 8. |
Check for duplicates. If you have existing information in your target list and are concerned about importing duplicate information, see How to Check for Duplicate Records. Otherwise, don’t bother checking for duplicates; it slows down the import.
 If the intent of your import is to update existing items and replace the attached files, choose to check for duplicates and then choose to update existing records. See How to Check for Duplicate Records. If the intent of your import is to update existing items and replace the attached files, choose to check for duplicates and then choose to update existing records. See How to Check for Duplicate Records.
|
| 9. |
Review and Import. If you think you may want to run this import again, save your configuration parameters in a template file. See Save the Import Configuration for more information.
Otherwise, click Import to start the import.
|
| 10. |
When the import completes, click View Log to review the import. You can also review the results later since the log file is saved. See Review the results with the Log Viewer for more information. |