| Return to Configuration Overview |
|---|
The Date Filter is designed to filter out items that aren’t associated with a specific date. To connect and configure a Date Filter, follow the steps listed in this section.
-
Step 1 – Configure the Date Filter
Add the Date Filter web part to the page and configure the tool pane. -
Step 2 – Create the Connection
Make the connection between the Date Filter web part and your list that you are displaying on the same page.
Configure the Date Filter
| Options | Step | Action |
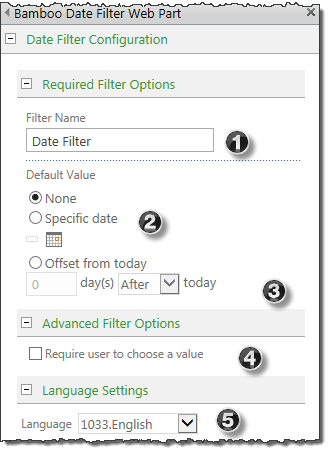 |
1. | Edit the web part to open the tool pane to modify the settings to your specifications. The first step is to enter a name for the filter in the Filter Name field. |
| 2. | Select a default value for the filter to use. The available options are no default value, any specific date, or a pre-set distance (before or after) from the current date. | |
| 3. | To force users to select a date filter, check the box next to the Require user to choose a value option. | |
| 4. | Language Settings | |
Connecting the Date Filter to a Web Part
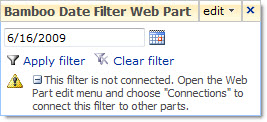
Once you’ve configured the Date Filter, you’ll need to connect it to the Web Part you want it provide data for. Until the filter is connected to a Web Part, it won’t do anything, and you’ll see the message displayed below.
Use the following procedure to connect the Filter.
| Step | Action | Result |
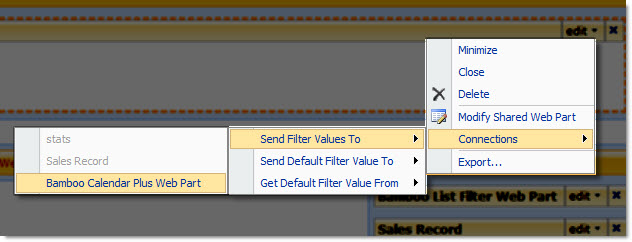
| 1. | From the Date Filter Web Part’s Edit menu, select Connections > Send Filter Values To > (your destination Web Part). |
|
| 4. | From the Date Filter Web Part’s Edit menu, select Connections > Send Filter Values To > (your destination Web Part). |
|
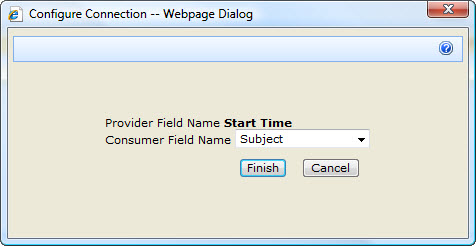
| 5. | From the dialog that pops up, select the List Column that the filter should be based on. | Remember, the List the web part is using as source data is determined by the web part, not the List Filter. So if you’re connecting to a Calendar web part that’s configured to use data from the “Events” List, the available columns in this dialog will be from that List. |
| 6. | Click Finish. | The dialog will close, and your Filter is now ready to be used. |