| Options for Installing |
|---|
IMPORTANT: As of April 2017, Bamboo no longer includes the Installation/Setup program in product download packages. Please Overview of the Updated Installation Process for Bamboo components for information about the updated process.
To access the Setup program:
Note: The minimum screen resolution to view the Setup program is 1024×768.
| Step | Action |
|---|---|
| 1. | Download the self-extracting product EXE (i.e., HW03.R1.7.SP2010.SL.exe) and save it to a local folder on the appropriate SharePoint server (see Location of Install Files if you are unsure about which SharePoint server to install on). |
| 2. |
If you aren’t ready to install, click the X in the upper right corner to close it. To start the Setup program manually later, double-click the Setup.bat file in the root folder where the product files were extracted. |
 Double-click the product EXE file to extract the contents of the product download.
To Run the Setup:
| Step | Action |
|---|---|
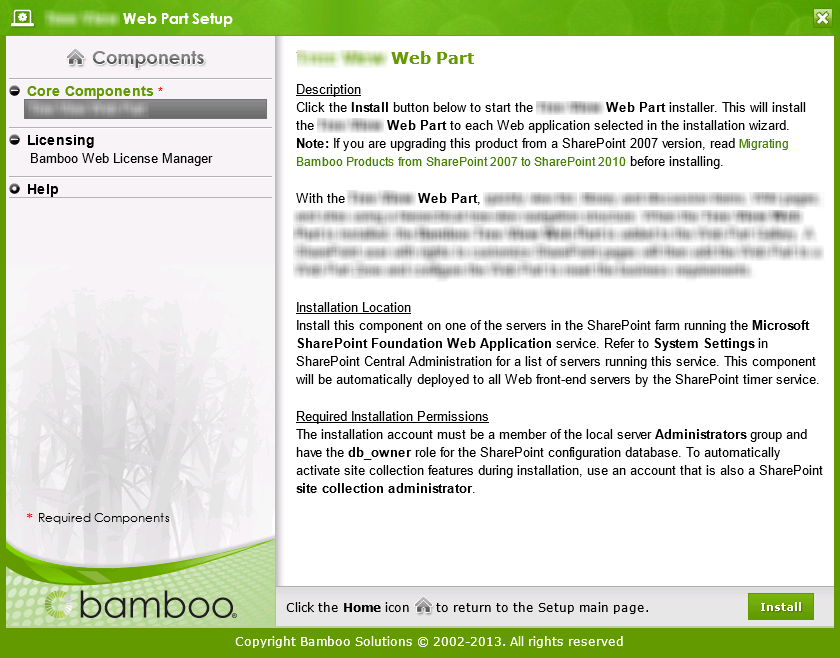
| 1. | Review Recommendations for a successful install |
| 2. | Run the Installation/Setup program and highlight a component to install. It’s best to install components in the order they are listed, if more than one is listed. |
| 3. | Verify the installation location and required permissions for the selected component. They will be listed on the right side of the screen and could change for different selected components. |
| 4. |
Click the Install button that appears in the lower right corner. The install process will begin.
|
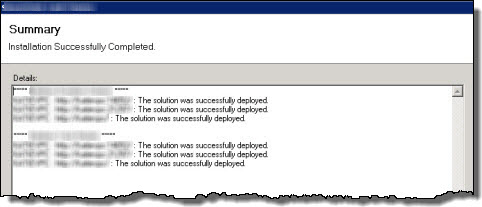
| 5. |
When the installation is complete, a Summary will be displayed. Some Bamboo product components install several features. The install routine does not abort the installation if one feature fails to install. It continues to install the next feature. For this reason, be sure to review this summary carefully to make sure the install completed without error. You may need to scroll up to review the entire summary.
|
| 6. |
Repeat Steps 2-5 for each required component listed. Required components are designated with a red asterix. Install optional components as needed.
|
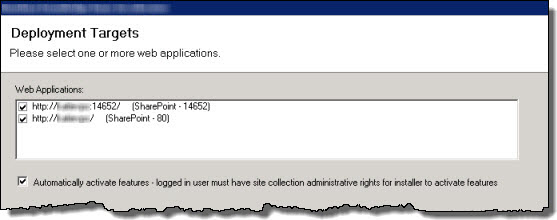
| 7. | When all desired components are installed, restart the World Wide Web Publishing Service or the App Pools, depending on which you may have stopped. |
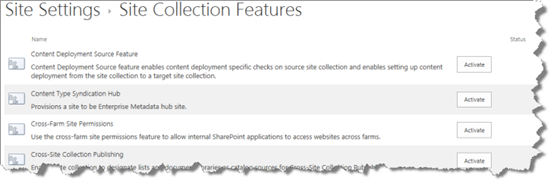
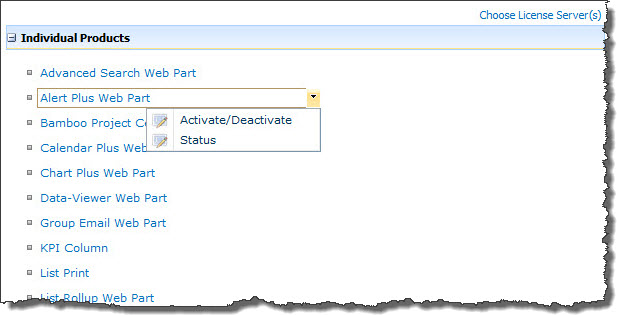
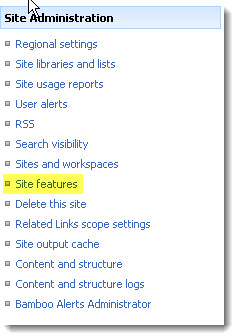
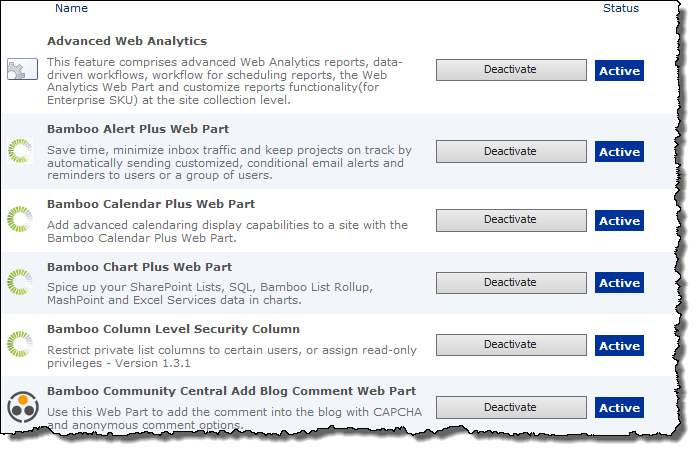
| 8. | If you didn’t automatically activate features in site collections during the install, be sure to activate the site collection feature(s) in the appropriate site collection before adding the web part to a page. See Activating a Bamboo Site Collection Feature for more information. |
Return to Options for Installing


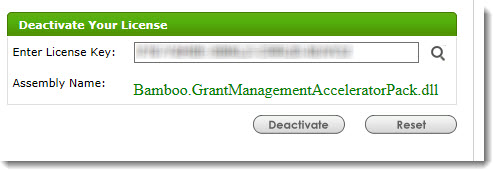
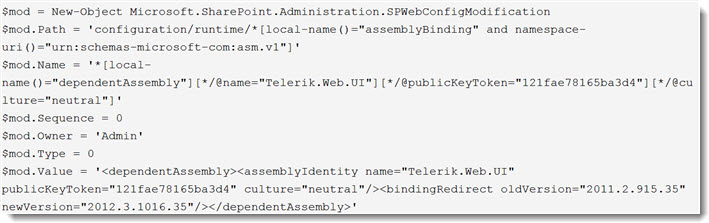
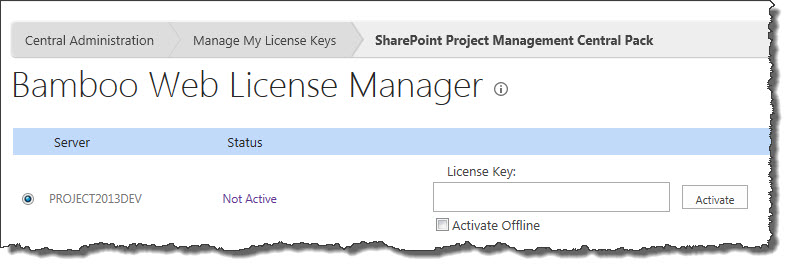
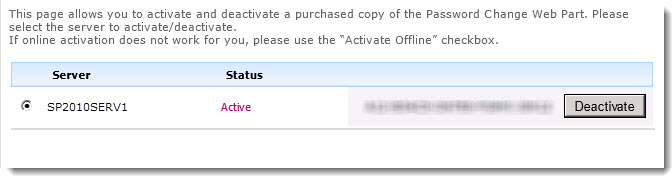
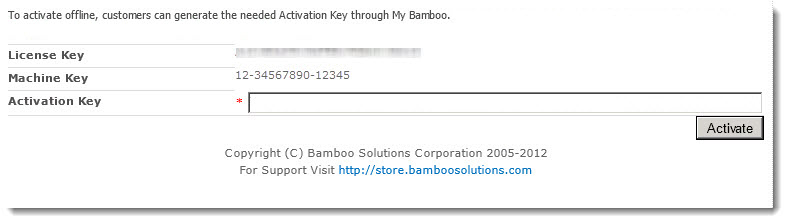
 ). The Assembly Name licensed with this key will be displayed. Ensure it is the product you expect and then click Deactivate.
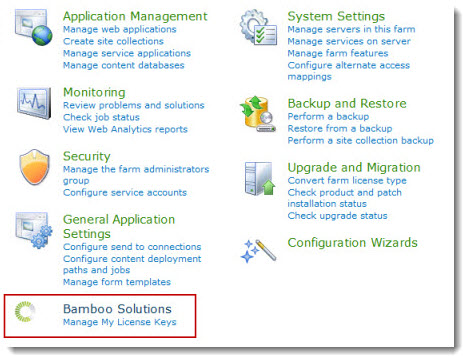


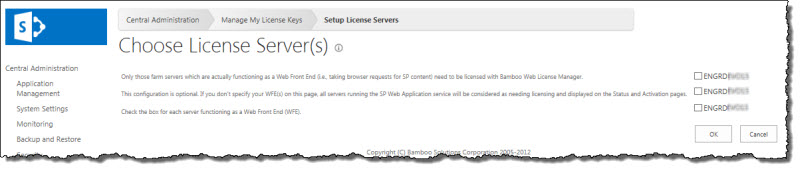
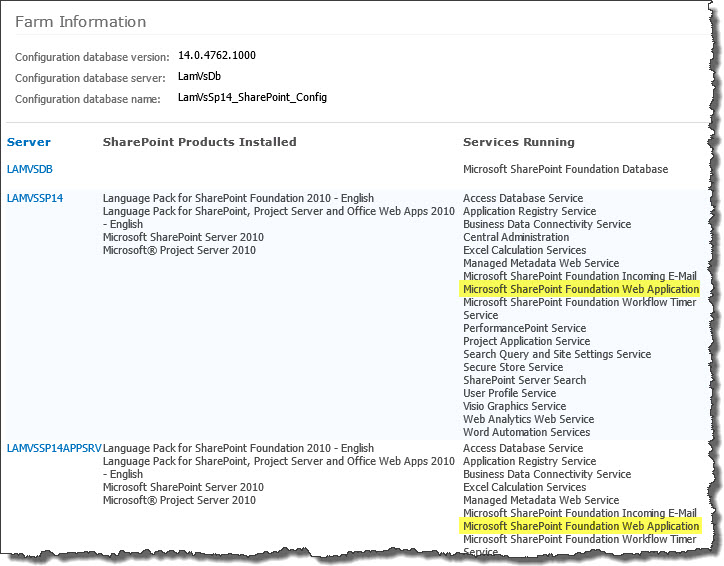 To determine which servers on the farm run these services, go to Central Administration > System Settings > and then Manage servers in this farm. If you are using WSSv3/MOSS, this page is accessed in Central Administration through Operations > Servers in Farm. In this example, there are two WFE servers on the farm.
 An ever increasing number of companies are choosing SharePoint as a collaboration system. One of the main attractions with SharePoint is the ability to quickly build a shared information database through the use of Lists. SharePoint Lists can render data in multiple views to present the information in various formats tailored for use by different sets of users. These views can be a list, calendar or other custom views such as our Gantt chart view. One of the views that out-of-the-box SharePoint is missing is a Map View for SharePoint Lists that may contain geographic data. For example, address fields in a contact list or a customer list that is being used to manage sales and marketing information.
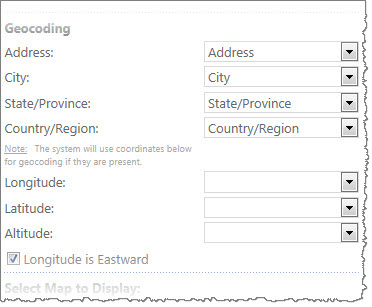 Regardless of your data source, select the columns for Address, City, State/Province, and Country/Region. If your data already contains geographic coordinates, select the columns that contain Latitude, Longitude, and optionally, Altitude.
 SharePoint 2013:
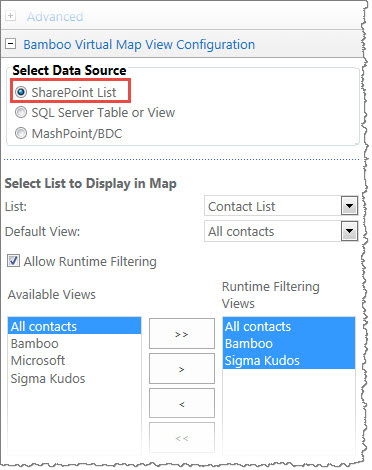 Select this option to access the available SharePoint lists/libraries on the current site.
 Select this option to indicate whether or not to use a SQL Server Table or View
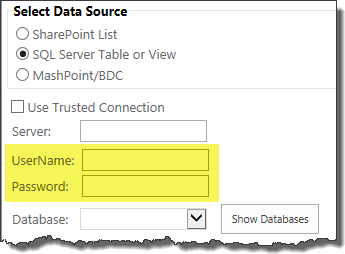 If you want to use a database located on another server, and thus, will not use a trusted connection, additional configuration parameters will appear:
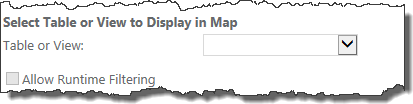 In the Select Table or View to Display in Map section of the tool pane, choose the Table or View that contains the data to be displayed on the map.
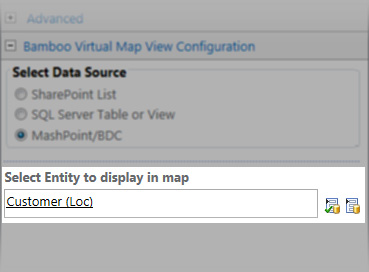 Select this option to access databases, web services or Custom Providers through Bamboo MashPoint or with a source configured via Microsoft Business Data Catalog (BDC).
 To select the entity from the available content types, click on the Select External Content Type icon (
 ) to open the External Content Type Picker window where you can find the external data source with the data to display on the map. Select the appropriate one and click OK to close the window.
 ) to make sure you entered it correctly.
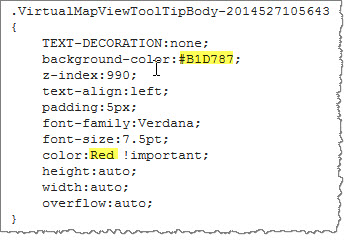
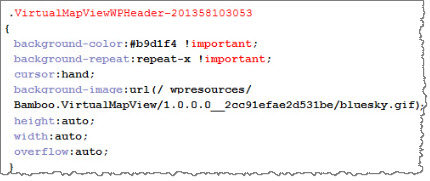
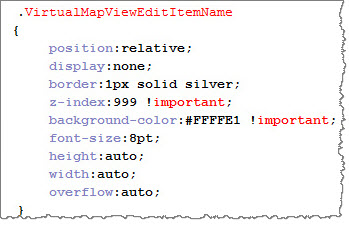
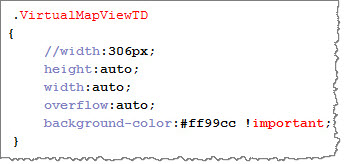
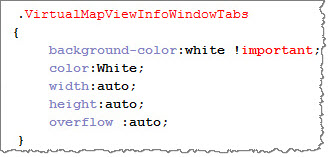
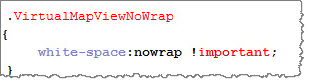
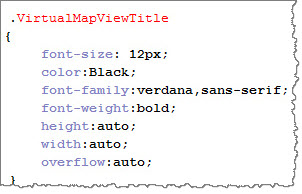
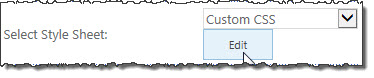 To access the style sheet editing option in the tool pane, select Custom CSS from the Select a Style Sheet drop-down button, and then click Edit. The style sheet editor opens.
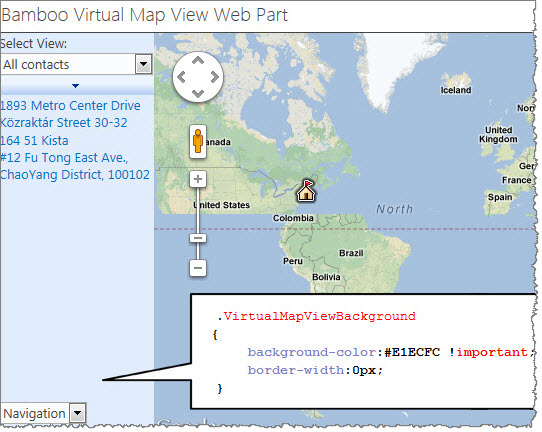
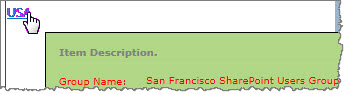

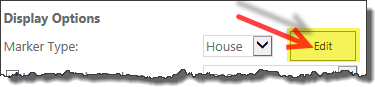 In the web part tool pane, click Edit next to the Marker Type selection. A window will appear where you can edit information about the available marker types.
 Once the tag for your custom marker is saved, it will be available in the Marker Type selection list. Select it in order to see it displayed on your map.
 You will find many of our products complement each other quite nicely saving you the time and trouble to write custom code. With Bamboo at the heart of your SharePoint investment, you gain access to a huge catalog of enhancements, components, and accessories that add the critical functionality your business requires.
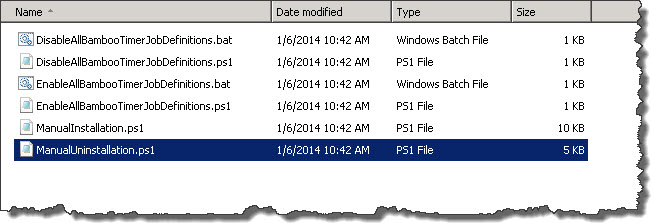
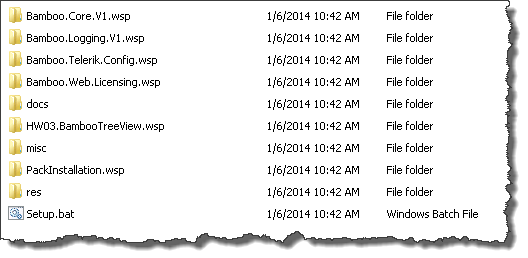 When you extract the product EXE to a location on your SharePoint server, several folders are created that contain installation files and Setup program configuration files. The root level of the extracted file system includes the file Setup.bat, which launches the Setup program. The list below shows the installation files for the Tree View Web Part, as an example.
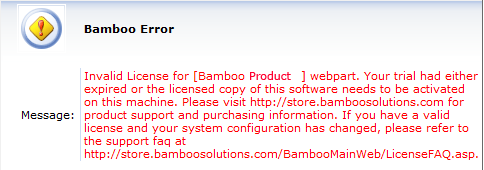
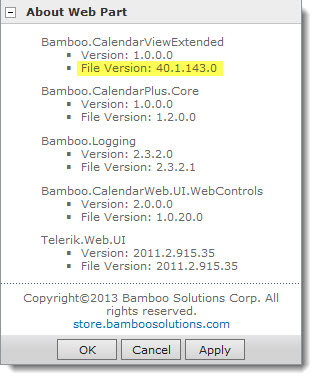
 As you look at each product’s documentation page, you will see there is a link to the Release Notes for that product at the top of the page.