Set up Quick Launch Navigation

Set up Quick Launch Navigation

Configuring Grants Management

DesignerThe Quick Launch Bar contains links to select lists and libraries of the current site and can optionally contain links to sub-sites and pages of the current site. You use the Quick Launch to navigate between different areas of your site, such as between a list and a library or from a parent site to a sub-site. You must have at least Designer permission to modify the Quick Launch Bar.

QL_GrantsMgt.jpgYou can edit the Quick Launch by adding, deleting, or changing the order of links. You can also show or hide links to sub-sites and pages on the Quick Launch, add links to pages outside of the site, and even hide the Quick Launch. The Quick Launch is displayed to the left side of most pages of a site.

The Quick Launch is also referred to as current navigation, because you primarily use it to navigate between the features of the current site. The options available to you for configuring the Quick Launch will vary depending on whether the publishing features are enabled for your site collection.

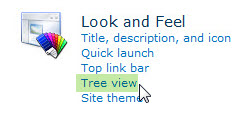
NOTE: You can quickly determine whether your site has publishing activated by looking at the Site Settings page under the Look and Feel section.

LFnavigation.jpgLFtreeview.jpg
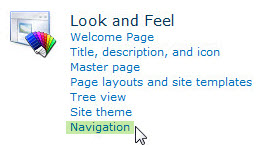
If you see a link titled Navigation, then you are working with a publishing site and you can configure your site using the Navigation Settings page.

If you see links titled Top link bar and Quick Launch, then you are working with a non-publishing site and you have a more limited set of navigation configuration options available to you.

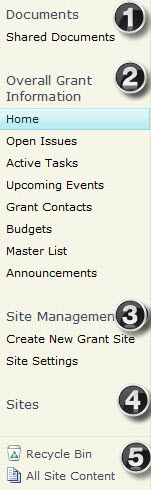
Below are more details about each section of the Quick Launch bar that you would see in a typical Bamboo Grants Management site:

No. Setting Description
1. Documents Within the Documents section, you have the choice to display links to several types of libraries; you can show links to not only document libraries, but picture libraries or forms libraries.
2. Overall Grant Information Within the Grants Management master site, you have an option to show a variety of links to summary information pertaining to your grants. Again, these links are customizable through the site settings navigation.
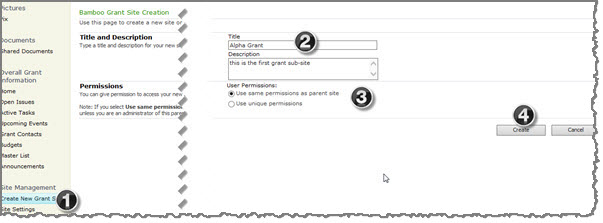
3. Site Management Bamboo adds a section to the Grants Management master site whereby you can quickly create new Grant sites and manage your site settings.
4. Sites Within any given site collection, you could have sub-sites and this section provides a quick way to get to a list of those sites.
5. Recycle Bin & All Site Content Every site has a Recycle Bin so that if someone in your organization inadvertently deletes a list, it can easily be recovered from there. There is also a link to all of the content within your site to quickly navigate and at a glance see a page containing everything in your site.

Read this article from Microsoft to learn how to hide or show links on the Quick Launch Bar

Modify the Logo

Modify the Logo

Configuring Grants Management
Step Action Result
1. Navigate to the home page of your project site.
2. Use the ribbon to edit the page.
EditInRibbon.jpg
3. Highlight the image on your page and click the Change Picture icon in the ribbon. Select the source where your picture is stored.

PictureSource.jpg

  • If your picture is on your Computer, navigate to the folder where you have it stored.
  • If the logo is on another web site or you know its URL, you can pick From Address to insert the image URL.
  • If the image logo is in this SharePoint site collection, you can pick From SharePoint to navigate to the library where it is stored.
4. Enter alternative text, if desired, in the Alternative Text field. Set the image style, position and size if you want to change them. ModifyImageProperties.jpg
5. Click Apply and then OK to save your changes. The new logo displays on your site now.
sa02-2010-modify_logo2.jpg

Localize Bamboo Applications or Custom Columns

Localize Bamboo Applications or Custom Columns

Overview of the localization process for Bamboo Products

Bamboo applications and custom columns are slightly different than web parts when it comes to localizing/translating. The user interface isn’t confined to a web part, but can exist as site definitions or other custom pages. For example, the configuration of a Bamboo custom column is within the SharePoint list settings area.
The text strings that require translation are located in different files than the strings that appear in a web part.

Changing the language or text for an application or custom column is a multi-step process:

Top

About the Language Files

Text displayed in a Bamboo application may be included in one or both of the following locations:

  • Provisioning Resources. These resources are located in the 12, 14, or 15 “Hive”, in the Resources folder. The number of the Hive depends on the version of SharePoint you are using (e.g., SP2007 has a 12 Hive, SP2010 has a 14 Hive, and SP2013 has a 15 Hive). 14Hiveresources.jpg

    The Bamboo.*.resx files include text used in site features, site definitions, list definitions, and other provisioning resource elements. Any changes you make in these files will apply to new product instances only.

  • Application/Runtime Resources. These are also located in the 12, 14, or 15 Hive, but in the CONFIGResources folder.The Bamboo.*.resx file in the CONFIG folder is different than the one included in the Resource folder.14HiveCONFIGResources.jpg 
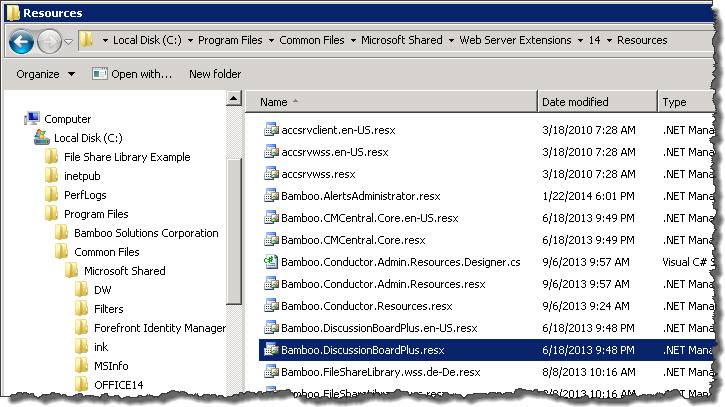
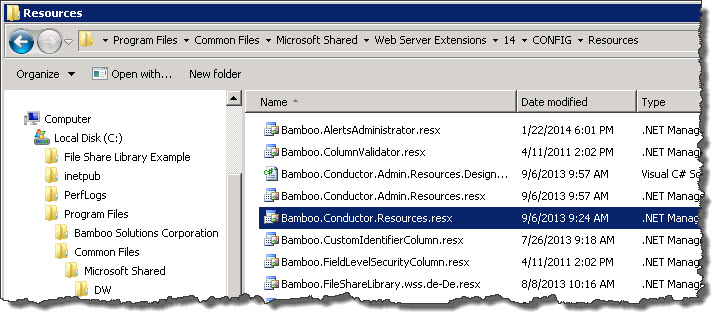
This one includes text used in application pages, custom site menu actions, navigation elements, and other runtime resources. Any changes you make will apply to new and existing product instances only.

In each location, there may be multiple versions of Bamboo.*.resx files with identical content. The different files are provided for English (en-US), German (de-DE), French (fr-FR), and Spanish (es-ES). The content of all files is in English until you translate it to your language. If your site is configured to use a language that does not have a corresponding Bamboo product .resx file, copy an existing file and rename it to include the culture name for that language pack. For example, create a file for Italian by saving the default file as Bamboo.[Product].it-IT.resx. Make your changes to this new file. If your site is configured to use a specific language but you do not have a culture-specific file, the product will use the default Bamboo.[Product].resx file instead.

Icon-WarningIMPORTANT: If you customize one of the default resource files provided with the product, your changes will be overwritten when you upgrade.

To avoid losing customizations, copy the customized file to a different location (not the same folder) before upgrading. After the upgrade is finished, compare the new file with your customized file to incorporate any new entries. Then copy the merged file to the Resources folder. Culture-specific files created for languages that are not provided with the product will not be overwritten during an upgrade, but you still need to incorporate new resource entries.

Top

Editing text in resource files

Icon-WarningIMPORTANT: Before making any changes, back up your original file to a different folder.

To change text in a resource file, open it in a text editor and locate the text you want to change. Editable text is usually found between the <value></value> tags, as shown in the screen shot below. Do not modify the data tag. If you want to remove text completely, delete only the text; do not delete the <data> or <value> entries from the file, or the server will display an error message. In the example below, the editable text is highlighted in gray.

Common_resxEdit.jpg

When you are finished with your changes, save the file and copy it to the appropriate Resources *folder on *all Web front-end servers in your SharePoint farm. Follow the instructions below to make your changes take effect.

Top

Applying Language File Updates

To apply changes to Provisioning Resource Files:

If you modified the provisioning resources file, apply your changes by restarting Web services with the following command on all Web front-end servers.

iisreset

NOTE: changes to provisioning resources affect new instances of the Bamboo product only; existing instances of the product are not updated.

To apply changes to Application/Runtime Resource Files:

If you modified the application/runtime resources file, apply your changes by executing the following stsadm command on all Web front-end servers. This command copies the updated resource file to the App_GlobalResources folder of each Web application. Changes apply to existing product instances and any new instances you create.

stsadm -o CopyAppBinContent

NOTE: Changes apply to EXISTING product instances AND any new instances you create.

Configuring the Grant Project Site

Configuring the Grant Project Site

Configuring Grants Management

Grant Title and Description

Although the project site contains the normal SharePoint title bar, you can also display the grant’s title and provide more descriptive text about the grant within the web part at the top of the project site. When you create a site, by default it is labeled “Grant Title and Description” but this is easily changed within the web part.

Step Action Result
1. Use the ribbon to edit the page. Edit.jpg
2. Edit Grant Title and Description web part and enter the title and description. ModifyTitleDescription.jpg
3.

Use the ribbon to format the text in the content section, as desired.

As an option, you could link to a text file that already contains text about the project; just enter a URL in the tool pane under Content Link in the web part tool pane.

Modify within the content editor:ModifyDescriptiveText.jpg
OR
Enter a URL to a text file about the project:
TitleDescripText.jpg

Modify the Logo

Follow the same process you conducted to modify the logo on the master site.