Modifying the Settings of the List Considator
There are three groups of users who can potentially configure the consolidated data (rollup) that is displayed in the List Consolidator:
- Designated user account that has exclusive permission to create or modify the default rollup.
- End Users. You can allow all users to create or modify their own rollup if they prefer. When a user accesses the page where the rollup is displayed, the Modify View button at the bottom of the Web Part is visible if the user is allowed to create their own view.
- Users with Contribute permission or higher. These users have the ability to create their own view of the rollup but they cannot modify the configuration of the default rollup.
Depending on the web part configuration and whether a default rollup has been configured yet, end users may see different things when they visit a page where a List Consolidator resides. Use the table below to understand the behavior for your use of the web part:
|
Designated User Account |
No Designated User Account |
| Users can Modify Rollups |
Before a default rollup is created for the web part, all users with Contribute permission or higher will not see a rollup, but will be able to create one. See How to Create a List Rollup for more information.
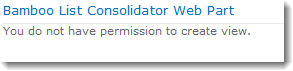
Users without Contribute permission will see the message below until the default rollup is created.
The rollup created by the designated user becomes the default rollup. All users who have not modified (or cannot modify) the default rollup will continue to see the default rollup every time they access the rollup page.
Users with Contribute permissions or higher will see the Modify Settings button on the display so they can create their own rollup at any time. Once a user modifies the default rollup to create their own, they will see their modified version by default every time they access the page.
|
Since no designated user is named, no default rollup will ever exist.
End Users with Contribute permission or higher can configure their own rollup. See How to Create a List Rollup for more information. Once they create a rollup, that will be the rollup displayed whenever they access the page.
Users without Contribute permissions will never see a rollup. Instead, they will see the message below.
|
| Users cannot Modify Rollups |
Before the default rollup is created, all users with Contribute permission or higher will see the message below when they visit the page.
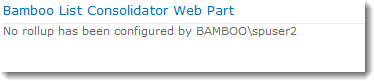
NOTE: In the message above, Bamboo/spuser2 is the logged in user, not the designated user account.
Users without Contribute permission will see the message below until a default rollup is created.
Only the designated user sees the Modify View button at the bottom right corner of the page. The rollup created by the designated user becomes the default rollup. Once it exists, all users see it.
If the web part has been configured to allow users to sort, group or filter, those options will be available to all users.
|
If you do not configure a designated user or check the box allowing all users to modify rollups, your web part will not be configured and you will see the message below. Be sure to configure at least one of the options.
 |
How to Create a Rollup with List Consolidator
After configuring List Consolidator (see Overview of the Configuration Parameters for List Consolidator for more information), you can create a rollup.
NOTE: The process is the same whether you are the designated user creating the default rollup or a user with Contribute or higher permissions is creating a personal rollup.
Follow these steps to configure a rollup:
| Step |
Action |
Result |
| 1. |
From the Define Lists for Rollup section, select the list type you want to rollup. The drop-down list shows all list types available in the site collection.
 |
| 2. |
In the Sites Included in Rollup section,
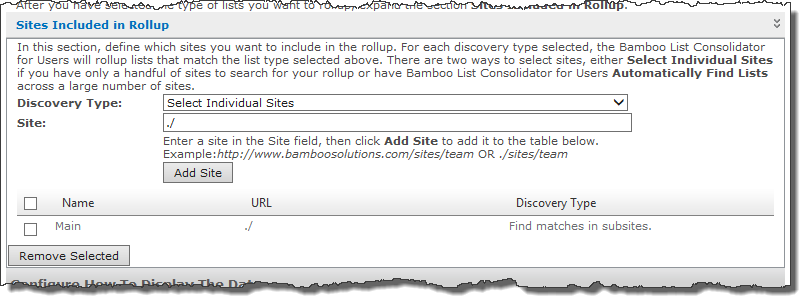
select one of the following site discovery types:
- Select Individual Sites. Enter the full URL or a relative URL for a site in the Site text box.
 Use relative paths whenever possible. Relative notation doesn’t include the name of the server. The relative notation for the current site is ./ and the relative notation for the parent site is ../. Use relative paths whenever possible. Relative notation doesn’t include the name of the server. The relative notation for the current site is ./ and the relative notation for the parent site is ../.
- Automatically Find Lists in Sub-sites of Selected Site. Use this option to automatically find all lists that match the selected list type in the current site AND the sites under the site where List Consolidator is being configured.
- Automatically Find Lists in Entire Site Collection. Use this option to automatically find all lists that match the selected list type in the entire site collection.
Click the Add Site or Add Defined Discovery Type button to add the rollup configuration to the table just below this button. This table shows all the sources selected for your rollup. Each item in this table makes up the data source for your rollup.
To add another site, enter another URL in the Site box and click Add Site again. Two lines will appear in the table.
To remove items from the table, select the check box for that item, then click Remove Selected.
|
| 3. |
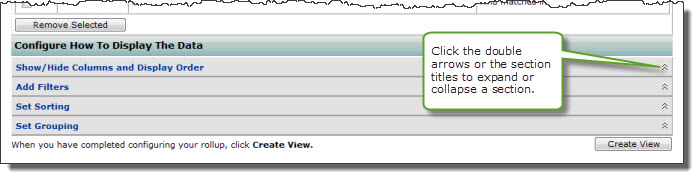
From the Configure How to Display the Data section. For each subsection, click the double arrows or the section title to expand the section.
 |
| 4. |
Configure the following:
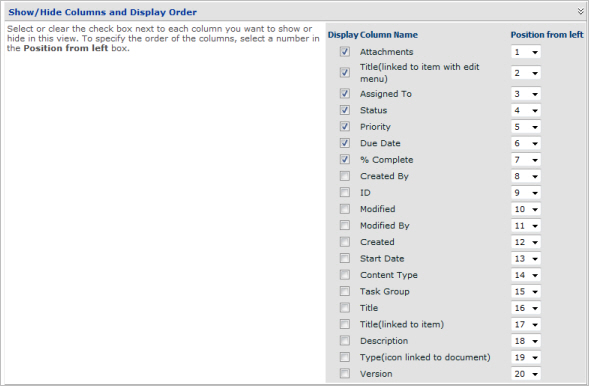
- Show/Hide columns and display order – Select or clear the check box of columns you want shown/hidden in the rollup. To re-order the columns, select the drop-down box under Position from left and select a position number for each column shown in the rollup.
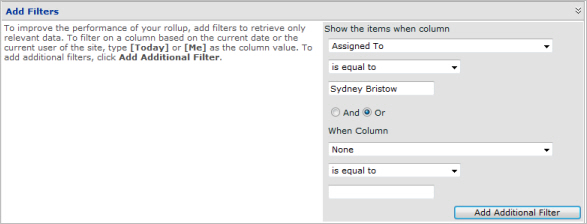
- Add filters – Select a column, comparison operator, and then enter a value. If you want to add more to the filter condition, select And/Or and enter more filter information. Click the Add Additional Filter button to add another filter using an And or an Or Boolean operator.
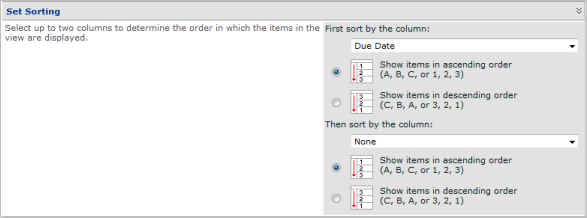
- Set sorting – Select a column to sort by, then a sort order. If desired, add information for a second sort column as well.
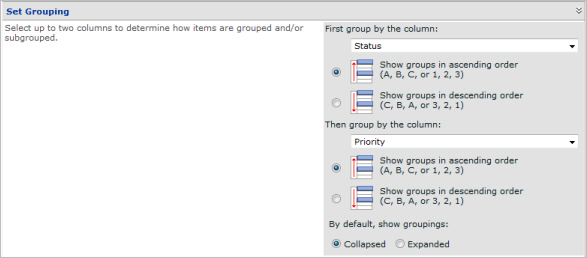
- Set grouping – Select a column to group by, then a group order. If desired, add information for a second level grouping as well. Select whether you want the group(s) collapsed or expanded by default.
|
 |
| 5. |
After you have completed configuring your rollup, click the Create View button in the lower right corner of the display. |
|