| Create a new alert |
|---|
 Alert Plus has three tabs where parameters for an alert need to be configured.
We will discuss the Event Tab here. For information on the other tabs, click the links below.
B – Recipients Tab
C – Mail Format Tab
Event Tab
 Alert Plus is very flexible and has a variety of ways you can set up alerts. Configure the Alert Plus Event Tab following the steps below.
| Step | Action | Result |
|---|---|---|
| 1. | Give your Alert a title and set its status (e.g., Enable or Disable). |
The information you type into the Title box is saved into the web part. The default status is Enable. If you switch to Disable, the alert will not be triggered, but all configurations will be saved.
|
| 2. | Decide where the items that trigger the alert reside. Choose a SharePoint List or Library or a Bamboo List Rollup. | Your selection dictates the source of the data for your alert. |
| 3. | Enter the URL of the site where your list/library resides or where your List Rollup is defined. Click the “Load” button to load the available lists/libraries or List Rollups. |
|
| 4. |
Pick the list that stores the items that you want to alert on.
|
|
| 5. | Select the alert trigger type.  |
Your selection dictates how the alert will be processed. See Which Trigger Type Should You Use for more information about trigger types and some examples. |
| 6. | Decide how frequently an email will be sent.
|
In addition to the frequency of the alerts, you also have the option to combine multiple alerts into a summary notification. See How often should E-mails be Sent and Combine Alerts into a Summary Alert for more information. |
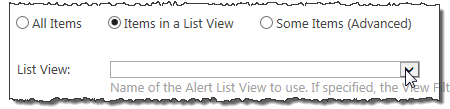
| 7. |
Pick which items in the list can generate the alert. Depending on your choice, the interface may change.
|
|