To configure User Manager for Sites, edit the web part and follow the steps in the table below. User Manager for Sites also has a Settings menu on its tool bar. See Settings Menu in the Toolbar to review the settings that are configurable under this toolbar menu.
| Image | Step | Action | Description |
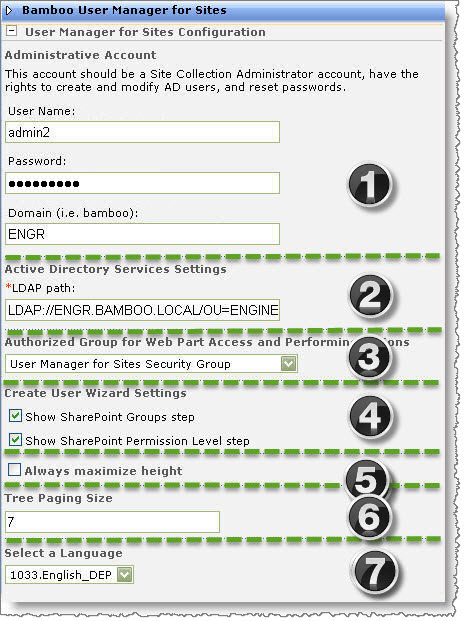 |
1. | Administrative Account | Enter the User Name, Password and the Domain of an account that a Site Collection Administrator has rights on which to create and modify Active Directory users and rights to reset Active Directory user passwords. |
| 2. | Active Directory Services Settings | Enter the LDAP path where you want users created in Active Directory. | |
| 3. | Authorized Group for Web Part Access and Performing Actions | Site Collection Administrators can access the web part and perform actions by default. However, if you want to delegate user management to site administrators or designated administrators, then it is recommended that you create a SharePoint group specifically for these users and select that group here. | |
| 4. | Create User Wizard Settings |
Select from the following to determine whether you want admin users to assign SharePoint user groups and permission levels.
|
|
| 5. | Always maximize height | Select this check box to allow the User Manager for Sites interface to change its height based on the number of items shown in the tree. | |
| 6. | Tree Paging Size | Enter the number of child nodes displayed in the tree at a time. If you enter “7”, then seven child nodes will be displayed at a time with a View more… link following the last child node. Click the View more… link to show another 7 child nodes. | |
| 7. | Select a Language | Pull down the drop-down box to select a language other than English. (Steps to localize language can be found here.) |