User Redirect displays the list of users, allowing the administrator to define redirect paths. When a user accesses a page in SharePoint, the web part redirects the user to the specified destination URL if the user is on the redirect list. A different redirect page can be identified for each specified user. With User Redirect, you can have pages that are restricted for most users but allow certain users to access them.
After User Redirect is added to the page, you have three configuration decisions to make:
- Determine if you want to allow or restrict access for selected user(s)
- Identify users to be allowed or restricted
- Identify the page to which users will be redirected.
To customize User Redirect, edit the web part.
The tool pane is displayed on the right side of the screen:
| Step | Action | Result |
| 1. | Allow Access – Select Allow to allow specified users to access the page. All other users will be redirected. | 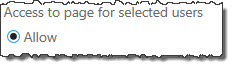 Users who have access to your page will appear in the Users list below. Highlight a user name and click Apply |
| 2. | Restrict Access and Redirect – Select Restrict and Redirect to redirect members but allow everyone else. Be careful not to add a user twice with different redirect pages. At runtime, only the last entry for the user will be acted on. |  |
| 3. | Users – The list of users and groups in your site appear; highlight a name and click Apply. | |
| 4. | Redirect Page – Enter the path and page to which the user will be redirected if he/she should not access the page. | |
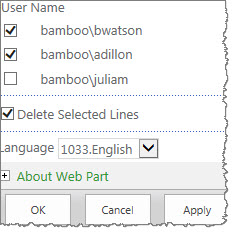
| 5. | User Name | This is the name you highlighted above. |
| 6. | Redirect Page | This shows the page the user to which the users is being redirected. |
| 7. | Delete Selected Lines |
|
| 8. | Language | See Localize Bamboo Web Parts for your Language. |