Use a Bamboo List Rollup as the Data-Viewer data source

Use a Bamboo List Rollup as the Data-Viewer data source

Configuration Infographic Overview of Configuration Screens

ListRollup Bamboo List Rollup is one of the four available data sources for Data-Viewer.

When working with List Rollup keep in mind:

  • Data-Viewer can connect to Bamboo List Rollup Schemas and Data Views from List Rollup 5.0 or higher.

  • List Rollup must already be installed (sold separately) and a rollup created in order to use Bamboo List Rollup as a data source. For information on how to create List Rollups, view the List Rollup Online Documentation.

  • Data-Viewer will use a single Bamboo List Rollup as the data source, however List Rollup can aggregate an unlimited number of lists.

To configure Data-Viewer to display data from a Bamboo List Rollup:

NOTE: The following steps require you to have accessed the Data-Viewer Settings screens by clicking the Data Viewer Web Part Settings button in the web parts configuration tool pane.

Step Action Result
1.

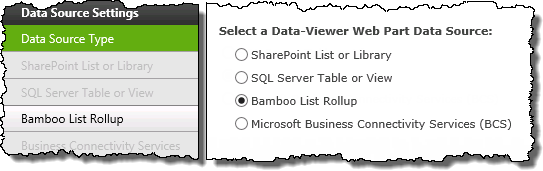
Click the Bamboo List Rollup button under Data Source Settings in the navigation tool pane. Image of the Navigation Pane with the Bamboo List Rollup button available. All other data source buttons are grayed out

NOTE:You will only be able to select this button if Bamboo List Rollup is selected as the Data Source Type

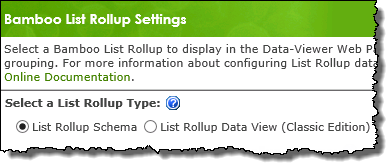
The Bamboo List Rollup Settings screen will be displayed on the right side of the configuration pop-up and allows you to scroll through the configuration options associated with the data source.
2.

Select the type of List Rollup that will be used as a data source:

  • A List Rollup Schema created with List Rollup Schema

  • A List Rollup Data View (Classic Edition) created with
    List Rollup Classic

    Information on the differences between the Bamboo List Rollup tools is available
    here

Radio buttons to select List Rollup type

Icon-Tip The List Rollup Schema is the preferred List Rollup aggregation method. List Rollup Data View (Classic Edition) is available to support legacy aggregations.

3.

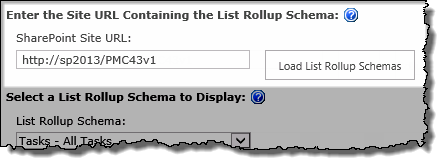
Enter the location of the schema or Data View then click the Load List Rollup… button.

  • If you selected List Rollup Schema in the previous step, enter the SharePoint Site URL where the schema you want to display was defined. The Schema definition may be in a different site collection. Schemas definitions are stored in a known list and therefore, only the site URL is needed.

  • If you selected List Rollup Data View (Classic Edition), enter the URL of the page that contains the Data View you want to display. Data Views are web parts themselves and exist on a particular page of a site. The page may be in a different site collection.

    Icon-WarningIMPORTANT: Although you can enter a URL for another Site Collection, be careful about going across Web Applications. You may have issues if the other web app has a significantly different security setup.

The predefined rollups associated with the List Rollup source selected will be listed in List Rollup… drop-down selector.
Image of the Page or  Site URL field and the Load List Rollup button

  • Both absolute paths (http :// server name/site ) or relative paths(./Site/) can be used for the site URL. Bamboo recommends using relative paths if:
    1. Multiple Alternative Access Mappings are being used
    2. The Web part will be included in a site template
4. Select the Schema or Data View rollup to display.
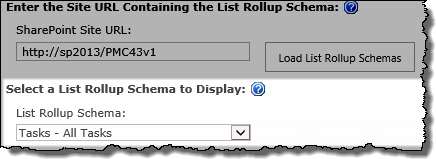
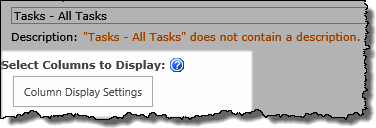
 List Rollup schema/ data view drop down selector
5.

Click the Columns Display Settings button to specify:

  • Which columns to display (required)
  • Column Alias, or alternate header text
  • Column position
  • Column Width
  • Text Justification

Columns Display Settings button

NOTES:
1. You must select at least one column to display in the Web Part.
2. For information on how to add new columns to an existing Data View click here

6.

You have now configured the web part to use a Bamboo List Rollup as the data source.

Continue to scroll down the screen to optionally configure how displayed data will be organized including specifying:

  • Sorting

  • Grouping

  • Filtering

Configuration Infographic Overview of Configuration Screens