Configure the columns to display in Data -Viewer
 After you have identified the Data-Viewer data source you will need to identify the columns that will be displayed in the Web Part. This step is required when configuring all data sources.
When working with the Columns to Display pop up screen keep in mind:
- You must select at least one column to display
- If you choose a different list or view, or otherwise re-load the data to be displayed, the previously configured column settings will be lost.
To configure the columns to display in Data-Viewer:
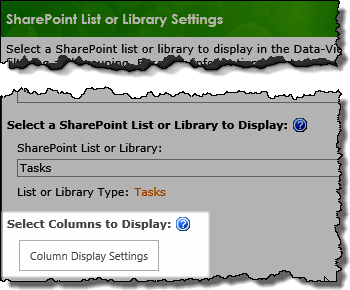 1. Click the Column Display Settings button found on the data source configuration screen.
NOTE: This step requires you to have accessed the Data-Viewer Settings screens by clicking the Data Viewer Web Part Settings button in the web parts configuration tool pane.
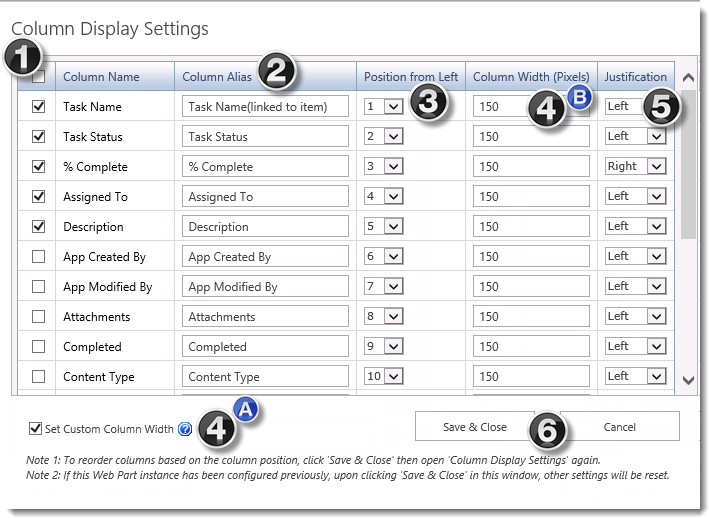
2. Select the columns to display in the pop up screen, shown below.
| # |
Function |
| 1. |
Display Check Box : (required)
-
In the Column Display Settings window, locate the Column Name you would like to display and click the corresponding checkbox to the left.
-
Columns with a check in the box will be displayed in the web part.
-
To select all columns, click the box in the header of that column.
|
| 2. |
Column Alias:
-
In the Column Alias field, type the name you would like displayed in the header row of the grid view for each column.
-
The specified will be visible in the web part display as the column header in Standard and Datasheet modes, Grouping, and Inline Edit .
Column Alias use on Grouping is new with Data-Viewer 3.7
NOTES:
1. If the user clicks on the title link (if it is included in the display) to open the display form or selects Edit Item in the item context menu, the original column display name is shown.
2.In the screen shot above, Task Name(linked to item) will be displayed in the web part unless the text in brackets is removed from the Column alias
|
| 3. |
Position From Left:
-
In the Position from Left column, choose the order of the column from the respective drop-down menu.
-
Clicking Save & Close and reopening the Column Display Settings window will show the updated Position from left order.
NOTE: The default position of columns is determined by the number order, then by alphabetic order.
|
| 4. |
To adjust the default Column Width:
- Check the Set Custom Column Width box in the bottom-left corner of the window (4A).
- When checked, the values in the Column Width column are enabled and default to 150 pixels each.
- Enter the desired default width in pixels in the Column Width column (4B)
 Important: Important:
The Set Custom Column Width check box must be checked if you want to allow users to adjust column width in run-time, or if you want to define a custom height and width for the web part
|
| 5. |
Justification:
Select the desired justification (left, right or center) for the data displayed in the column. |
| 6. |
|
|