| TTM Control Panel | Time Tracking checklist |
|---|
Some organizations use a weekly schedule for tracking time, others use bi-weekly or monthly. The Reporting Period Management web part lets you add new reporting periods to Time Tracking and Management (TTM) so users can enter time for the defined periods.

Keep in mind:
-
Creating Reporting periods is a mandatory step in the Time Tracking Configuration Checklist.
-
You will periodically need to create additional timesheet periods.
-
There cannot be any gaps or overlaps between reporting periods.
To create timesheet periods:
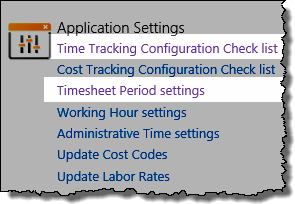 Access the Reporting Period Management page from the Timesheet Period settings link
OR
from the Time Tracking Configuration Checklist
NOTE:
This requires you to have Full Control or Design permissions on the TTM site.
| # | Function |
| Reporting Period Parameters The following settings define the length and dates for your timesheet reporting periods. 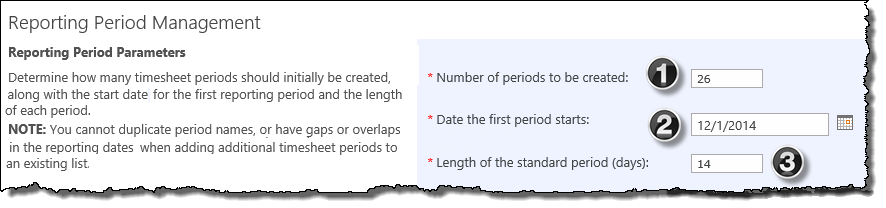 |
|
| 1. |
Number of periods to be created
|
| 2. |
Date the first period starts:
|
| 3. | Length of the standard period (days) Enter the number of days for each reporting period. Your new reporting periods do not have to be the same length as existing ones. |
| Reporting Naming Convention The following settings to define the length and dates for your timesheet reporting periods.  |
|
| 4. |
Prefix
|
| 5. |
Next sequence number (required)
|
| 6. |
Suffix
|
| 7. |
Preview and Create Periods
|
| To return to the Time Tracking configuration checklist, use the Time Tracking link in the TTM quick launch menu
|
|
 button to preview the list of new reporting periods in the table on the Reporting Period Management page
 button to add the reporting periods to the Periods list. After they have been created, timesheets for those periods can be submitted.
 button for the item.
| TTM Control Panel | Time Tracking checklist |
|---|