Applies To:
- SharePoint Knowledge Base Solution Accelerator R2.0 or newer
- Workflow Conductor R1.6 or newer
- SharePoint Server and Foundation 2010
- MOSS 2007 and WSS v3.0
IMPORTANT if you are using Workflow Conductor prior to Release2.x: Set up the following workflow processes during off hours. Publishing the workflow templates requires the application pool to be recycled. (Upgrade your WFC product soon so that you won’t need to publish during off hours!)
LIMITATIONS:
To approve workflow tasks, users require the following permissions: Assignee, Initiator, Site Collection Administrator.
NOTE: To complete task forms and to view the Approve, Reject and Submit buttons, users must be able to:
- Read the workflow item that the workflow is running on and
- Edit items in the Workflow Tasks List that is associated with the workflow.
To create an approval process to publish KB articles:
- Install and configure SharePoint Knowledge Base Solution Accelerator. See the KBSolution Accelerator for more information.
- Install and configure Workflow Conductor. See Workflow Conductor for more information.
- Configure the approval workflow for publishing articles following the steps below.
| Import and publish the workflow template | ||
| Step | Action | Result |
| 1. |
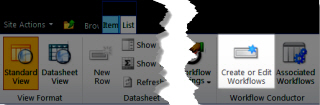
From the KB Admin site, go to Site Actions > View All Site Content > Bamboo KB Articles List.
|
 Workflow Conductor Studio opens. |
| 2. | Click Import from the Workflow Conductor Studio menu. | 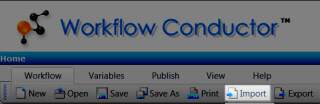 |
| 3. |
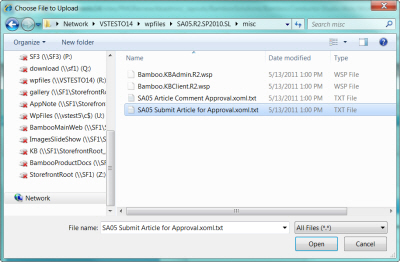
Click Browse and navigate to the SharePoint Knowledge Base Solution Accelerator product extraction folder. Open the misc folder and select SA05 Submit Article for Approval.xoml.txt. Click Open, then Import. |
 |
| 4. |
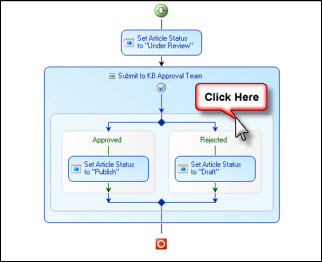
The workflow template is loaded into Workflow Conductor Studio. In the workflow diagram pane, click on Submit to KB Approval Team. |
 |
| 5. | In the Widget Properties tab in the settings pane, enter the account(s) for the user(s) who will approve KB articles. | 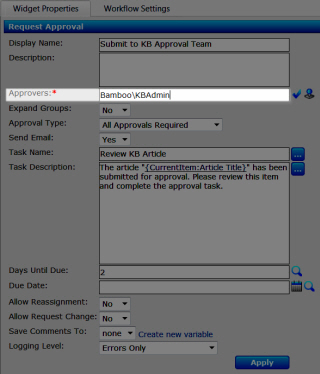 |
| 6. |
If desired, modify the other widget properties:
Workflow Conductor updates the diagram. |
|
| 7. | Select Publish > Deploy from the Workflow Conductor Studio menu. |  |
| 8. | Click Yes to save the workflow as a template. | 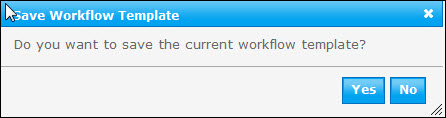 The template is saved to the template gallery, and the application pool is recycled. 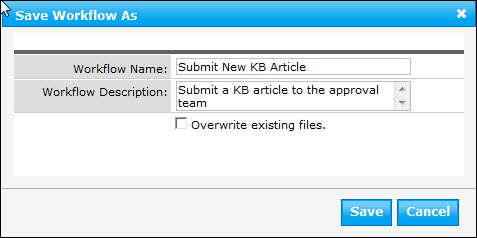 |
| 10. | Click Close to close Workflow Conductor Studio. | 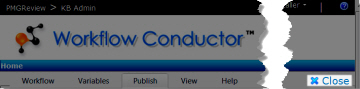 |
| 12. | Configure the Workflow Start Feature. You can start a workflow using the out-of-the-box SharePoint button, located in the ribbon, or you can create your own buttons for the KB workflow approval process (available for SharePoint 2010 only). For SharePoint 2007, start a workflow using the out-of-the-box SharePoint button. 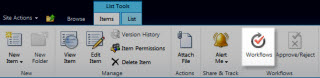 |
|
| 13. | From the KB Admin site, navigate to Site Actions > Site Settings > Site Actions > Manage Site Features and activate the Workflow Start Feature. |  |
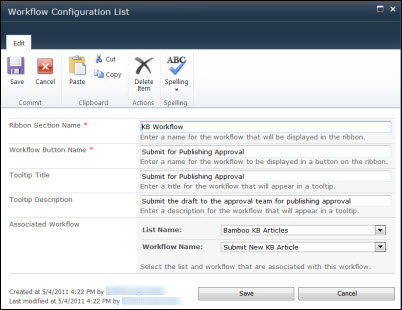
| 14. | Return to the KB Admin site and select the Workflow Configuration List. Complete the following fields. |
|
| 15. |
Start a workflow to approve and publish articles: ◦From the KB Admin site, select Article Control > Manage Articles. Locate the desired draft article for which you want to start the workflow. The New button is located in the ribbon. |
 To view the New button, view the draft article in view form, or navigate to the Bamboo KB Articles List, select the desired article, and use the ribbon to select List > Items and click the button. 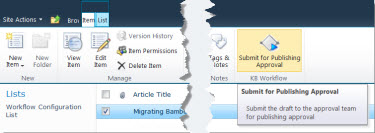 |
| 16. | Click Submit for Publishing Approval. Workflow Conductor will open. Click Start Workflow. | 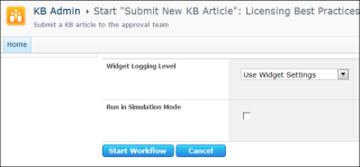 |
| 17. | Return to the article. The article now has a new field, Article Status, with the value Under Review. | 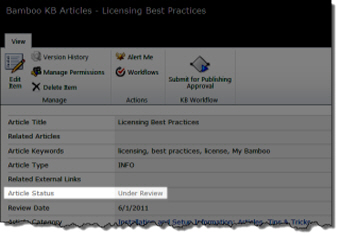 |
| 18. | The approver will receive an e-mail notification with a link to the article and a link to the approval form. | 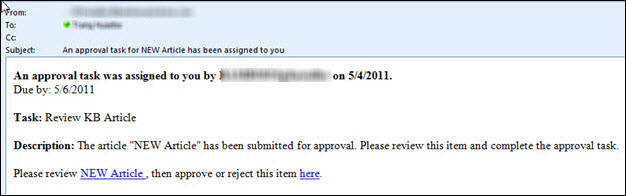 |
| 20. | The approver can either Approve or Reject the article. If the article has already been approved or rejected, the form only displays the Cancel button. | 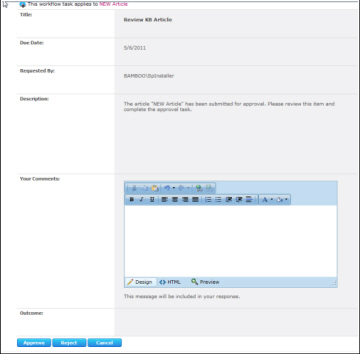 |
| 21. | Once the article has been approved, the status changes from Draft to Publish, and the article is available to end users in the KB Client site. | 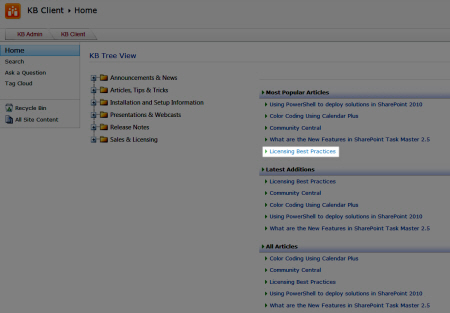 |
See Also: