You have a variety of options when configuring Chart Plus, one of which is using a Mashpoint or BDC connection as your data source. Depending on your choices, you see different options. This covers leveraging MashPoint/BDC as your data source.
| Step | Action | Result |
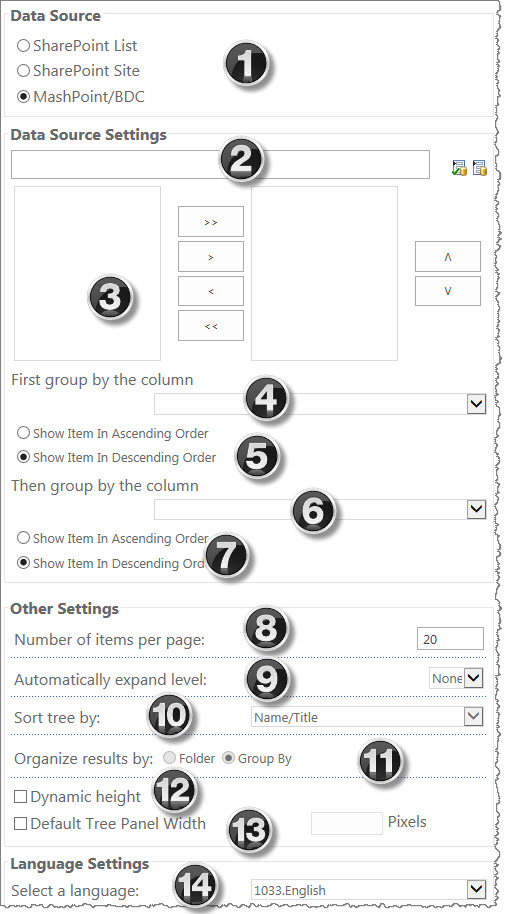
| 1. | Data Source = MashPoint/BDC When you choose a BDC as your data source, your options appear on screen as shown here. Details on each option are described in the table below. |
 |
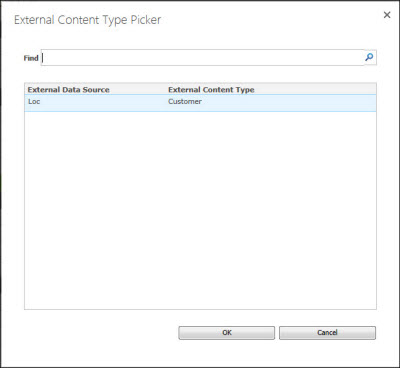
| 2. | Use the External Content picker icon  to the right of the Data Source Settings box to select non-SharePoint content in your environment. to the right of the Data Source Settings box to select non-SharePoint content in your environment. |
All available external content types appear for you to select.
|
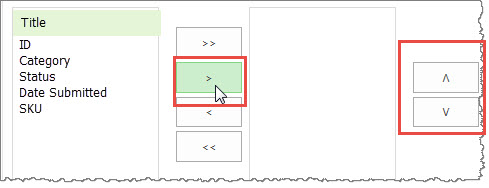
| 3. | All available columns in your external list will show on the left side of the windowpane. | simply highlight the column(s) that you want to display on Tree View and use the > arrow to move them into the selection box. |
| 4. | First group by column | This is your option to group items within your external content list by one of the columns. Grouping by a column sets up Tree View to display that grouping as a top level with items in that group as sub-items similar to Windows Explorer displays content in folders. |
| 5. | Show Item in Ascending Order | Select this radio button if you the data to be ordered A-Z in the Tree View display. |
| 5. | Show Item in Descending Order | Select this radio button if you the data to be ordered Z-A in the Tree View display. |
| 6. | Then group by the column | In the drop-down menu you will see a list of columns that by which you can group your data. |
| 7. | Show Item in Ascending or Descending Order | You may sort your items one way and the groupings a different way. |
| 8. | Number of items per page | This option is only enabled when you select a document or picture library. Tree View uses this number to display the number of items per page when a tree node is selected. |
| 9. | Automatically expand level | Select this check box to automatically expand the tree nodes up to 3 levels when the web part renders on a page. |
| 10. | Sort tree by | Select a column by which to sort the tree. |
| 11. | Organize results by | Select this check box to display information in the left pane of the web part by folder hierarchy or by the grouping configured in the selected list view. |
| 12. | Dynamic height | This option allows the web part to expand in height based on the amount of data displayed in the left or right panes. |
| 13. | Default Tree Panel Width in Pixels | You can set a fixed width for the tree; if you check this box, fill in the number of pixels in the box on the right. |
| 14. | Select a language | Pick a language from the drop-down menu. More details about localization of Bamboo products can be found here. |
See also:
