| Return to Configuration Overview |
|---|
One of the filters in Filters Collection is the Choice Filter, which is designed specifically to connect to a SharePoint List web part that you are displaying on a SharePoint page. After the Choice Filter web part is added to the page and the tool pane configured, a second step is required. You need to make a connection between the Choice Filter web part and the list on your page so that it knows where the source of your data is and on what column in the list to filter.
If you don’t make that connection, you’ll see this message on the page.

-
Step 1 – Configure the Choice Filter
Add the Choice Filter web part to the page and configure the tool pane. -
Step 2 – Create the Connection
Make the connection between the Choice Filter web part and your list that you are displaying on the same page.
Configure the Choice Filter
| Step | Action | Result |
| 1. | Edit the web part on the page and name your filter. | 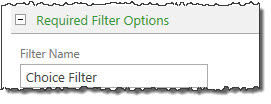 The default name matches the type of filter you are using; in this case, it is the Choice Filter. |
| 2. | In the text box, enter the choices on which users will be able to filter. |
 |
| 3. | Decide what type of filter your end users will see. The Checkboxes filter may not be enabled based on the type of column on which you are filtering. | 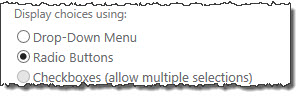 |
| 4. | Expand the next section of the tool pane to see the options for advanced filters. You can require users to choose a value, enter a default value for the filter and show values that contain no data. | 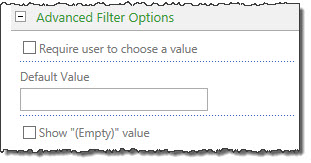 |
| 5. | Click Apply and click OK to save your changes. | |
Create the Connection
| Step | Action | Result |
| 1. | After you have made your changes on the tool pane, edit the web part to open the connections choices. | 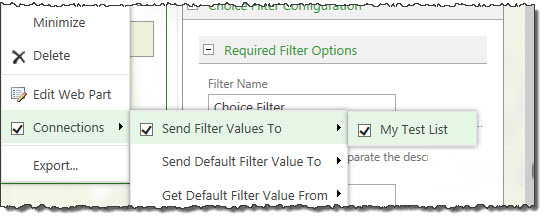 In this example, we have selected to send the filter to the list. |
| 2. | You have a couple of ways you can connect the filter web part to the list web part on the page. | |
| 3. | When you make a selection to Send Filter Values To a list, a dialog box opens on which you need to make more configuration choices. | 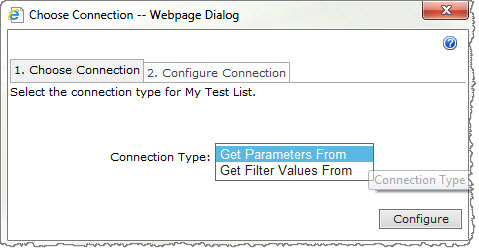 Step 1- Select Get Filter Values From |
| 4. | After choosing your connection, the view switches to the next step where you pick which column in your list that contains the data you want to filter. In our example, we are pulling data from a column called Choices. | 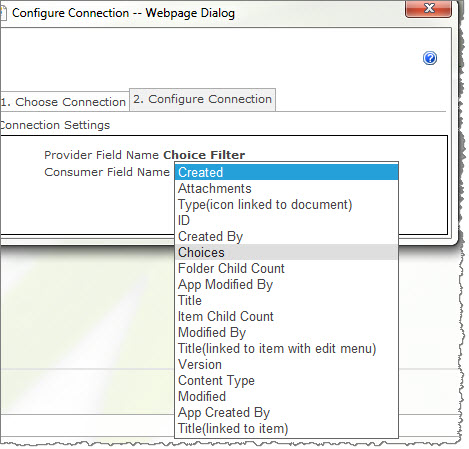 Step 2 – Configure Connection |
| 5. | Click Apply and click OK to save your changes. | |
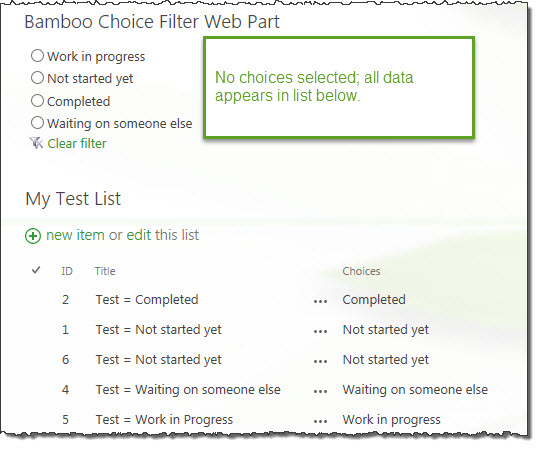 After you have completed your configuration, the page is ready for end users to interact with. In the examples below, the first screen shot shows no choices made in the Choice Filter web part.
 In the next screen shot, a choice was made using the Choice Filter web part and the list view shows data filtered by that choice.