Top
| Return to Configuration Overview |
|---|
One of the filters in Filters Collection is the List Filter, which is designed specifically to connect to a SharePoint List web part that you are displaying on a SharePoint page. Unlike the other web parts in Filters Collection, the List Filter web part must be connected to a SharePoint List before it can be configured. Otherwise, you’ll see this message in the tool pane when you attempt to configure the part.

-
Step 1 – Create the Connection – Make the connection between the List Filter web part and your list that you are displaying on the same page.
-
Step 2 – Configure the List Filter – Within the tool pane view, select the connected list and configure the filter.
Create the Connection
| Step | Action | Result |
| 1. | Edit the web part to open the connections choices. | 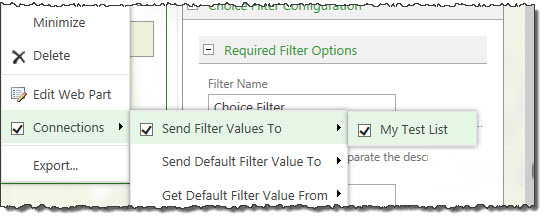 In this example, we have selected to send the filter to the list. |
| 2. | Select the connection type for the list you selected in Step 1. | 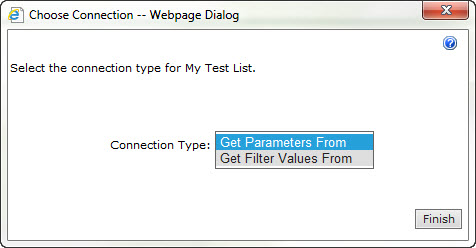 Choose “Get Filter Values From” to pull in the data that you want to filter through the List Filter web part. |
| 3. | Click the Finish button. | |
Configure the List Filter
| Step | Action | Result |
| 1. | Choose the list you’ve connected to from the drop-down menu under Select Connected List. | 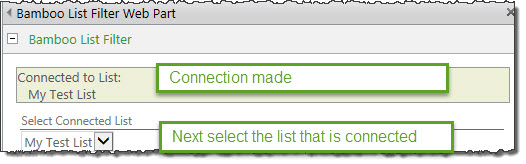 |
| 2. | To add a column on which to filter, click the Select Target Column drop down. | Note that by default, you don’t have any filter columns in the tool pane.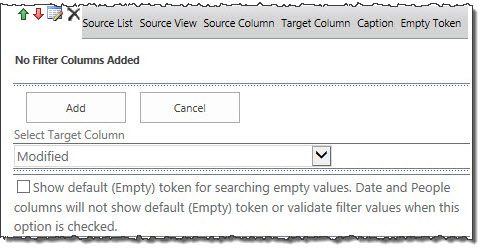 |
| 3. | Choose a column from the drop down list and click the Add button. | 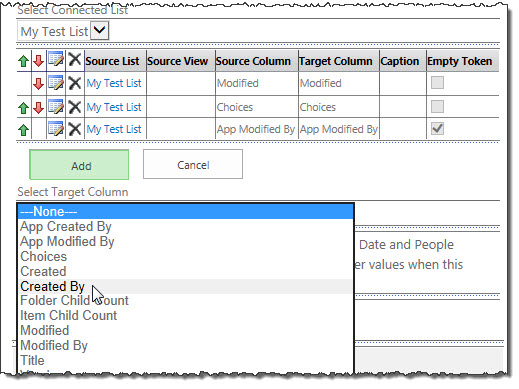 |
| 4. | You can order the columns by using the red and green up and down arrows to re-arrange them in the sequence you want them to appear on the page. | 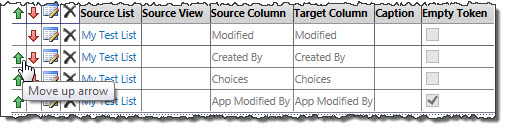 In this shot, the user is clicking on the Up arrow to re-order the “Created by” column |
| 5. | Show default (Empty) token for searching empty values. | Checking this box will show empty values token. Date and People columns will not show default (Empty) token or validate filter values when this option is checked. |
| 6. | You have the option to name this filter. |  |
| 7. | Select the number of filter controls to be displayed in a row. This controls the number of columns displayed on the page; we recommend the same number as you have picked in Step 3 or an evenly divisible number for aesthetic reasons. | 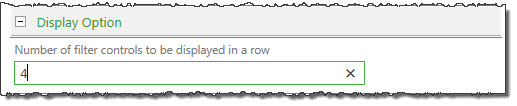 Notice in our screen shot below, the four filter columns we selected appear across a row. If we had chosen 3, one of the columns would be below the others making it look off balance as shown below.  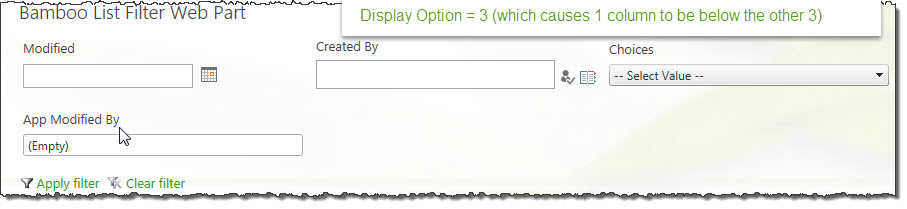 |
| 8. | Click Apply and click OK to save your changes. | |