Configure the My Status Web Part Tool Pane
 If you are adding the My Status web part to a SharePoint site outside of the In/Out Schedule Board site, it must be configured so it can read and update scheduling information from the site’s lists. To do so, use the following procedure to configure the Web Part from the tool pane.
| Step |
Action |
Result |
| 1. |
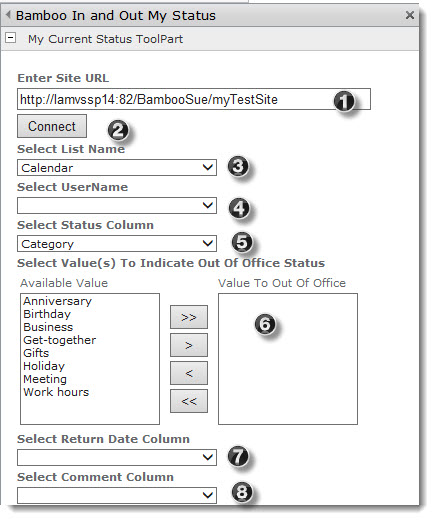
Enter Site URL: |
Pick the site URL for your site that contains the list to which you want to connect. |
| 2. |
Connect |
Click the connect button to make the connection to the site. You’ll see a message explaining whether or not the connection is successful. |
| 3. |
Select List Name |
Pick the list you want to use from the drop down options. |
| 4. |
Select UserName |
This is the column the Web Part will use to determine which items are associated with the user. |
| 5. |
Select Status Column |
This is the column from which the Web Part will determine the user’s status. |
| 6. |
Select Value(s) To Indicate Out of Office Status |
Select all of the status values to associate with “Out” status from the Available Value list, and add them to Value To Out of Office. Any status value included here will be considered “Out” by the My Status Web Part – anything not included will be considered “In.” |
| 7. |
Select Return Date column |
Select End Time from the Return Date Column so that viewers at a glance see when that person is expected to be back in the office. |
| 8. |
Select Comment Column |
The Web Part will display this column’s information along with the status of the user. |
|