| Step |
Action |
Result |
| 1. |
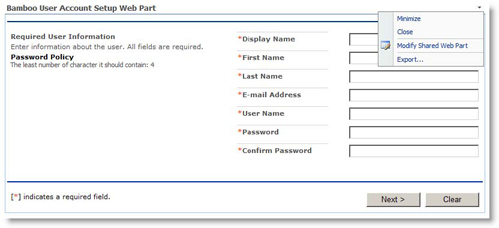
Select Modify Shared Web Part from the menu accessed at the upper right corner of the Web Part. This menu is only accessible by users with authority to modify the page. |
 |
| 2. |
The tool pane for User Account Setup is displayed on the right side of the screen. Expand each section to configure. |
 |
| 3. |
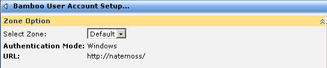
Select the Zone |

User Account Setup affects, either Default, Intranet, or Internet. As pictured here, the Web Part will display the selected zone’s Authentication Mode, (and, where applicable, the Membership Provider) as well as a URL example for that mode. |
| 4. |
Configure the Administrative Account |
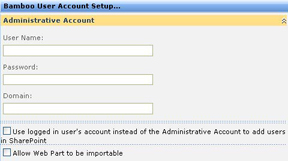
- Administrator User Name:
- Active Directory Service: Enter the user name for the domain administrator who has the appropriate rights for creating Active Directory users.
- Local Server User Group: Enter the user name for the machine administrator (i.e. member of the Administrators group on the local NT machine).
- This Administrator account must have the permission to add users to the selected SharePoint groups.
- Administrator Password: Enter the password for the administrative account that will be used to actually create the user account in Active Directory or Local NT Server User Group.
NOTE: Passwords are generally case-sensitive.
- Administrator Domain: Enter the domain where this Administrator account resides.
- Use logged in user’s account instead of the Administrative Account to add users in SharePoint: Select this check box to use the logged in user’s account (i.e. impersonation) to add users in SharePoint. The logged in user must have permission to add users to the selected SharePoint groups.
- Allow Web Part to be importable: Select this check box to allow this Web Part to be exported and imported (i.e. added to a page or site) with all the configuration settings intact in the DWP file that is created upon export. By default, this check box is not selected so that the User Account Setup Web Part cannot be exported and imported to another page or site with all the configuration information intact. Checking this option also enables you to include this Web Part as part of a site template so that this configured Web Part is automatically available to users when creating a new SharePoint site.
|
| 5. |
Configure Users and Groups |
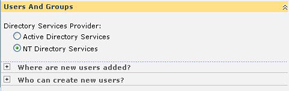
- Directory Services Provider: Select either Active Directory Services or NT Directory Services.
- Where are new users added?: Expand this section to configure whether users are created in SharePoint Groups, Permission Levels or both.
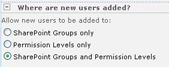
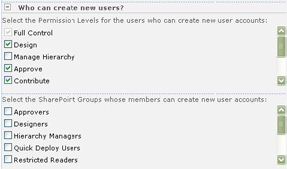
If you select SharePoint Groups only, then you must select where you want to get the SharePoint groups (including custom groups) from (the current site or the entire site collection), then select the groups the Web Part user can add users to.
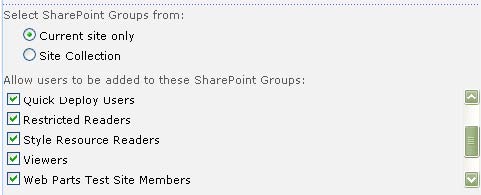
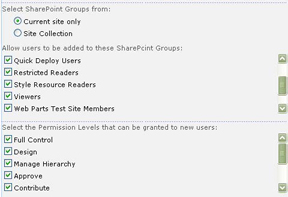
If you select SharePoint Groups and Permission Levels, then you must select where you want to get the SharePoint groups (including custom groups) from (the current site or the entire site collection), select the groups the Web Part user can add users to, then select the Permission Level(s) that can be granted to new users.
Who Can Create New Users?: Expand this section to configure the groups (including custom groups) and permission levels required for Web Part users to create new users.
|
| 6. |
If you selected Active Directory as your directory services provider, then the Active Directory Properties section is available for you to configure.

- Domain Name: Enter the full qualified domain name where the new accounts will be added to. For example: marketing.company.com or domain.local
- Cannot Change Password: If this option is selected, users created via the Web Part will not be able to change their password.
- Password Never Expires: If this option is selected, users created via the Web Part will never be forced to change their password.
- Change Password at Next Login: If this option is selected, users created via the Web Part will be required to change their password the first time they log in. This option cannot be selected if either Cannot Change Password or Password Never Expires is active.
-
Disable Account: If this option is selected, new accounts will be disabled by default.
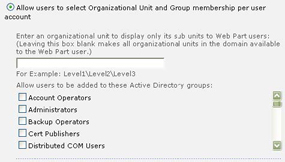
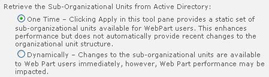
Organizational Unit Selection Options.
-
Retrieve the Sub-Organizational Units from Active Directory
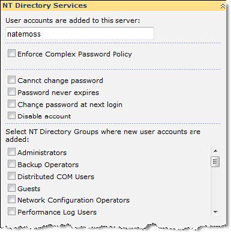
If you selected NT Directory as your directory services provider, then the NT Directory Properties section is available for you to configure.
-
User accounts are added to this server: Enter the server name of where the new user accounts will be added to. For example: MyServerName
-
Enforce Complex Password Policy: The User Account Setup Web Part cannot determine whether the SharePoint server requires a complex password policy when using NT Directory Services as you directory provider. Select this check box if you want to enforce a complex password policy based on Active Directory Services complex password policy and display this policy in the Web Part.
- Cannot Change Password: If this option is selected, users created via the Web Part will not be able to change their password.
- Password Never Expires: If this option is selected, users created via the Web Part will never be forced to change their password.
- Change Password at Next Login: If this option is selected, users created via the Web Part will be required to change their password the first time they log in. This option cannot be selected if either Cannot Change Password or Password Never Expires is active.
- Disable Account: If this option is selected, new accounts will be disabled by default.
- Select NT Directory Groups where new user accounts are added: Select an NT Directory group(s) where new user accounts will be added to.
|
| 7. |
Configure E-mail Notification |
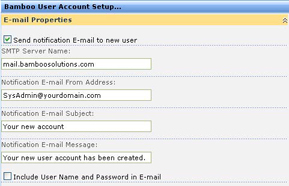
- Send notification E-mail to new user: Select this check box to have an email automatically sent to the new user notifying them that their account has been created. The Web Part will send the e-mail to the email address in the newly created user account. When you check this box, additional email properties are displayed for further configuration.
- SMTP Server Name: Enter the name of the SMTP server.
- Notification E-mail From Address: Enter the email address that you want the email to be sent from.
- Notification E-mail Subject: Enter the subject for the email notification.
- Notification E-mail Message: Enter the body text for the email notification. Click in the text box and then click the icon to the right of the text box to expand the field to write the text.
- Include User Name and Password in E-mail: Select this check box to include the user name and password in the E-mail notification.
|
|