| Return to Connecting to an Exchange Calendar |
|---|
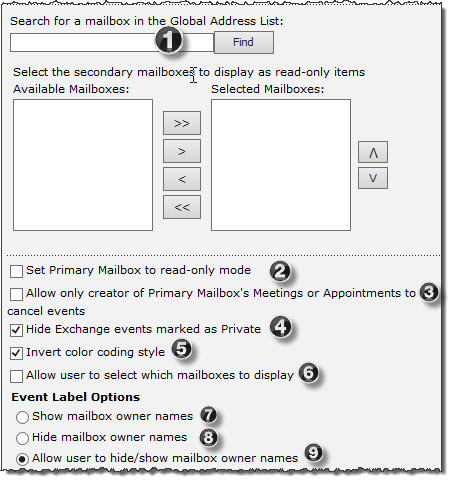 In this section of the tool pane, you will configure a few more display options:
| Step | Action | Result |
| 1. | Search for a mailbox in the Global Address List: |
To search the Global Address List for additional mailboxes, enter a display name into the Search for a user in Global Address List field and click the Find button 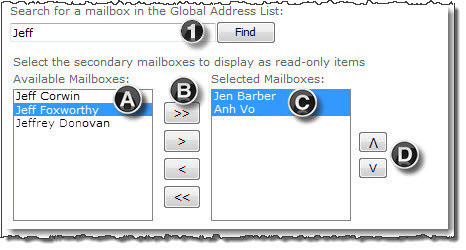
|
| 2. | Set Primary Mailbox to read-only mode | Select this option to display all items from the Primary Mailbox in read-only mode. Other users will not be able to create new appointments or meetings. This option applies to the Primary Mailbox only; all Secondary Mailboxes are read-only by default. |
| 3. | Allow only creator of Primary Mailbox’s Meetings or Appointments to cancel events | Select this option to allow only the event creator to cancel an event. |
| 4. | Hide Exchange events marked as Private | Select this option to display only public calendar events. |
| 5. | Invert color coding style | By default, the fill color for an event label represents the mailbox owner and the border color indicates the event color-code setting. Select this option to reverse the color style so that the border color indicates the mailbox owner instead. |
| 6. | Allow user to select which mailboxes to display | Select this option to allow users to choose which calendars to display in individual views of the Web Part page. Note: This option does not affect the calendars that are displayed for other users. |
| 7. | Show mailbox owner names | Select this option to display the user name of the mailbox owner associated with each calendar event. |
| 8. | Hide mailbox owner names | Select this option to hide the user name of the mailbox owner associated with each calendar event. |
| 9. | Allow user to hide/show mailbox owner names | Select this option to provide users with an option to hide or display their user name when creating calendar events. |