| Return to Configuration Overview |
|---|
 After In/Out Schedule Board and corresponding site template are installed, you can create a Schedule Board site by using the site template.
NOTE: Even if you plan to use the My Status web part separately on an existing site, you still need to create a new site based on the Schedule Board site template to store the necessary data.
You will need to log in as a user with the rights to create sites from the top level of your site collection.
From the Site Contents menu of your top-level site, select “New Subsite“
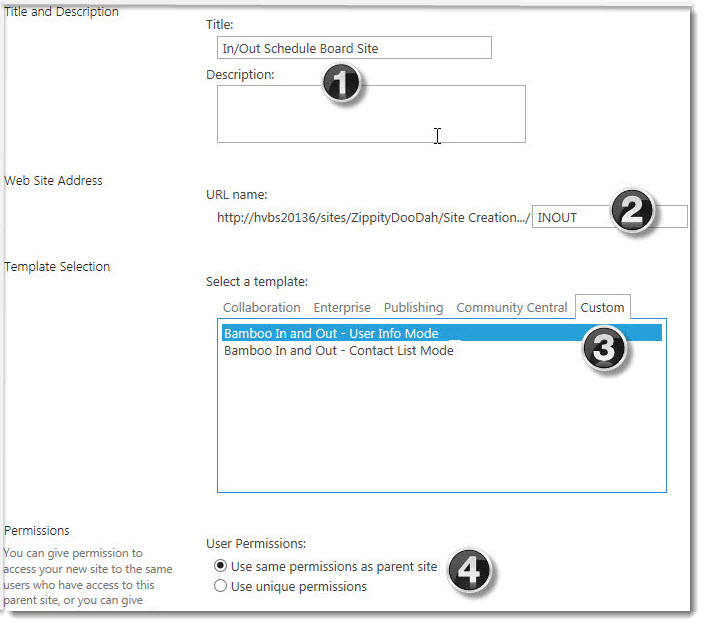
| Step | Action |
| 1. | Fill in the Title & Description fields to give your site a name. |
| 2. | Label your site with a short URL name (we recommend no spaces or punctuation). |
| 3. |
Click the Custom tab to select from the available Custom templates; there are two In and Out options. What is the difference?
|
| 4. | Click Create – The site will now be created. In a few moments, once the site has been created, your browser will load it, and you can start configuring the web parts on the site. |
Congratulations! The new In/Out Schedule Board site is now ready to configure.