| Return to Configuration Overview |
|---|
Often the data that you want to map may fall into several categories and you want the marker for each location to represent the category. This is supported with the Virtual Map View Web Part.
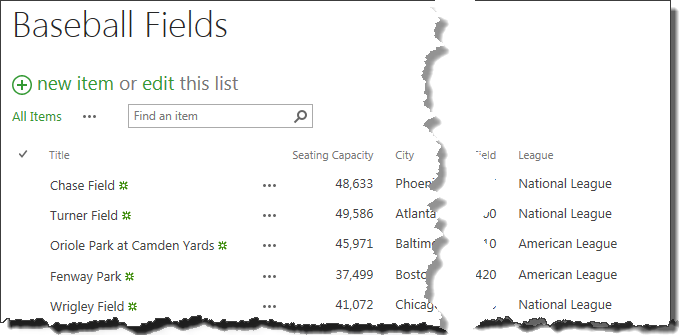 As an example for these instructions, consider a SharePoint list that stores information about baseball fields in the USA.
You want to display National League parks with one marker type ( ) and American League parks with another (
 ).
).
Follow these steps to configure your map with multiple markers:
| Step | Action |
|---|---|
| 1. |
A selection list will appear next to the Use Multiple Markers box; it contains all the columns from the selected Data Source. Select the column from the data source that stores the value to determine the marker type to use. In our example using the Baseball Fields list, this column is League. |
| 2. |
Next, you need to specify which marker to user for each value of the Use Multiple Markers column selected in Step 1 above. If you want to use custom markers, create them first.
For each Marker that you want to display on the map, edit the associated tag to update the MarkerType value. MarkerType should equal the value of the Use Multiple Markers column that is associated with that marker. In our Baseball Fields example, the Use Multiple Markers column is League. The League column is set to either American League or National League for each baseball park in the list. For this baseball field example, we created two custom markers, one called NL for National League and the other called AL, for American League. After updating the MarkerType value for each, the tags for those two markers look like this: When edits are complete, click Save to save changes and close the edit window. Otherwise, click Cancel to close the window without saving any changes. |
| 3. | After clicking Apply and then OK in the tool pane, a portion of the configured map will look like this: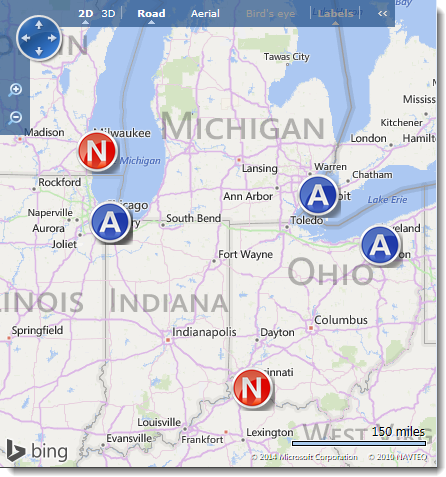 |
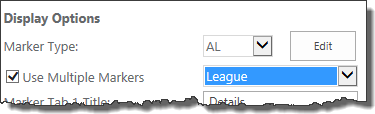 In the tool pane of the Virtual Map View, check the Use Multiple Markers box to use multiple marker types to denote different types of data (i.e., one marker for American League baseball parks and another marker for National League parks).
 Click the Edit button next to the Marker Type field. An edit window appears.
| Return to Configuration Overview |
|---|