Configure the Alert Plus Recipient(s) Tab
 On the Recipient tab, define how the system determines to whom the alert messages will be sent. With the variety of options available to you in Alert Plus, you might be wondering which is the better one to use? The simplest option is to set an alert to send to yourself. This choice is often used when setting up a new alert. Send the message to yourself as you work through the configuration for the first time so that you see the results and can modify anything as needed. When you are ready to establish your notifications, you can define the alert recipients several different ways.
 Use the links to see information about the other tabs.
Tab A – Event
Tab C – Mail Format
Use the table below to learn more about each recipient choice:
| Option |
Description |
| Lookup an email in another list (Advanced) |
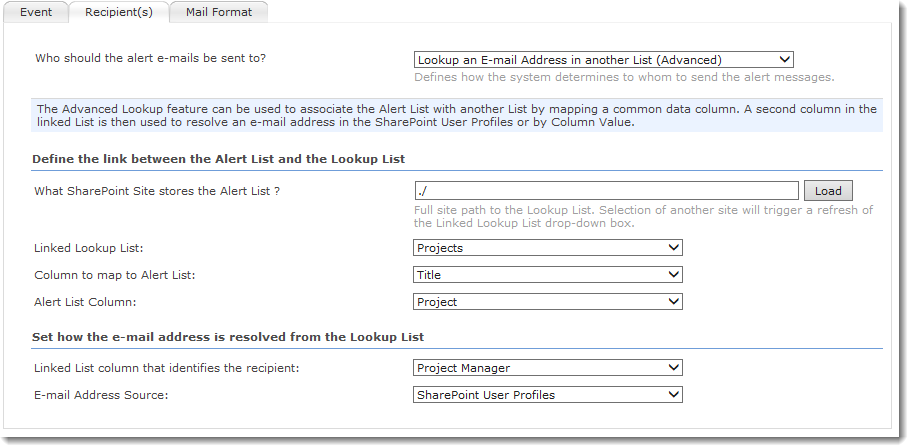
The Advanced Lookup feature can be used to associate the Alert List with another List by mapping a common data column. A second column (other than the mapped common data column) in the linked List is then used to provide an e-mail address as the email message recipient.
Specify the following parameters:
-
What SharePoint Site stores the Alert List? Enter the URL path to the site where the Lookup List resides. The Lookup List contains a column that identifies the user or email address to receive the email message. After entering the URL, click Load to load the available lists in the Linked Lookup List selection list.
 When possible, use relative URLs. For example, in the above configuration, ../ indicates the list we need to lookup to is in the parent site above the current site. When possible, use relative URLs. For example, in the above configuration, ../ indicates the list we need to lookup to is in the parent site above the current site.
-
Linked Lookup List Select the Lookup List, which is the list that contains the person or email address to receive the email message.
As an example, consider that the alert list is a Task list. Another list in the same site stores information about Projects, including the Project Title and Project Manager. The Task list has a lookup column called Project that looks up to the Title column of the Projects list. To send an alert email to the Project Manager when a task is overdue, select the Projects list as the Linked Lookup list.
-
Column to map to Alert List Indicate the column in the Lookup list to match to the column in the Alert List in order to find the item that contains the person or email value.
Continuing the example started in Step 3 above, the column in the Linked Lookup list to map to the Alert List is the Title column.
- Alert List Column Indicate the column in the Alert List to match to the column in the Lookup List in order to find the item that contains the person or email value.
Continuing the example started in Step 3 above, the column to map to the Alert List is the Project column.
- Set how the e-mail address is resolved from the Lookup List
- Linked List column that identifies the recipient This is the column in the Linked Lookup list that contains the Person or Email address.
- E-mail Address Source If the column in Step 5a above is a Person, choose SharePoint User Profile so the email address can be retrieved from the SharePoint User Profile. Otherwise, the column should contain the actual email address, so choose Column Value.
|
| Lookup an email address in the alert list |
This option allows you to select a column in the Alert List that contains either the alert recipient (a Person) or an email address.
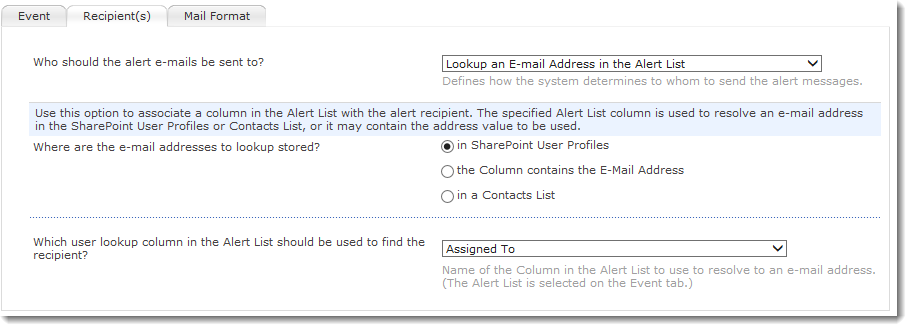
Configure Where are the e-mail addresses to lookup stored? You have three options to choose from; each option is described below with the associated choices that display for each.
- In SharePoint User Profiles: When this option is selected, choose a Person or Group type column in the Alert List that contains the name of the person to receive the email message.
- The Column contains the E-mail Address When this option is selected, choose a Single Line Text type column in the Alert List that contains the email address to receive the email message.
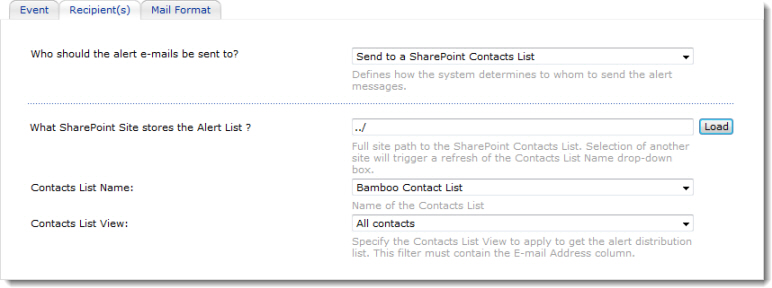
- In a Contacts List This option is similar to that described in the (Advanced) recipient type earlier. To use it, there must be a lookup column in the Alerts List that looks up to the Contacts list. When it is selected, the interface changes slightly to that shown below.
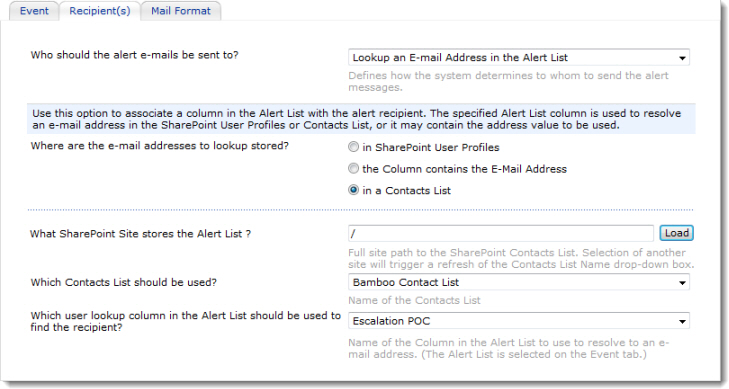
- What SharePoint Site stores the Alert List? Enter the URL to the site where the Contacts list resides. click Load to load the available Contacts lists from that site.
- What Contacts List should be used? Choose the Contacts list.
- Which user lookup column in the Alert List should be used to find the recipient?Choose the lookup column in the Alert List that looks up to the selected Contacts list.
|
| Send to a fixed set of Users or Email addresses |
When you select a fixed set of users or email addresses, you are presented with two choices for type of recipients; depending on your choice, you can manually enter some emails, perform a search for SharePoint users, or pick from a list of users in your SharePoint site.
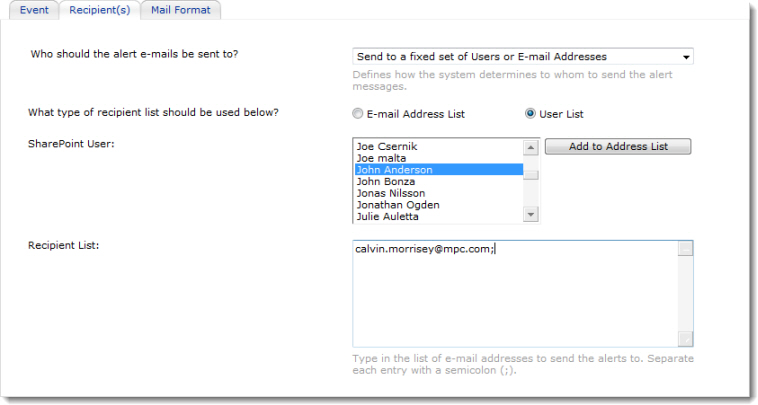
NOTE: If you decide to type in the list of e-mail addresses to send the alerts to, you must separate each entry with a semicolon (;). If you get this warning message:
The following errors were found on the Recipient(s) Tab:
* You must enter a valid e-mail address.
Remove the space after the semicolon; SharePoint does not like the spaces between each name. |
| Send to a SharePoint list |
Using his option, you can send alerts to users or groups stored in a SharePoint list column. You will need to type in the full site path to the SharePoint List and click the Load button. From there you can select the list, the list view, the list column that contains the user, and whether that column contains an email address, or if the email address needs to be pulled from the SharePoint user profile.
 |
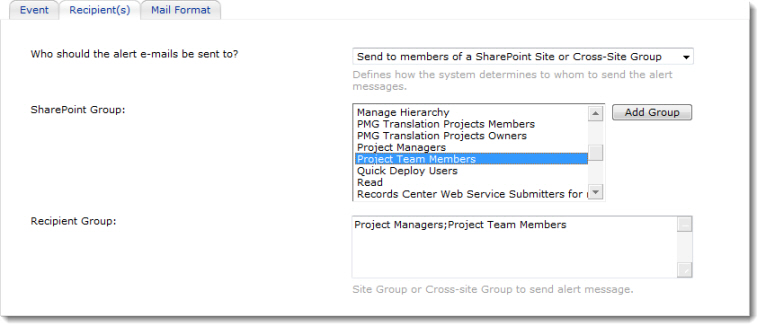
| Send to members of a SharePoint Group or AD Group |
When you pick this option, you can search for users, select from a list of SharePoint groups in your site, or select from a list AD groups. After selecting a group using any of these methods, click the Add Group button to populate the Recipient Group window below.
 |
| Send to me |
This option does not open another window because there is nothing to pick; the web part will simply alert you. It finds your e-mail address in your SharePoint user profile. |
| Start a workflow |
If you have active workflows associated with the list you are alerting on, they will appear in the Available Workflows window.
 IMPORTANT: Only workflows that can be started manually from the alert list are listed. IMPORTANT: Only workflows that can be started manually from the alert list are listed.
Highlight a workflow in the Available Workflows list and click the single arrow to move it to the Selected Workflows list.
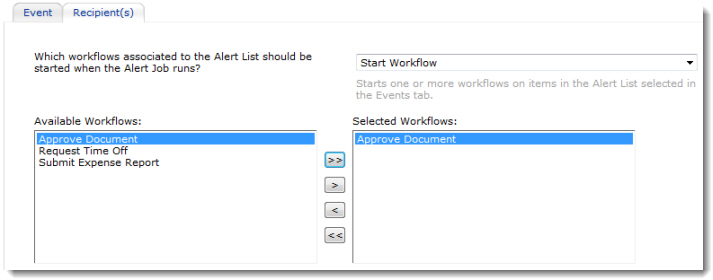
Starting a workflow using Alert Plus can help simplify your workflow and provide an alternative to using delays or waits in the workflow.
|