Create a new alert, modify an existing alert, or monitor the status of the existing alerts from the web part interface. See the Overview of the Alert Plus Web Part for more information.
IMPORTANT: It is not necessary to add an Alert Plus Web Part to a page in each site. In fact, it is easier to manage your alerts if you minimize the number of sites where you put the web part. Because you specify the URL for the site where the alert items reside, you can consolidate your alerts in one web part on a single page in your site collection.
To configure the web part, follow these steps:
| Step | Action |
|---|---|
| 1. | Add the Alert Plus Web Part to a SharePoint page using the instructions in the topic Add a Web Part to a Web Part Page. |
| 2. | 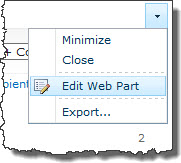 In the upper right corner of the web part, select Edit Web Part (or if you are using SharePoint 2007, select Modify Shared Web Part). The Tool Pane for the web part will open on the right side of the page. In the upper right corner of the web part, select Edit Web Part (or if you are using SharePoint 2007, select Modify Shared Web Part). The Tool Pane for the web part will open on the right side of the page. |
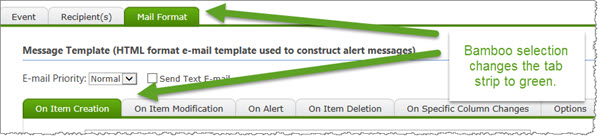
| 2. | Tab Strip Skin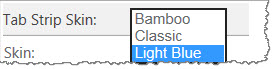 In the Tool Pane for the web part, configure the available options. You can choose one of three options for the skin; the default color is Light Blue. In the Tool Pane for the web part, configure the available options. You can choose one of three options for the skin; the default color is Light Blue.
If you choose Classic, the tab strips become tan. And if you choose Bamboo, the tab strips on the web part turn green. |
| 3. | Select a Language Follow the instructions here to choose the language. |
| 4. | Click Apply your changes and then OK to save them. If desired, click Cancel to close the Tool Pane without saving any changes. |