| Overview of Export Options |
|---|
| Step | Action |
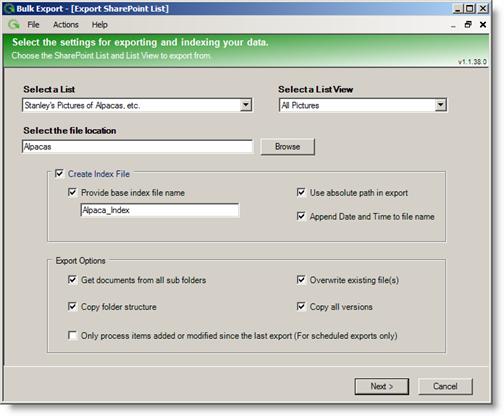
| 1. | Select the SharePoint List (or Document Library, or Picture Library) to export the data and documents from. The Libraries included on the list are those available on the SharePoint Server and Site entered on the Connect dialog and accessible by the interactive user or custom account specified.  |
| 2. | Once a library is selected, the Views available in that library appear as selections in the List Views list. Select the appropriate view. |
| 3. | Select the Local or Network File Directory to export the files to. Click Browse… to browse to the location. Be sure the user entered previously has access to this location. |
| 4. |
Choose your Index File Options.
|
| 5. |
Enter the appropriate Export Options:
|
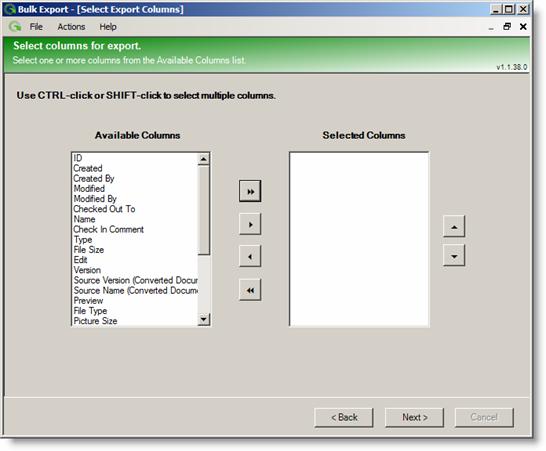
| 6. | Click Next when ready. The Column Export screen appears.
|
| 7. | Specify the columns you want to include in your index file by selecting them from the Available Columns list, and clicking the right arrow button. To add all columns, click the double right arrow button. |
| 8. | To remove columns, select them from the Selected Columns list, and click the left arrow. To remove all columns, click the double left arrow. Any columns on this list will be included in the export. |
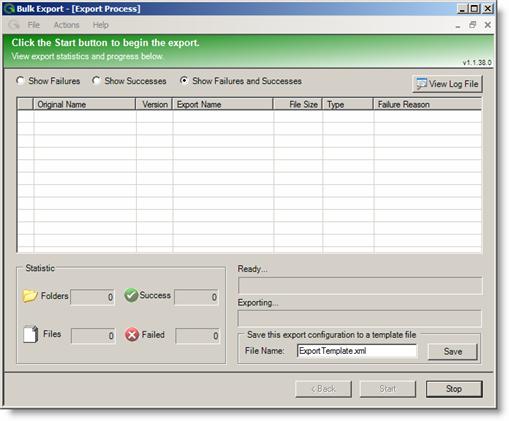
| 9. | When you are satisfied with the contents of the Selected Columns list, click Next. The Export Process screen will appear.
|
| 10. | To save the export configuration so the process can run unattended, click Save on this screen. A confirmation message will appear ensuring that the file was successfully saved. |
| 11. |
Before you export, select Show Failures, Show Successes, or Show Failures and Successes to determine what feedback to receive during export. Then, click Start to begin the export interactively. The process progress will appear on the screen, and depending on the chosen setting, the list will populate with successful conversions, failed conversions, or all conversions.
|

