| Return to Configuration Overview |
|---|
 Click on a category name below for details about the options available in the Preferences section of the Web Part Settings. To edit Task Master Web Part Settings, edit the Web Part properties and click the Task Master Web Part Settings button in the Web Part tool pane.
| Step | Action | Result |
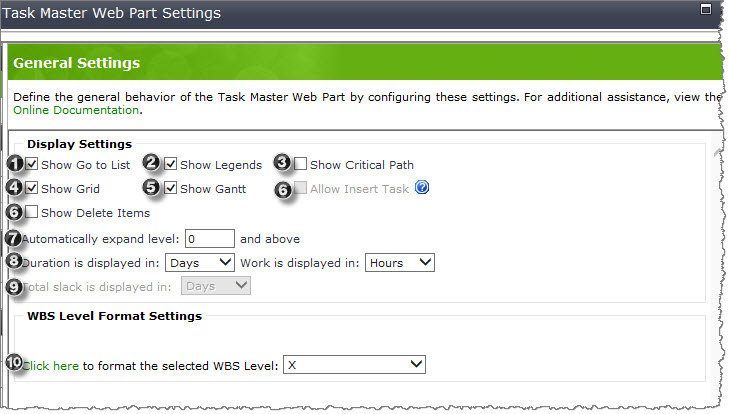
| 1. | Show Go to List | When selected, the Go to List button is displayed in the Task Master web part. Go to List opens the task list in a SharePoint list view. |
| 2. | Show Legends | Allows you to show or hide the legend at the bottom of the Task Master web part. The legend defines the color codes used for items displayed in the Gantt view. |
| 3. | Show Critical Path | When selected, includes an option in the Task Master web part to highlight tasks that are in the critical path. See: How to Show the Critical Path. |
| 4. | Show Grid or Show Gantt |
Select whether the Task Master web part displays the task grid, the Gantt chart, or both.
|
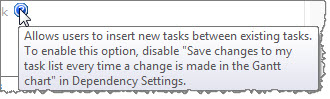
| 5. | Allow Insert Task |
When selected, allows users to insert new tasks above or below existing ones directly in the task grid. When Insert Task is enabled, an Insert Task icon
|
| 6. | Show Delete Items | When selected, the Delete Item button is displayed in the Task Master web part. To delete one or more tasks, select the radio button next to the task(s) and click Delete Item in the toolbar menu. Click OK in the prompt to delete the selected task(s) and its subtasks. |
| 7. | Automatically expand level | By default this field is set to 0, which means that all of the summary task groups in your task list will be collapsed when you first access Task Master. If you set this field to 1, the summary task groups will be expanded and will show the first level of tasks under the summary task. To view tasks under a first-level task, click the + to expand that level. You can set the level to work with as many levels as you introduce in your task list. |
| 8. | Duration and Work | Choose how your calculated duration and work are displayed: by days, hours or minutes. After adding a new task, click the Recalculate button to calculate the duration and work for the new task. |
| 9. | Total slack is displayed in | A Total Slack of zero indicates the task is a critical task, meaning that the amount of time a task finish date can be delayed without affecting the project finish date. |
| 10. | WBS Level Format Settings | Configure these settings to format the display properties for a Work Breakdown Structure (WBS) level. 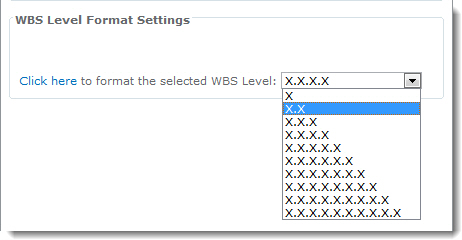 For each summary task group, X represents the WBS level for that task and corresponds to the Task Master outline structure. In the example above, Initiation Phase with a WBS of 1 is at level 1 (X), while Contractor Labor Hours with a WBS of 1.2.2.1 is at level 4 (X.X.X.X). Formatting WBS levels does not require that you show the WBS column or maintain the WBS structure. More detailed description can be found here. |
 is displayed next to each task in the task list so that users can click the Insert Task icon.