Users who have permission to update the user profile information are able to make changes to the profile database.
| Step | Action | Result |
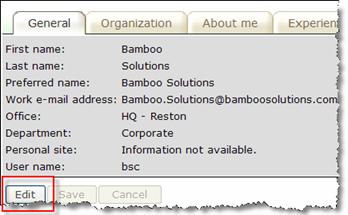
| 1. | To update a user profile, click on the Edit button at the bottom of the tab window. |  |
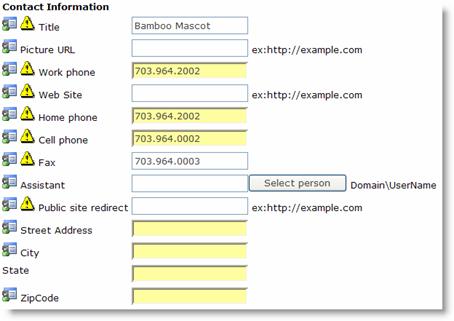
| 2. | The Web Part displays the fields that can be edited by the user. The fields are again grouped by each section: Contact Information, General, Organization, About Me, and other tabs as available. The system also displays two icons next to each field: Indicates a field that will be visible to everyone (marked as Public in the profile). This icon is not used in MOSS 2007 or WSS 3.0. There is a separate column to the far right of the user profile fields that allow you to choose who each field is visible to (depending on the available options for that field). Indicates a field that will be visible to everyone (marked as Public in the profile). This icon is not used in MOSS 2007 or WSS 3.0. There is a separate column to the far right of the user profile fields that allow you to choose who each field is visible to (depending on the available options for that field). Indicates a field that is scheduled to be updated automatically from the other corporate profile directory, such as Active Directory. Changes to these properties may be lost if the import is run after the edit session. Indicates a field that is scheduled to be updated automatically from the other corporate profile directory, such as Active Directory. Changes to these properties may be lost if the import is run after the edit session. |
|
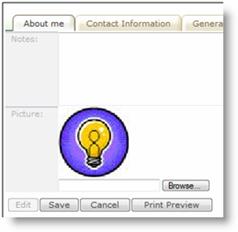
| 3. | Upload User Pictures: The User Directory allows you to upload profile pictures. When you are using the Web Part in the AD mode, you can browse for a GIF or JPEG image and upload directly from the user interface and the image is stored in AD. You can also configure the Web Part so that the image is stored in a SharePoint Library of your choice instead of AD. In the SP mode, you can specify the path to a SP Library where an image file is already uploaded or copy and paste the URL to a picture on the internet by editing the profile in the Web Part. |
 |
