Issue
Have you created an alert on one of your document libraries to let your users know when a new document is added or when an existing document is modified? This works great, but the hyperlink associated with the {itemlink} token goes to the display form for your file, not the file itself. Some users expect that the hyperlink in the e-mail message will open the file for them.
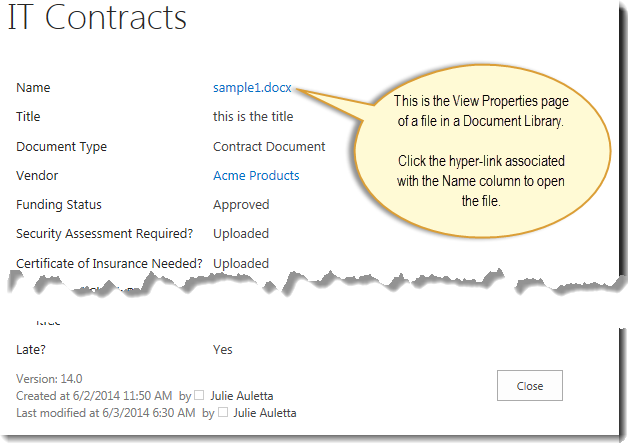 In other words, when your users click on the default link they see the meta data for the document in the document library and need to click on the link there to view the file. For some, this is one too many clicks.
Resolution
Here is how to customize the item link so it opens the file rather than the form for this specific alert.
NOTE: In the example here, we are using a Document Library that has folders. This is a more complex issue, since the URL to the file will include the folder name. If the file is buried in several levels of folders, its even more complex since the URL must include the list of nested folders.
Follow these simple steps:
| Step | Action |
|---|---|
| Configure the alert. In the Event tab, specify the list or library to alert on. | In this example, we will send an email alert when existing files are modified.
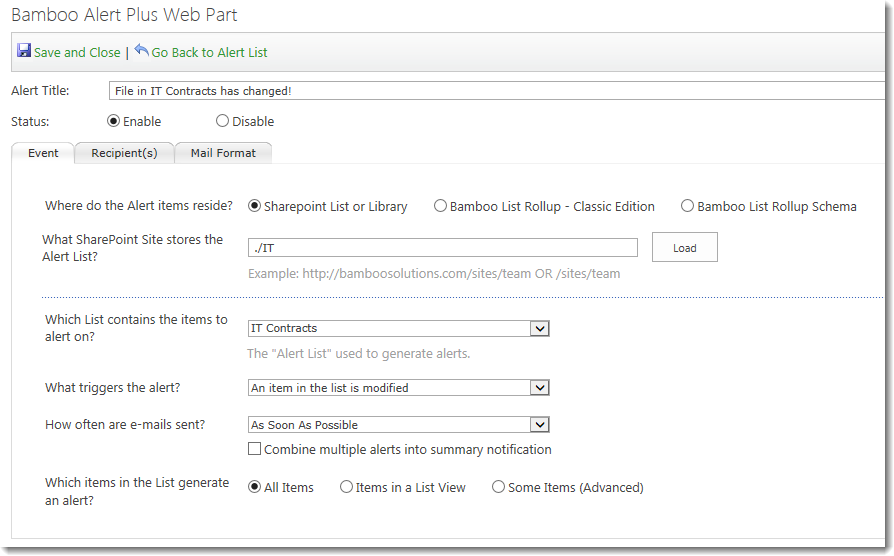 |
| Configure who will receive the email message in the Recipient tab. The configuration on this tab will not impact the mail format. | |
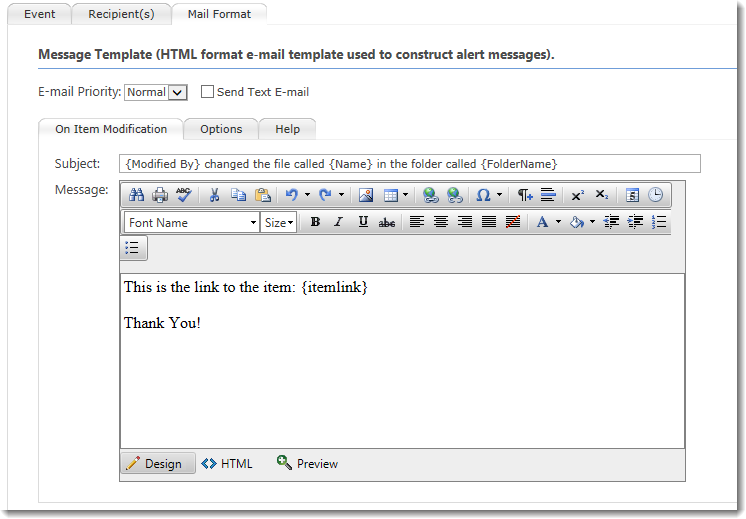
| On the Mail Format tab, compose the message that the e-mail recipient will get. Use the regular {itemlink} token; we will configure it later in the Options page of the Mail Format tab. |
 Using the above mail format with the default {itemlink}, an email from this alert will look like that shown below. 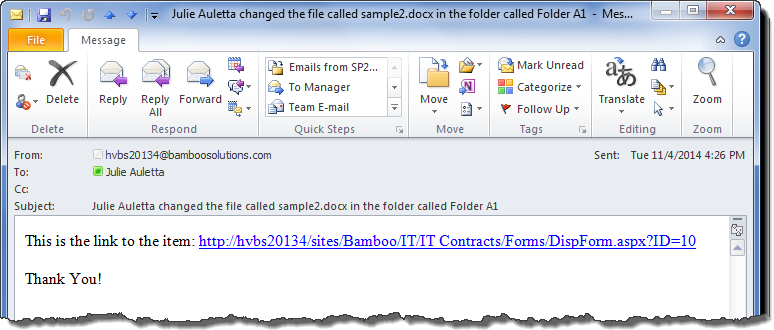
|
| Because we don’t want the default behavior of the {itemlink} token, we need to adjust it on the Options page of the Mail Format tab. |
 Add a Custom Item Link by entering a URL in the box provided. The default link from the email example above looks like this: In order to link to the file, we need to change the URL to include the folder name (if one exists) and the name of the file, which is stored in the Name column of the library. The new link is: This Custom Item Link applies only to this alert. Notice that we used a token {FolderPathName}. This is different than the token {FolderName} we used in the subject line of the email. {FolderPathName} is usually the best choice to use unless you are sure that no subfolders will ever be created.
|