| Overview of Import Options |
|---|
This page describes how to import data from a SQL Server database through an ODBC connection into a SharePoint List using
List Bulk Import.
| Step | Action |
|---|---|
| 1. | Connect to the Target Site. If you aren’t connected to the desired site, see Reset the Connection to the Target SharePoint Site. |
| 2. | 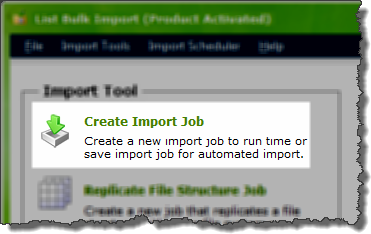 In the Import Tool section of the dashboard, click Create Import Job. In the Import Tool section of the dashboard, click Create Import Job. |
| 3. |
When that choice is selected, you will see the Select User Data Source selection list.
Choose the data source that contains the data you want to import into SharePoint and then click Next. |
| 4. |  On the Source Information tab of the Specify Source and Target page, select the Table or View that contains the data to be imported. On the Source Information tab of the Specify Source and Target page, select the Table or View that contains the data to be imported.
On the Target Information tab of the Specify Source and Target page, select the SharePoint list or library where you want the data to be imported to. |
| 5. |
|
| 6. |
|
| 7. |
When ready, click Next to continue. |
| 8. |
If you want to save your configuration parameters in the Import Job Deployment area of the page, please see Save the Import Configuration for more information. When ready, click Import to start the import.
|
| 9. | The progress of the import will be displayed on the page. When it completes, you can review the results. See Review the results with the Log Viewer for more information. |
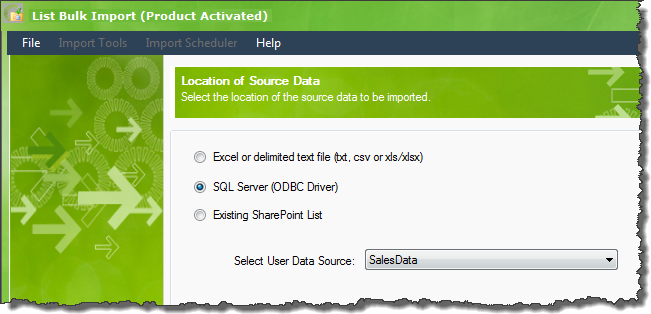 On the Location of Source Data page, choose SQL Server (ODBC Driver).
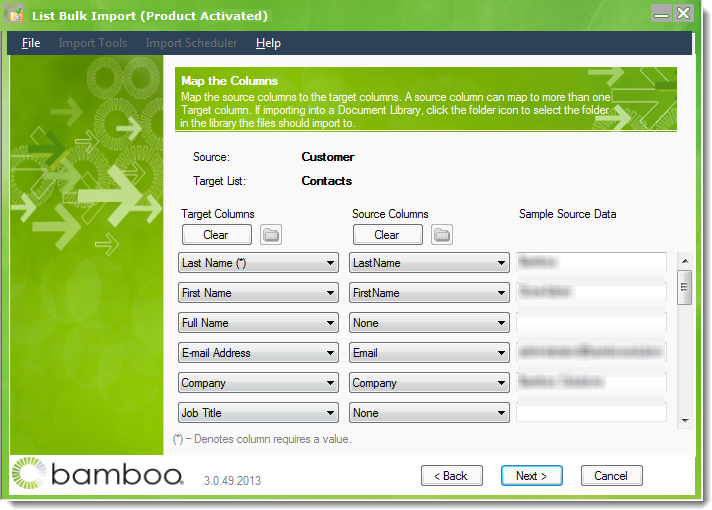 On the Map the Columns page, map columns from the SQL Table or View to the columns available in the selected SharePoint list.
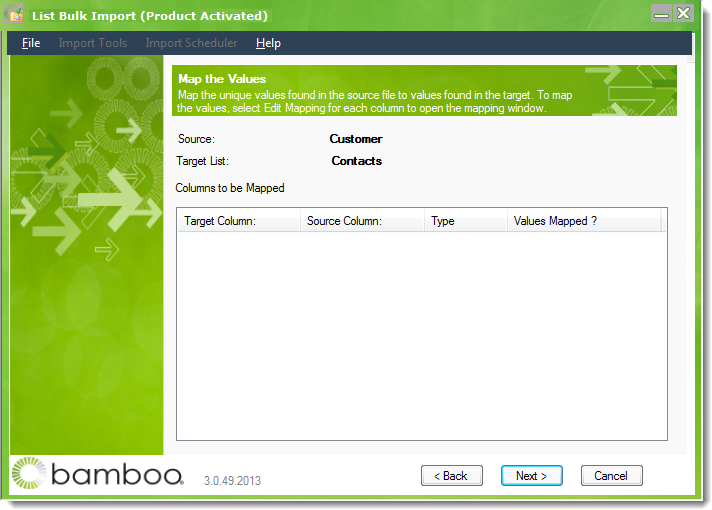 On the Map the Values page, map any choice or lookup column values. See
 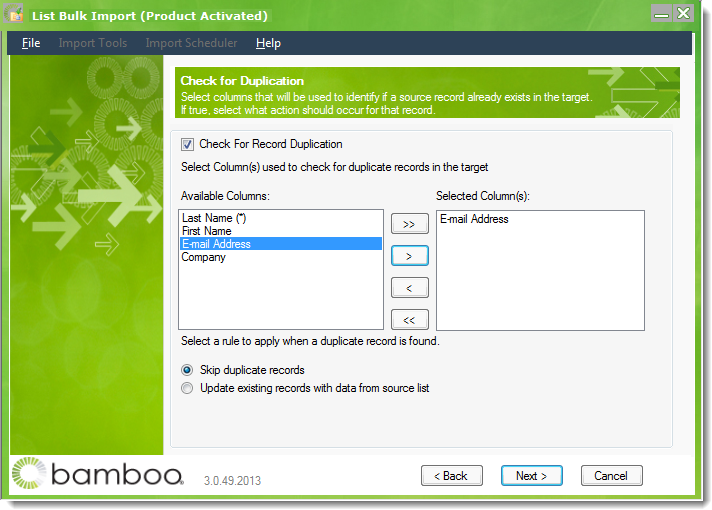 On the Check for Duplication page, decide if you want to check for duplicates. see
 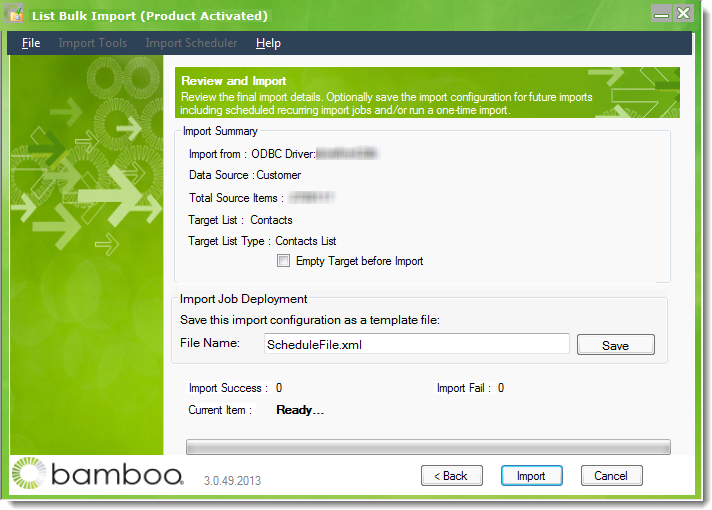 On the Review and Import page, review the import configuration.