NOTE: To setup alerts on Data Views created by the Bamboo List Rollup Web Part, you must have the Alert Plus Web Part version 2.2.0 and the List Rollup Web Part version 2.0.1 or higher. To set up alerts on Schemas created with the List Rollup Schema Designer Web Part, you must have Alert Plus 3.0 or higher and List Rollup 5.0 or higher.
Please note that Alert Plus Web Part versions prior to version 2.2.0 are not compatible with List Rollup Web Part version 3.0.0 or higher. All products are sold separately unless purchased as part of a suite or toolkit.
| Step | Action |
|---|---|
| 1. | From the Alert Plus Web Part, click New Item.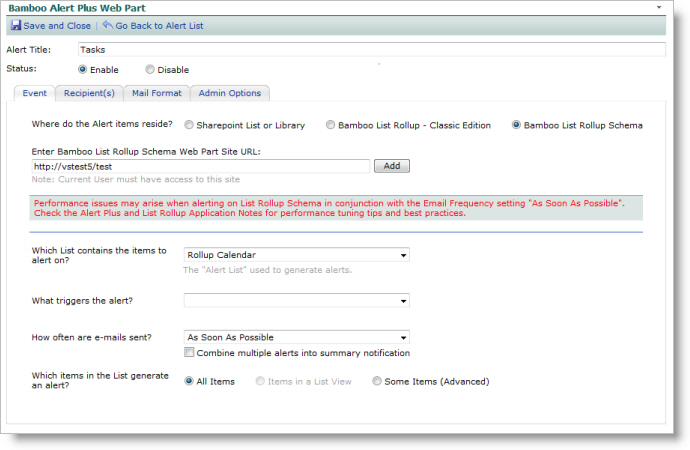 |
| 2. | Enter a Title for your alert. |
| 3. | On the Event Tab, select the check box labeled Bamboo List Rollup – Classic Edition or Bamboo List Rollup Schema depending on the version of List Rollup you used to create the rollup. Enter a page URL for List Rollup – Classic Edition or a site URL for the List Rollup Schema option. (Hint: The easiest way to get this entry is to navigate to the Data View or Schema location in another browser tab or window and copy the URL.) |
| 4. | Click Add to load the data views or schemas into the Which List contains the items to alert on? drop-down box for selection as the alert list. |
| 5. | In the Which list contains the items to alert on? drop-down box, select the Data View you want. |
| 6. | In the What triggers the alert? drop-down box, select whether the alert is sent when an item is created, modified, or exists. |
| 7. | In the How often are e-mails sent? drop-down box, select the frequency with which you would like to send the alerts: as soon as possible, every hour, every day, or every week. WARNING: Please keep in mind the number of lists that are included in the Data View you have selected. If you have rolled up more than 15 lists with a large amount of data in each list, you should consider setting your alerts to be sent every hour, day or week, rather than “as soon as possible”. See Alert Plus Performance Considerations for more information on performance tuning. |
| 8. | In the What Items in the list generate an alert? drop-down box, select All Items or Some Items (Advanced). See Event Tab for more information on these options. |
| 9. | Set up the Recipient(s) and Mail Format tabs as described in the respective sections above (see Recipient(s) Tab and Mail Format Tab for more information). |
| 10. | On the Admin tab, you can specify how often you want the alert to be sent for the same alert item in the E-mail Follow-up Wait Days box. The default is set to 1 day. If you want the alerts to be sent regardless of when the last one was sent, set this option to 0. See Admin Options Tab for more information. |
| 11. | In the Use Custom Schedule option, set the start time, end time, frequency value and unit. It is recommended that for rolled up data views with more than 15 lists with a large amount of data in each list that you set the service to check for updates to this list every 5, 8 or 10 minutes or more as needed to enhance maintain reasonable performance. See Alert Plus Performance Considerations for more information on performance tuning. |
| 12. | Click Save and Close. Your alerts will start processing according to your start time in the custom schedule. |