| TTM Configuration Overview | Timesheet Entry Configuration Overview |
|---|
Administrative Time lets you track employee’s categorized non project hours, such as vacation or sick time, or time spent on administrative tasks such as support or maintenance activities in the Time Tracking and Management (TTM) timesheet.
Keep in mind:
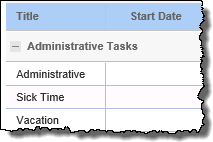 The Timesheet Entry Web Part is configured by default to reference the local Administrative Time list that is created with the TTM site. This list contains the following default items:
- Administrative
- Sick
- Vacation
-
By default, tasks in the identified Administrative Tasks list will be included on the timesheets of all users.
-
Changing the Timesheet Entry Web Part’s default configuration to reference a custom list is optional
To configure Timesheet Entry to use a custom Administrative Time list:
NOTE: The following steps require you to have accessed the Timesheet Entry Configuration Settings screens by clicking the Timesheet Entry Web Part Settings button in the Web Part’s configuration tool pane.
| Action | Result | |||||||||||||||
|---|---|---|---|---|---|---|---|---|---|---|---|---|---|---|---|---|
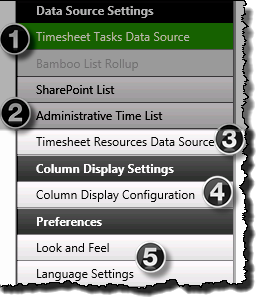
| 1. | From the Timesheet Entry configuration screen, click the Administrative Time List button under Data Source Settings in the navigation tool pane. 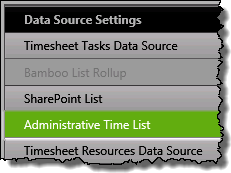 |
The configuration screen will be displayed on the right side of the pop-up window | ||||||||||||||
|
By default the Timesheet Entry Web Part uses the local Administrative Time list as the data source. If you will use this list, skip to step 5 for additional information on configuring the Web Part.
|
||||||||||||||||
| 2. |
Enter the site where the custom list is located, then click the green arrow Both absolute paths (http:// server name/site ) or relative paths(./Site/) can be used for the site URL. |
 |
||||||||||||||
| 3. | Pick the custom list from the Select Administrative Time drop down selector. | |||||||||||||||
| 4. |
Map columns from the list to the columns shown on the left.
|
|||||||||||||||
| 5. |
Click these links for additional Web Part configuration topics:
|
|||||||||||||||
 You have now configured the Web Part to use a custom list as the Administrative Tasks data source.
 | TTM Configuration Overview | Timesheet Entry Configuration Overview |
|---|