| Return to Troublshooting Timer Jobs |
|---|
Both of the Community Central timer jobs (the Master Timer Job and the Update Site Information Time Job) are set by default to run every five minutes. The timer job schedule settings can be modified by following these few steps:
| Step | Action | Description |
| 1. | From Central Administration, click the Monitoring link in the left-side panel. | |
| 2. | Click the Review job definitions link in the Timer Jobs section. | 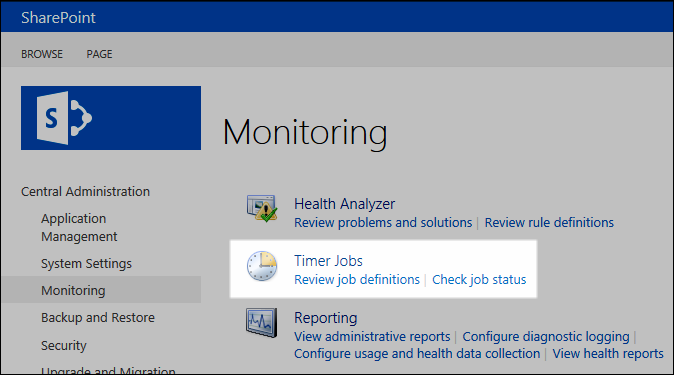 |
| 3. | Scroll down the list of job definition titles and locate the two Community Central timer jobs. Click on the timer job you wish to modify. |  |
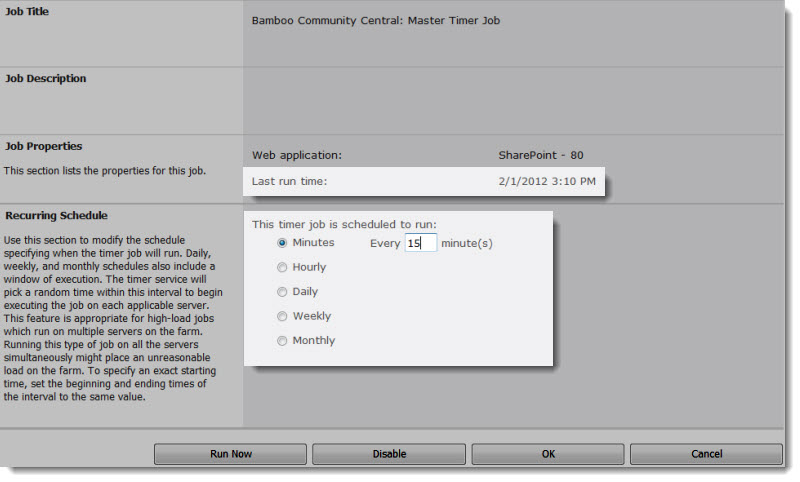
| 4. | Enter the new values on which you want the timer job to run. First, click the radio button to select Minutes, Hourly, Daily, Weekly, or Monthly. Next, enter the corresponding time value for the job. |
For example, if you want the timer job to run every 15 minutes, click to select Minutes, and then enter 15 in the Every_minute(s) field.
|
| 5. | Click OK to save the new settings. Click Run Now to run the timer job immediately. |
|