Migrating in this documentation refers to moving from one version of SharePoint to another. Upgrading, on the other hand, refers to updating your Bamboo product to a newer release.
IMPORTANT: If you are migrating from one version of SharePoint to another version (i.e., SharePoint 2007 to SharePoint 2010), please see the topics under Migrating to a new SharePoint version…. You may need to upgrade the Bamboo products on your SharePoint farm before migrating.
To upgrade from a previous release of this product, perform the following upgrade procedure:
| Step | Action |
|---|---|
| 1. | Review Best practices for a successful install to learn which servers to install on and what services to stop or restart. These steps apply if you are upgrading or installing for the first time. |
| 2. | Locate the product installation files. If you are upgrading, you may have downloaded a new version from the My Bamboo area of the Bamboo Solutions web site. If you just unpacked a new version, the Setup.bat will run automatically. Otherwise, double-click the Setup.bat program included in the root directory of the Installation Files. See About the Installation Files. |
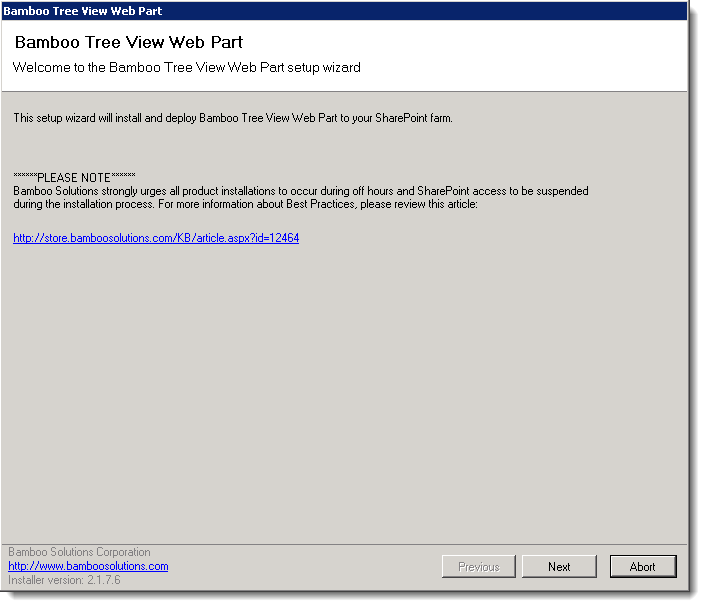
| 3. |  Select the first product component in the Components section in the Setup program. When a component is selected, information specific to it is displayed on the right side of the interface. Verify the Location of Install Files and Required Installation Permissions. When ready, click Install. The installation program starts. It is a step-by-step wizard. The example screen shot shown is for the Tree View Web Part, but most Bamboo product installs look similar. Select the first product component in the Components section in the Setup program. When a component is selected, information specific to it is displayed on the right side of the interface. Verify the Location of Install Files and Required Installation Permissions. When ready, click Install. The installation program starts. It is a step-by-step wizard. The example screen shot shown is for the Tree View Web Part, but most Bamboo product installs look similar. |
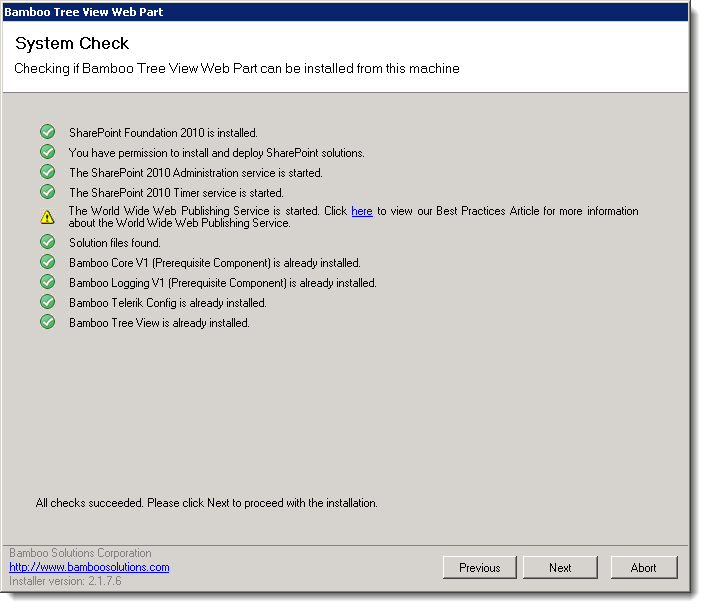
| 4. |  Click Next to begin the upgrade. Verify that the system checks pass successfully and click Next. If the system checks do not pass, you will not be able to proceed. Click Next to begin the upgrade. Verify that the system checks pass successfully and click Next. If the system checks do not pass, you will not be able to proceed.
Notice in the screen shot above that it will be possible to proceed if the World Wide Publishing Service is started, although a yellow warning icon is displayed. If you are running with Claims Based Authentication (CBA) or if you are installing on SharePoint 2013, you need to keep this service on in order to automatically activate features during the install. Other than these scenarios, we strongly recommend that you stop this service before installing or upgrading. See Recommendations for a successful intstall for more information. |
| 5. |
Wait while the components are upgraded. You will see progress displayed on the screen. |
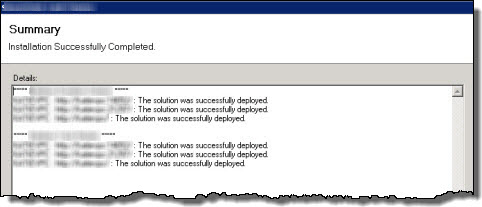
| 6. |  When the upgrade is complete, click Next to review the Summary screen and confirm that the product upgrade was successful. You may need to scroll up to review the entire summary. When satisfied, click Close. When the upgrade is complete, click Next to review the Summary screen and confirm that the product upgrade was successful. You may need to scroll up to review the entire summary. When satisfied, click Close. |
| 7. | If there are additional components listed in the Setup program, repeat steps 3-6 for each. |
| 8. | When all the component upgrades have been completed successfully, be sure to restart the World Wide Web Publishing Service if it was stopped. |
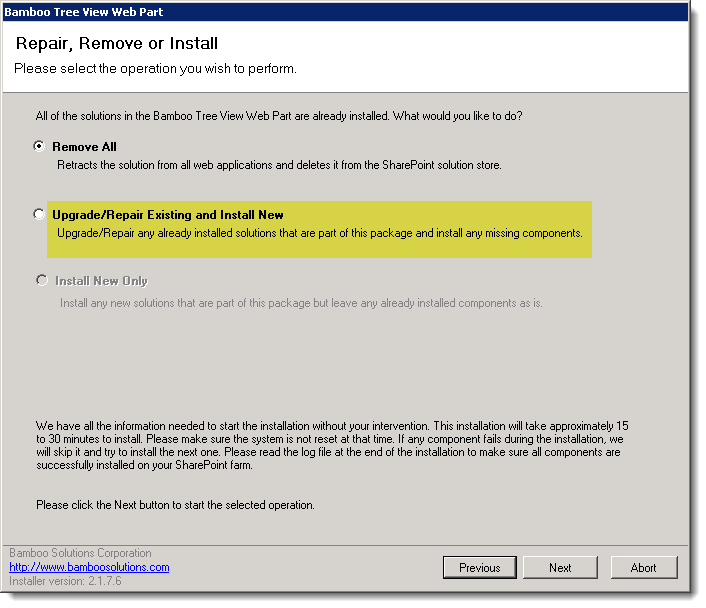
 In the Repair, Remove or Install screen, select the Upgrade/Repair Existing and Install New option and click Next.