| Overview of Calendar Plus Configuration settings |
|---|
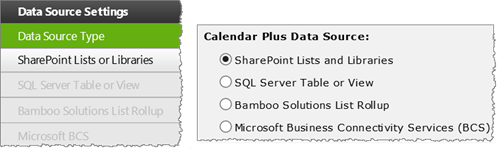
SharePoint Lists and Libraries are the default Data Source Type for Calendar Plus.
When working with SharePoint Lists and Libraries keep in mind:
-
Each SharePoint list or library referenced as a data source must contain at least one SharePoint Date and Time column.
-
Up to 10 SharePoint Lists and Libraries can be displayed in a single calendar instance.
NOTE: If you want to use more than 10 lists or libraries, Bamboo recommends using Bamboo List Rollup as the data source. This allows you to connect to rollups of multiple lists or libraries.
The following steps require you to have accessed the Calendar Plus Settings screens by clicking the Calendar Plus Web Part Settings button in the web parts configuration tool pane.
| Action | Result | |
|---|---|---|
| 1. |
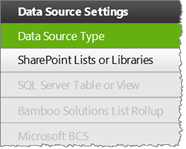
Click the SharePoint List and Library button under Data Source Settings in the navigation tool pane. You will only be able to select this button if SharePoint Lists and Libraries is selected as the Data Source Type |
|
| 2. | Click the Add List or Library button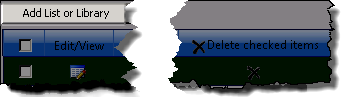 |
The Add List or Library to Calendar pop up window will appear that contains the settings to configure the list or library. It divided into two sections:
|
| 3. |
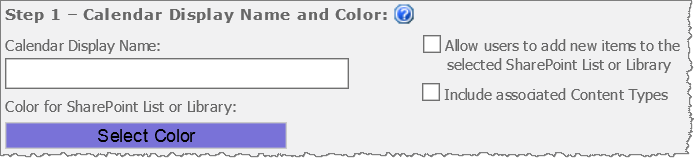
Complete the General Descriptions section to define how the list or library will be identified in Calendar Plus
|
The Calendar Name and color entered will be used in the calendar display to identify the source list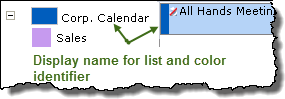 If Allow users to add new items… is checked, users can hover over the New Item button on the toolbar see the lists to which they can add a New Item 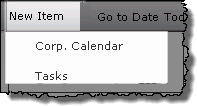 |
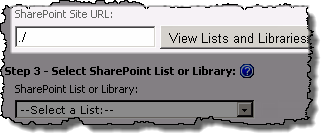
| 4. |
Enter the URL to the site that contains the list or library to be displayed in Calendar Plus, then click the View lists and Libraries button. Both absolute paths (http:// server name/site ) or relative paths(./Site/) can be used for the site URL. Bamboo recommends using relative paths if:
|
The available lists and libraries on that site will be listed in SharePoint List or Library drop-down menu. |
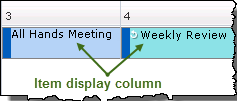
| 5. | Select the desired list or library, then select the column that contains the values you want to display in the item cell from the Item Display Column drop down.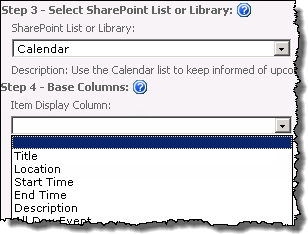 |
|
| 6. | Select the Date and Time column(s) in the list or library that will be displayed in the calendar. 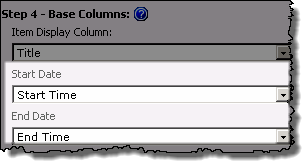 |
Whether you see Start Date and End Date fields or a Single Date field will depend on the selection made on the General Settings screen to Base the Calendar on a Single Date or Interval.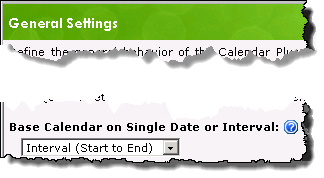 |
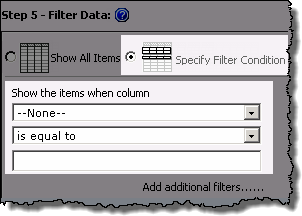
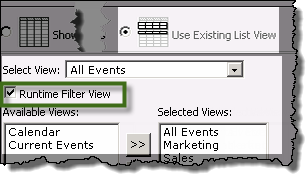
| 7. |
Apply a filter for the list or library by selecting from the following options:
|
Keep in mind: 2. Use the Add Filters link if you want to add another specified filter condition using AND/OR Boolean operators. 3. Data can be filtered dynamically at run time based on views using the Runtime Filter View. Users select the view they want to filter by from a drop down menu in the toolbar 4. Web part connections can be used to filter the contents of the calendar display but are not configured in the Calendar Plus web part settings. When using a SharePoint List or Library as the data source, the web part supports web part connections for the Display, Start Date and End Date columns. |
| 8. |
Stay in the configuration screen and complete the Optional Steps ORClick Save and Close |
Clicking Save and Close to return you to the SharePoint List and Libraries Settings screen, where you will see the newly added List or Library in the grid display. 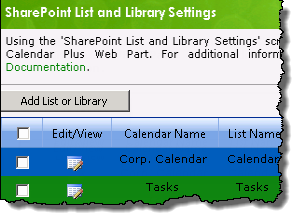 |
| 9. |
Use the left navigation pane and configure View Settings for the Calendar Plus web part ORClick Save and Close a second time |
Clicking Save and Close will exit the Calendar Plus Web Part settings screen |
| Overview of Calendar Plus Configuration settings |
|---|