The following outlines how to quickly configure a reminder alert. This alert uses the trigger type An item exists and a Bamboo List Rollup Schema as the Data Source.
Go to the page in your Portal, where the Alert Plus Web Part exists. If it hasn’t been added to a page yet, see How to add a web part to a SharePoint wiki page.
It is not necessary to add an Alert Plus Web Part to a page in each site. Because you specify the URL for the site where the alert items reside, you can consolidate your alerts in one web part on a single page in your site collection.
| Step | Action |
| 1. | 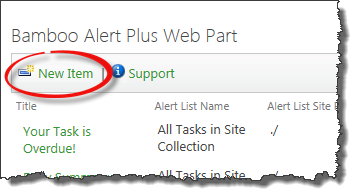 From the Alert Plus toolbar, click New Item. From the Alert Plus toolbar, click New Item. |
| 2. |  Give the new alert a title. You won’t be able to save the alert without a title. Give the new alert a title. You won’t be able to save the alert without a title. |
| 3. |
Identify the site where the items that will trigger an alert reside. First choose whether they are in a SharePoint List or Library or a Bamboo List Rollup. For this example, we will choose Bamboo List Rollup Schema * Next, enter the URL for the site where the List Rollup Schema was defined. After entering the URL, click the Load button to load the available schemas into the What List contains the items to alert on? box. For this example, we will choose the schema called All Tasks in Site Collection. 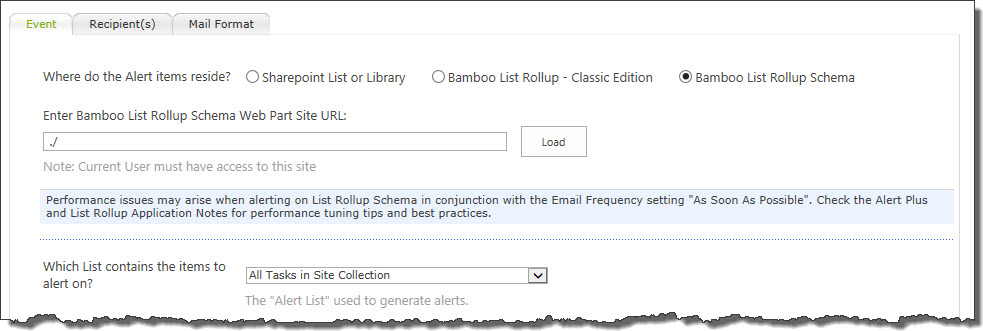
|
| 4. | Choose a What triggers the alert? option. For an alert that is sent as a reminder what a Task is overdue, we choose An item exists.
 For the Follow-up Wait Days, enter the number of days to wait before sending another email about the same overdue item. In other words, this type of alert has an automatic escalation. Reminder emails will continue to be sent as long as the item continues to meet the alert criteria. |
| 5. |
Choose How often are e-mails sent? For this example, choose As Soon As Possible so the email recipient receives the message as soon as we realize the task is overdue. Since the As Soon As Possible emails are processed every two minutes, this means the reminder emails will be sent shortly after midnight.
For information about the other options, including Combining multiple alerts into summary notification, see How often should E-mails be Sent. |
| 6. | What column values should generate an alert? For this example, we will use the CAML Criteria Builder. Select the Some Items (Advanced) option and enter the criteria as shown in the screen below. The specific date chosen as the Value for Due Date is not important since we will be changing it to use the current date. Click Copy Criteria to CAML Query Field when ready. The CAML Query will appear in the CAML Query box.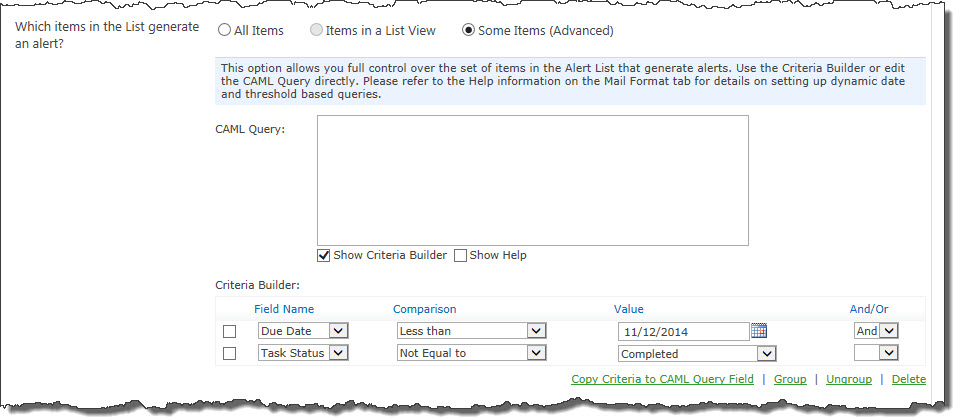 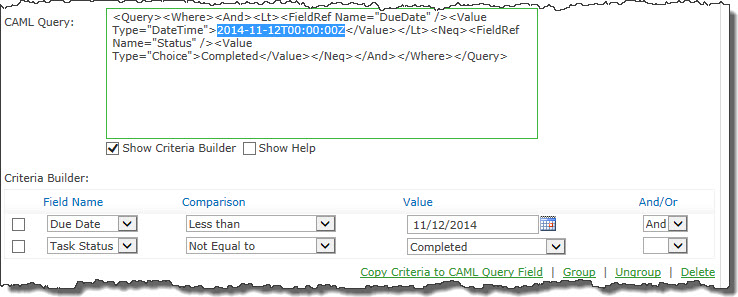 Highlight the date value entered, as shown here: Highlight the date value entered, as shown here:
This results in a query that will automatically find all overdue tasks. |
| 7. |
Click the Recipient(s) tab and choose the recipient of the email alert. For this example, we will send the reminder emails to the Task assignee by selecting the Lookup an E-mail Address in the Alert List option. The Assigned To column is in the Tasks list, but it includes the person’s name, not an email address. Select the in SharePoint User Profiles to tell Alert Plus where to find the email address associated with the person. 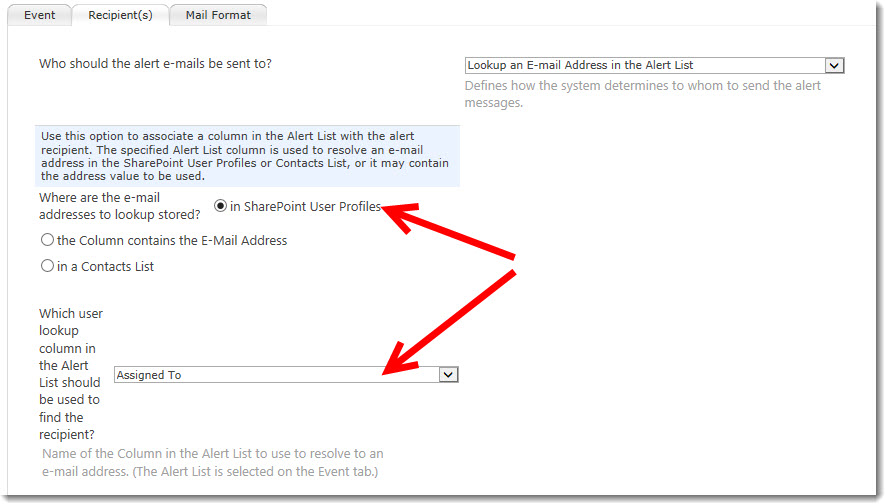 See Overview of Alert Plus Recipient Tab for more information. |
| 8. | Click the Mail Format tab and compose your message. To include columns values from or a link to the alert item, use tokens. For our example, we will compose a message like this:
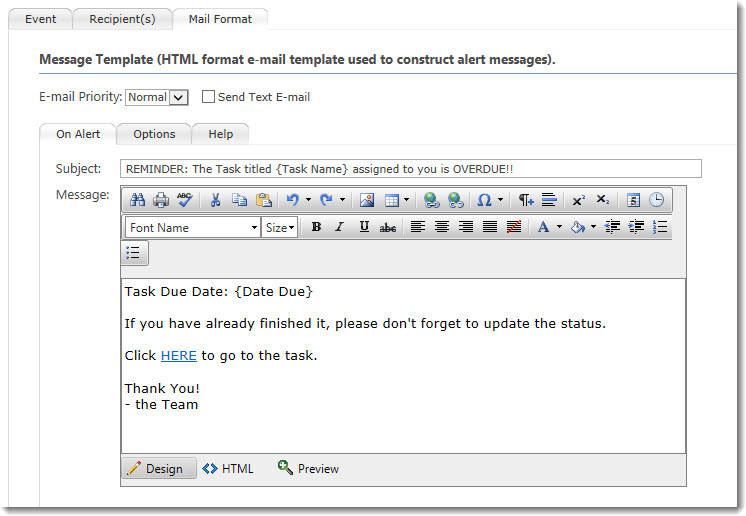 To see how the hyperlink to the task was composed, see the HTML view below: 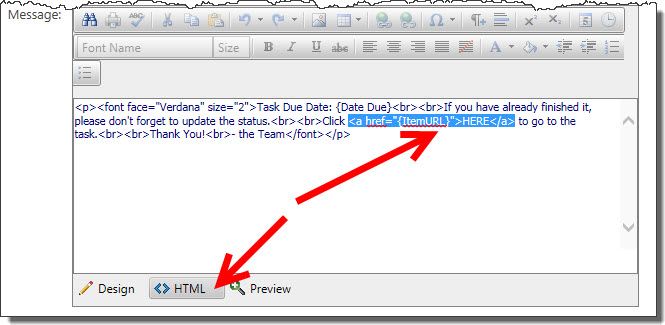 For more information about using tokens in mail formats, see Using Tokens in your Alert Plus Email Message. The email below is how this message will look. Notice that a blank due date in SharePoint will appear blank in the email message also. 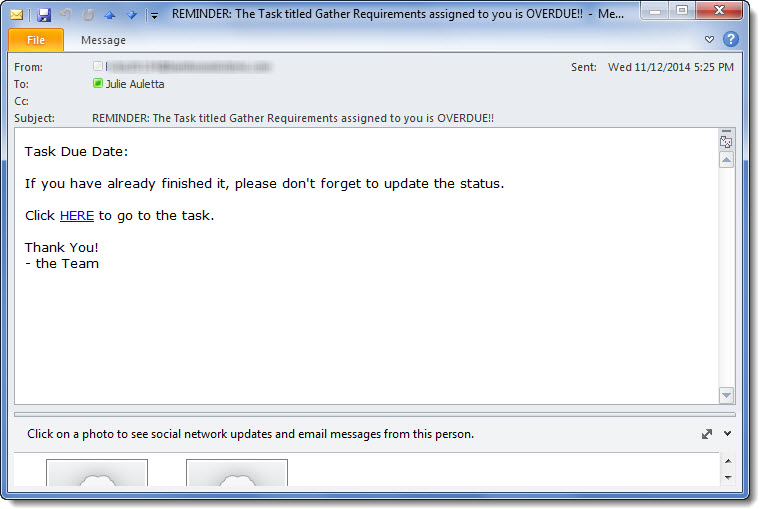 |
| 9. | Click the Save and Close button on the toolbar to save the new alert. |
*Bamboo’s List Rollup web part is sold separately.
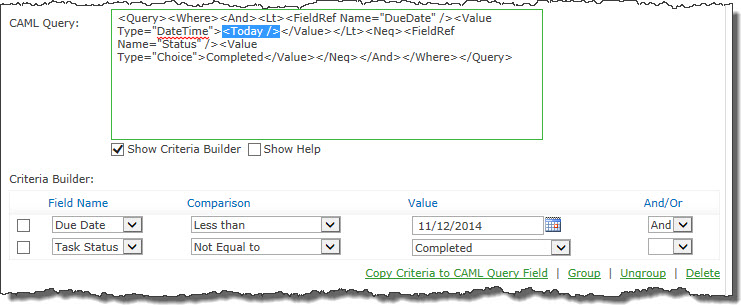 Enter <Today /> where the date value was, as shown here: