Using Marker Tabs
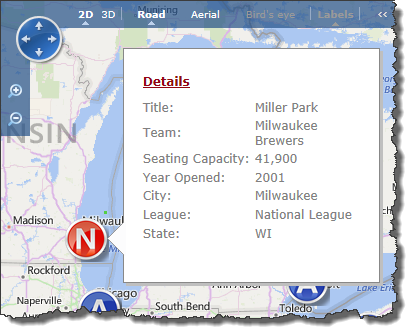 The Marker Tabs appear when a marker on the map is clicked. An example with two tabs (General and Stats) configured is shown here.
NOTE: The Bing MapTM display shows the pages of the popup slightly different than the Google MapTM display. The one shown here is the Bing MapTM display.
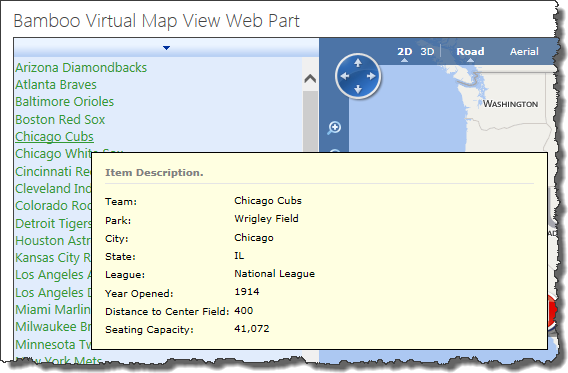 Another pop-up display, called Item Description, appears when the end user hovers over the list of items on the left side of the Virtual Map View display. An example is shown here.
To configure both displays, follow these steps:
| Step |
Action |
| 1. |
 In the Virtual Map View tool pane, decide how many tabs you want to use. Enter a Title for each. In the Virtual Map View tool pane, decide how many tabs you want to use. Enter a Title for each.
NOTE: If you don’t want to use a tab, leave the Title blank.
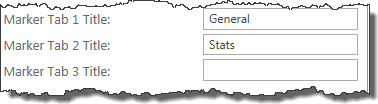
In the example shown here, we use two tabs and label them General and Stats.
|
| 2. |
 Next, decide what column values from the list to display on each tab. Next, decide what column values from the list to display on each tab.
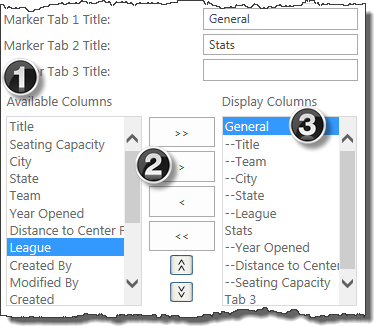
- Select a column from the Available Columns list that you want on the first tab. All columns from the list should be displayed.
- Click on the arrow > button to move the column from the Available Columns list (left box) into the Display Columns list (right box) and it will be positioned under the first tab.
- For subsequent tabs, highlight a tab label in the Display Columns list on the right side before selecting an available column and moving it to the right. It will be positioned beneath the highlighted tab.
To remove a column from the Display Columns list, select the column from the list, and click the left arrow button. The column you highlighted will be removed from that list.
To move the columns up or down once they appear in the Display Columns list, highlight the column in the Display Columns list and click the up ( ) or down ( ) or down ( ) arrow. The highlighted column will move one position. ) arrow. The highlighted column will move one position.
NOTE: You cannot move a column from one tab to another; you can only shift positions of columns within the tab group. To move a column to another tab, remove it from a tab group and follow the procedure above to move it into the appropriate tab group.
|
| 3. |
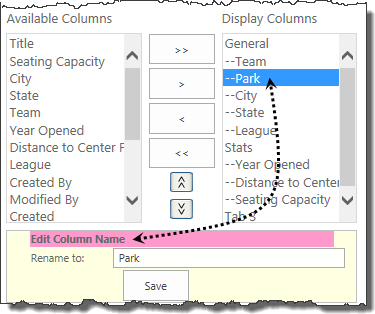 Rename a displayed column. Sometimes the actual column name may be too long or not descriptive. Rather than displaying the actual name of the column, it is possible to use a column alias for display in the marker tab on the map. Rename a displayed column. Sometimes the actual column name may be too long or not descriptive. Rather than displaying the actual name of the column, it is possible to use a column alias for display in the marker tab on the map.
To create an alias, double-click on the column name in the Display Columns list. An Edit Column Name section appears below the web part highlighted in bright pink. Type the new name in the Rename to field. click Save to save your change. After saving the column name, you will see it change in the Display Columns window.
NOTE: The column is not renamed in the source list. This change is only an alias used on the map display.
|
| 4. |
The order of the tabs and columns configured for the Marker Tabs in Step 3 impacts the order that columns appear in the Item Description pop-up shown here. The tab Titles don’t appear here, but the columns do.
NOTE: If the column appears in the Marker Tab, it also appears in the Item Description pop-up. If you created a column alias, it will appear in both pop-ups.
|