Once you deploy a workflow or publish it to a list, it is automatically associated with the list or library where you created it. Depending on how your workflow was deployed or published, it may also be available to associate to other lists or libraries in the site or site collection. If your workflow configuration is generic enough, you may not need to modify the workflow at all for it to run with other lists.
To see how to associate a workflow in SP2013/SP2010, see Associating a site workflow with a specific list.
To associate an existing workflow with a different list or library:
| Step | Action | Result |
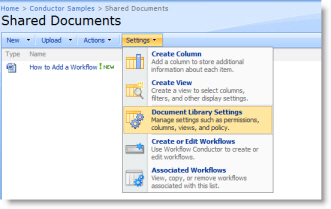
| 1. | In the list or library, click the Settings menu, and then click Document Library Settings or List Settings. |  |
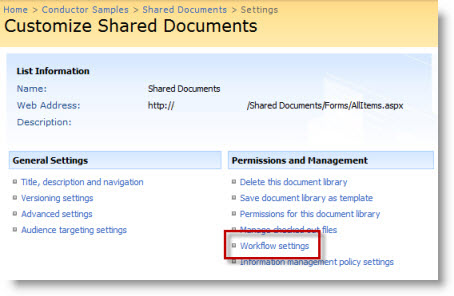
| 2. | In the Permissions and Management section, click Workflow settings. |  |
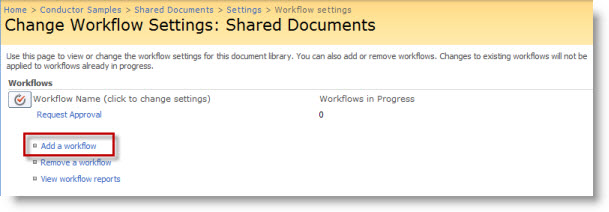
| 3. | In the Change Workflow Settings page, click Add a workflow. |
|
| 4. |
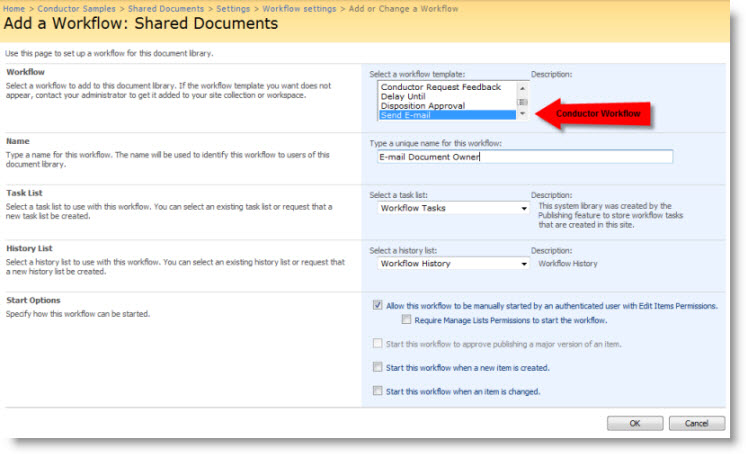
Select the workflow from the Workflow list. The following Conductor workflows are displayed in the list of available workflows:
|
 |
| 5. | Give the workflow a name unique to this list (this does not have to match the workflow name), select the Task and History lists the workflow will use (if you don’t want to use the default), define your desired Start Options, and click OK. | Your workflow is now associated to the current list or library and is listed as an available workflow for list items. |
See Also:
- Removing a Workflow Association
- Removing a Workflow
- Disabling a Workflow
- Retract and remove the workflow solution from the Web application (for Site Administrators only!)
- Deactivate the workflow feature in the site collection (for Site Administrators only!)
- Changing Workflow Options
