If none of the layouts or styles available in the List Rotator web part work for you, create a custom layout and apply your own styles.
In this article, we will create a custom layout for rotating this view (View for Rotating) of an Announcements list:
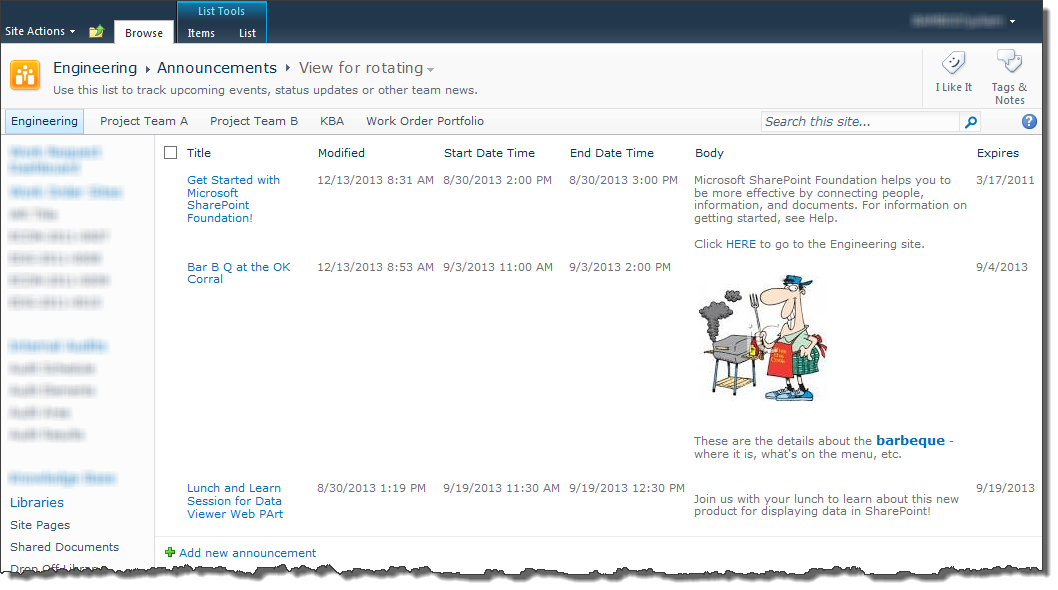

We want the custom layout to look like this when displayed in the List Rotator. No column labels are displayed and only the announcement Title, Body, and Event Date (calculated from the Start Date Time and End Date Time columns in the list) are included in the display.
To create this custom style, follow these steps:
| Step | Action | Result |
|---|---|---|
| 1. | Edit the web part and choose Custom as the Style in the web part tool pane. | The Edit Source and CSS Edit buttons become enabled.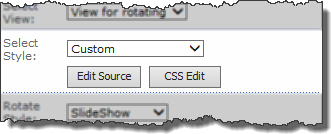 |
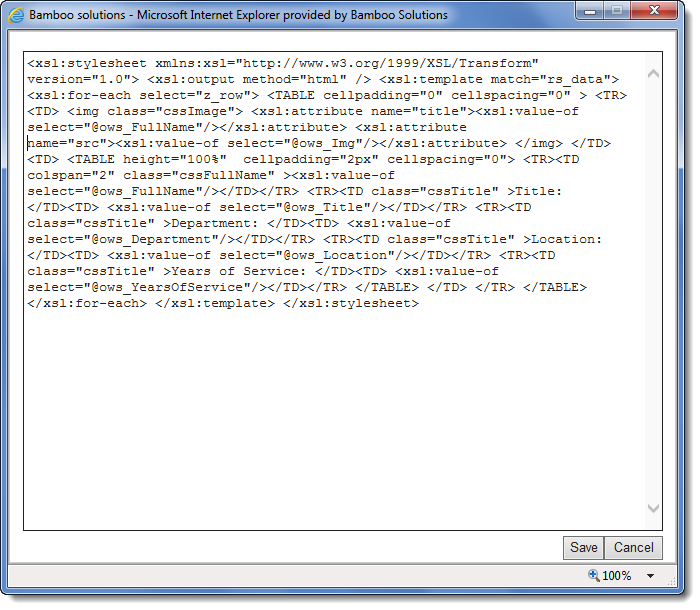
| 2. | Click Edit Source to create a custom layout for the information you want to display. |
A text editor appears for you to edit the source for the layout.
|
| 3. |
Edit the layout.
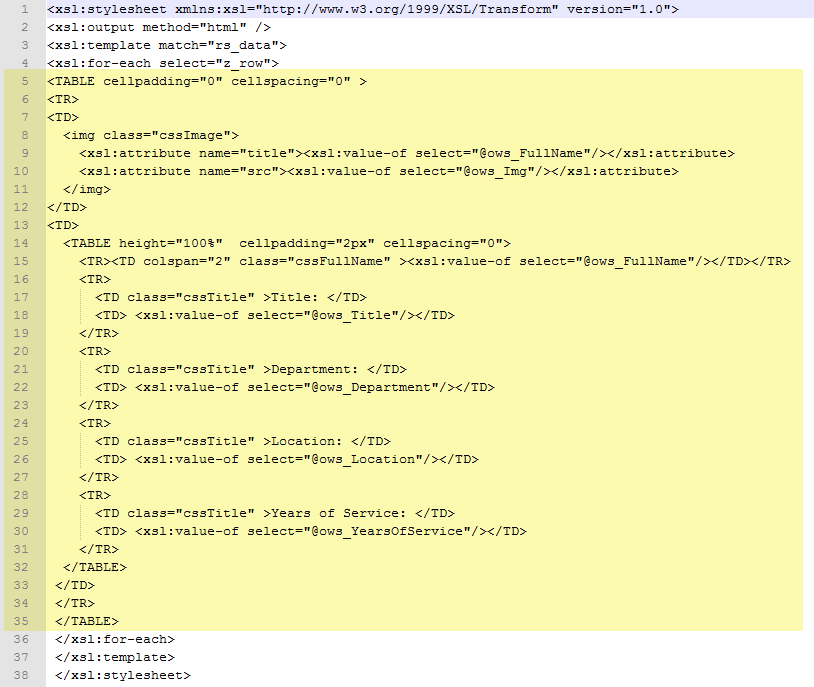
By default, the layout code looks like this (38 lines):
The custom layout we will build for the Announcements list has a different table structure. We don’t plan to include column labels, so the table is just 4 rows and two columns (the first two rows spans both columns). To implement the custom layout for the Announcements list shown at the top of the page, replace the outer <TABLE> tag in the default layout (lines 5 though 35) with the one shown below (HW21-AnnouncementsLayoutTableTagExample). Notice the code highlighted in yellow and purple. The yellow highlights show code needed to display the value of a particular column of the list. For example, the tag: will display the value of the Title column. The tag: will display the value of the Body column. You can use this syntax to display the value of any column with a name that doesn’t have any spaces in the name. If you have a column name with spaces (i.e., “Years of Service”), the tag will be: where _x0020_ replaces any spaces. The code highlighted in purple is the CSS class which controls the font, size, color, etc. of the display. See Step 6 below for more information. Finally, notice the width of each column (<TD>) in the ninth and tenth rows is specified as: or The first column is not as wide as the second to show the Announcement Body indented below the Announcement Title. |
|
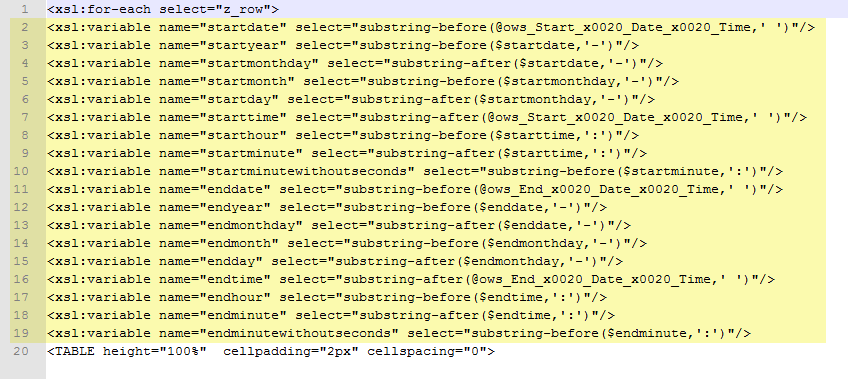
| 4. | In addition to the table layout, the custom layout for the Announcements list also includes a calculated value to show the start and end time of the event like this: 8/30/2013, 14:00 – 15:00. This is calculated at the beginning of the source file using the Start Date Time and End Date Time columns using the code highlighted in yellow below.
Just after the “for-each” line at the top of the layout, but before the first <TABLE> tag, this code (HW21-AnnouncementsLayoutVariablesExample) is added: |
|
| 5. | When your updated layout is complete, paste it back into the List Rotator Text Editor and click Save. | This saves your custom layout and closes the text editor. |
| 6. |
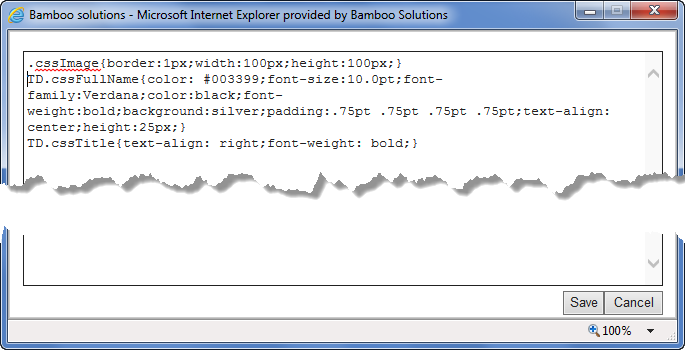
Next, you need to add custom fonts and text color. In our desired layout, the Title value is blue and bold. The class assigned to this in Step 3 above is CSSTitle2. Edit the web part and click the CSS Edit button in the Select Style area of the tool pane. |
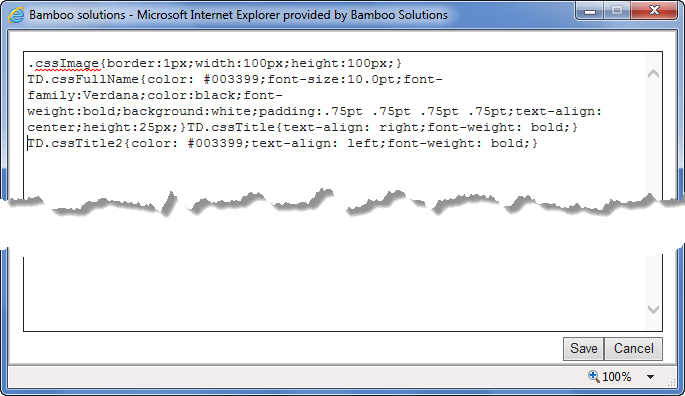
The default CSS appears in a text editor. If desired, copy the text into your editor of choice.The classes defined by default are cssImage, cssFullName, and cssTitle. For the desired layout, copy the text for cssTitle to make cssTitle2. Add the following for bold, blue text: as shown in the screenshot below (HW21-AnnouncementsCSSExample). You may choose a different color, font, etc. as needed. |
| 7. | When your updated CSS is complete, paste it back into the List Rotator Text Editor and click Save. | This saves your custom CSS and closes the text editor. |
| 8. | In the web part tool pane, click Apply and then OK to save the configuration changes you made to the List Rotator. | View the rotated values on the page. |
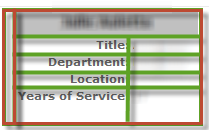 The main area to note is highlighted in yellow above. It includes two nested TABLE tags (table 1 starts on line 5 and the nested table starts on line 14; see the yellow highlight above). These tables look like the diagram shown here. The outside table (table 1, shown with red lines) has one row (<TR>) with two columns (<TD>). The inner table (shown with green lines) is inside the second column of the first table and has several rows with two columns each.
 Most layouts will have at least one table where you will display values from the columns of the list you want to rotate. Sometimes you may want to include column labels, as seen in the default layout above.
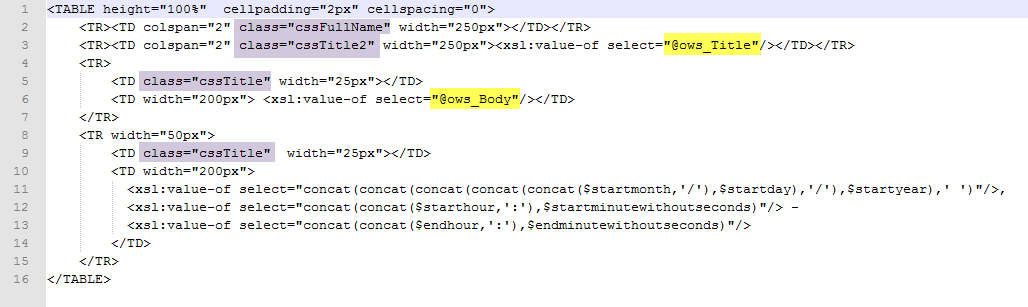
For other examples of custom layouts and CSS, see the following:
- Example Custom Layout for a Picture Library
- If you have a request for an example, please submit a Comment below.