Applies To:
- SharePoint Knowledge Base Solution Accelerator R2.0 or newer
- Workflow Conductor R1.6 or newer
- SharePoint Server and Foundation 2010
- MOSS 2007 and WSS v3.0
IMPORTANT: Set up the following workflow processes during off hours. Publishing the workflow templates requires the application pool to be recycled.
NOTE: To complete task forms and to view the Approve, Reject and Submit buttons, users must be able to:
- Read the workflow item that the workflow is running on and
- Edit items in the Workflow Tasks List that is associated with the workflow.
To create a workflow to approve and publish comments:
- Install and configure SharePoint Knowledge Base Solution Accelerator. See the KBSolution Accelerator for more information.
- Install and configure Workflow Conductor. See Workflow Conductor for more information.
- Configure the approval workflow for publishing comments following the steps below.
| Import and publish the workflow template | ||
| Step | Action | Result |
| 1. |
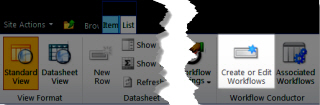
From the KB Admin site, go to Site Actions > View All Site Content > Bamboo KB Articles List.
|
 Workflow Conductor Studio opens. |
| 2. | Click Import from the Workflow Conductor Studio menu. | 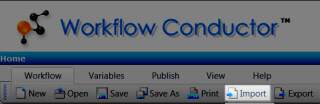 |
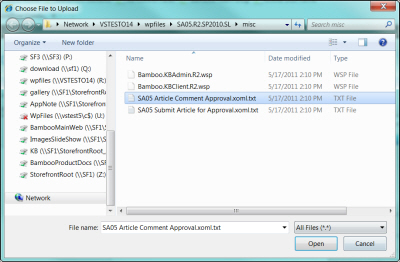
| 3. |
Click Browse and navigate to the SharePoint Knowledge Base Solution Accelerator product extraction folder. Open the misc folder and select SA05 Article Comment Approval.xoml.txt. Click Open, then Import. |
 |
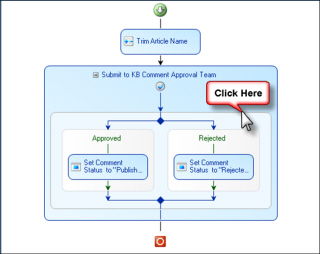
| 4. |
The workflow template is loaded into Workflow Conductor Studio. In the workflow diagram pane, click on Submit to KB Comment Approval Team. |
 |
| 5. | In the Widget Properties tab in the settings pane, enter the account(s) for the user(s) who will approve comments. | 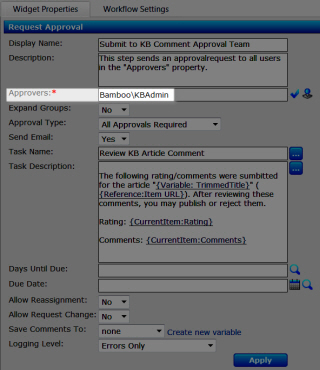 |
| 6. |
If desired, modify the other widget properties:
Workflow Conductor updates the diagram. |
|
| 7. | Select Publish > Deploy from the Workflow Conductor Studio menu. |  |
| 8. | Click Yes to save the workflow as a template. | 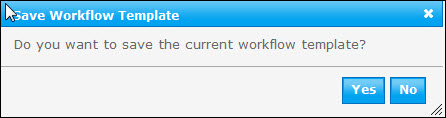 The template is saved to the template gallery, and the application pool is recycled. 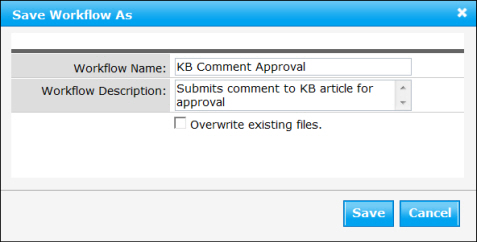 |
| 9. | Configure the Workflow Start Feature. You can start a workflow using the out-of-the-box SharePoint button, located in the ribbon, or you can create your own buttons for the KB workflow approval process (available for SharePoint 2010 only). For SharePoint 2007, start a workflow using the out-of-the-box SharePoint button. 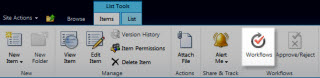 |
|
| 10. | From the KB Admin site, navigate to Site Actions > Site Settings > Site Actions > Manage Site Features and activate the Workflow Start Feature. |  |
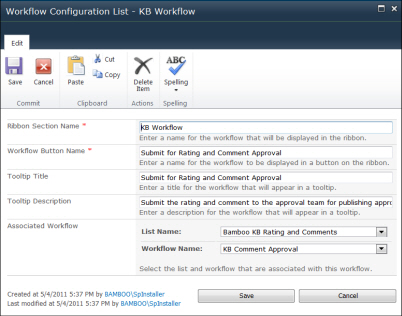
| 11. | Return to the KB Admin site and select the Workflow Configuration List. Complete the following fields. |
|
| 15. |
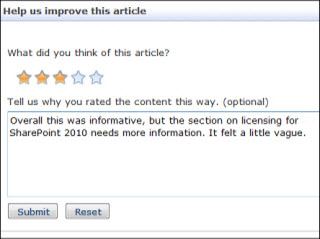
Start a workflow to approve and publish comments: To begin the workflow, an end user or a Knowledge Base Administrator submits a rating or a comment for an article and clicks Submit. |
 |
| 16. | The approver receives an email notification with a link to the comment and a link to the form to Approve or Reject the comment. | 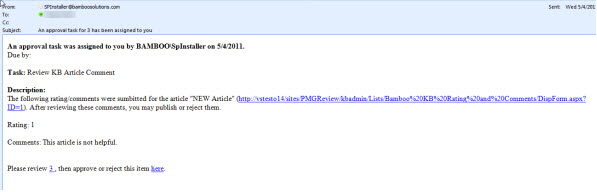 When the approver clicks the link, a form appears for approving or rejecting the comment. 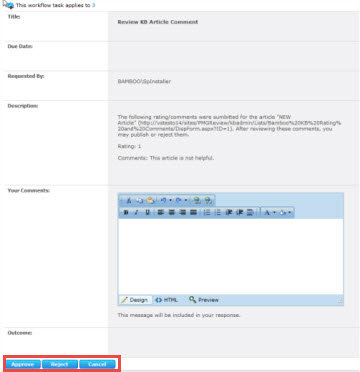 If the approver has already rejected or approved the comment, the only available option is Cancel. |
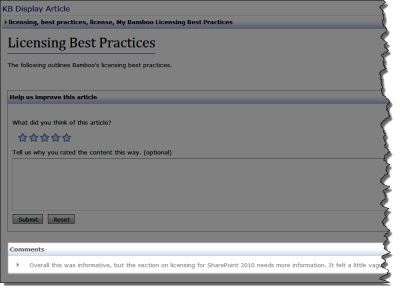
| 17. | Return to the article in the KB Client site. The comment is now published. |
|
| 18. | To close out workflow tasks, navigate to All Site Content > Lists > Workflow Tasks List. | 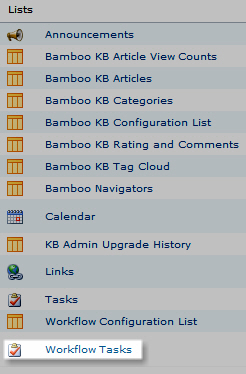 |
| 19. | Approve the desired comments. | 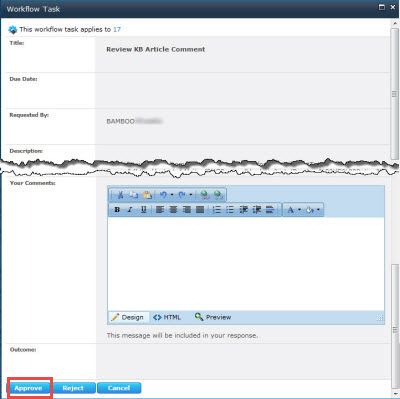 The item’s status will change to Completed.  |

See Also: