Import Data from One SharePoint Environment to Another
To import data from a delimited text file or Excel spreadsheet to a SharePoint list or library, follow these steps:
| Step |
Action |
| 1. |
Connect to the Target Site. See How to Connect to the Target Site for more information. |
| 2. |
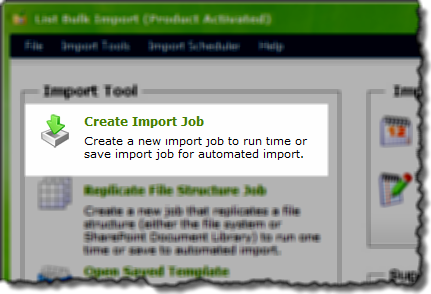 In the Import Tool section of the dashboard, select Create Import Job. In the Import Tool section of the dashboard, select Create Import Job. |
| 3. |
Select Existing SharePoint List. Like you did when specifying your Target SharePoint environment, enter the Source site URL, SharePoint Version, and Login Account.
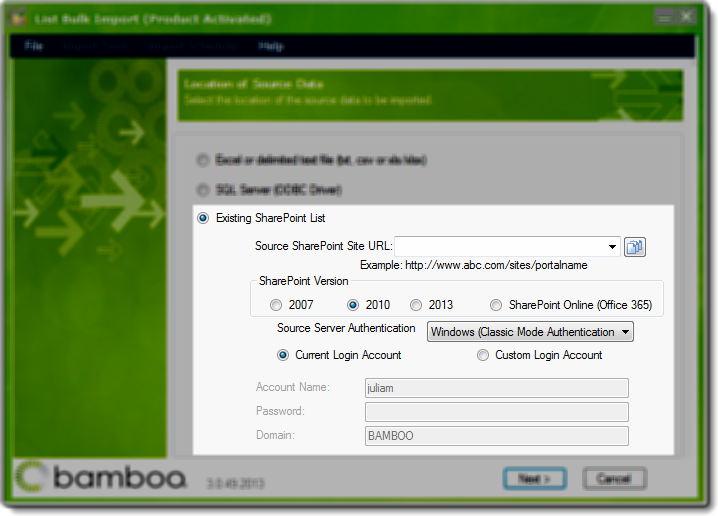
When ready, click Next to continue. |
| 4. |
On the Source Information tab, select the List or Library and View containing the items to be imported.
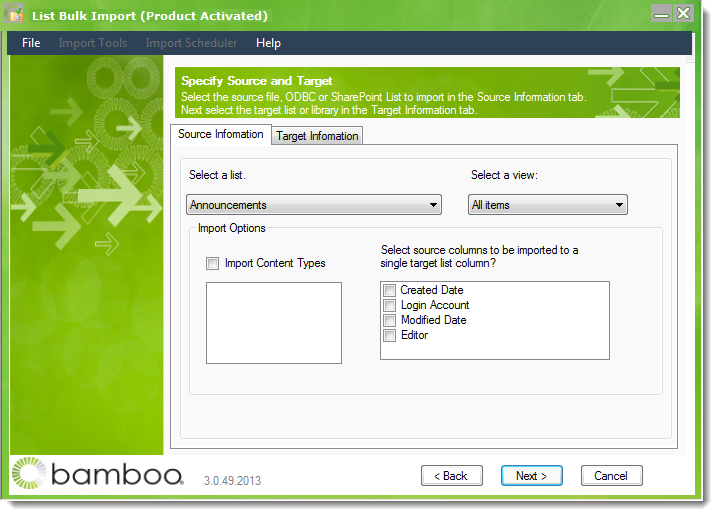
Select the Import Options:
-
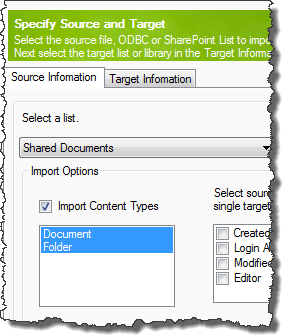
Import Content Types. Check the box to display the available content types from the source list. Then select/highlight the content types that you want to create during the import to your target list.
 IMPORTANT: The List Bulk Import can create content types only if the source and target lists are in the same site collection. IMPORTANT: The List Bulk Import can create content types only if the source and target lists are in the same site collection.
-
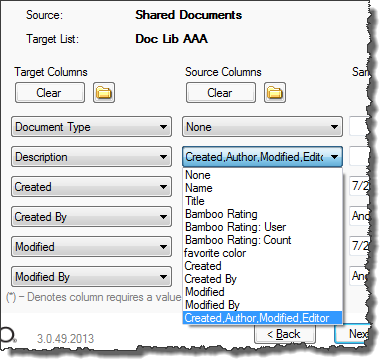
Select source columns to be imported to a single target list column. When importing files to a documentation library or list, the import process creates new items in the target list/library. As such, the SharePoint default columns of Created, Created By, Modified, and Modified by will be based on the date the file is imported and the user who ran the import. If you want to transfer information about when the file was uploaded to the Source list, it cannot be copied to the Created column in the target list. Instead, you can copy that date (and the other available column listed) to another column in the target list/library. The selected source columns will be concatenated and available as a Source Column in the Map the Columns page (Step 6 below). See screen shot at right where all four available source columns were checked.
IMPORTANT: You cannot specify a folder as part of the source or target destination. You can choose the folder to import from or to in the Map the Columns page (see Step 6 below).
|
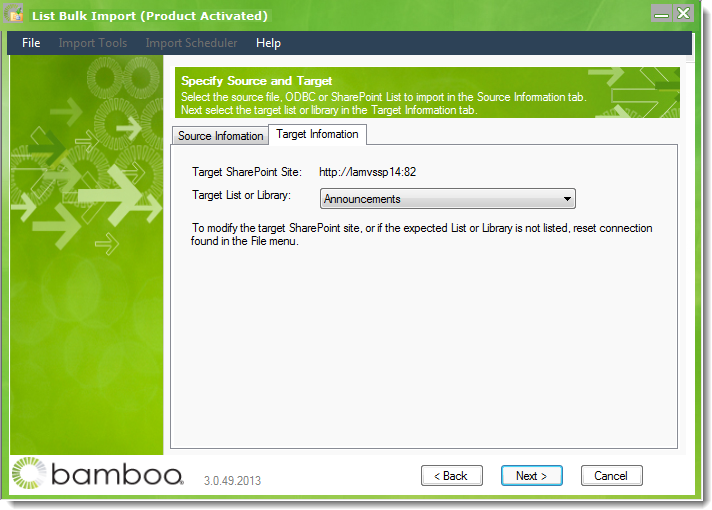
| 5. |
Once the Source Information is specified, click the Target Information tab and select the list or library in the Target Site to import to. All available lists and libraries are shown in the drop-down menu. Once selected, the menu is populated with available lists and libraries found within the specified site.
NOTE: If the list or library is not shown, see Reset the Connection to the Target SharePoint Site to refresh the list.
IMPORTANT: You cannot specify a folder as part of the source or target destination. You can choose the folder to import from or to in the Map the Columns page (see Step 6 below).
|
| 6. |
Map the Source and Target Columns. After selecting the Source Information and Target Information, click Next to begin mapping source columns to the target site.
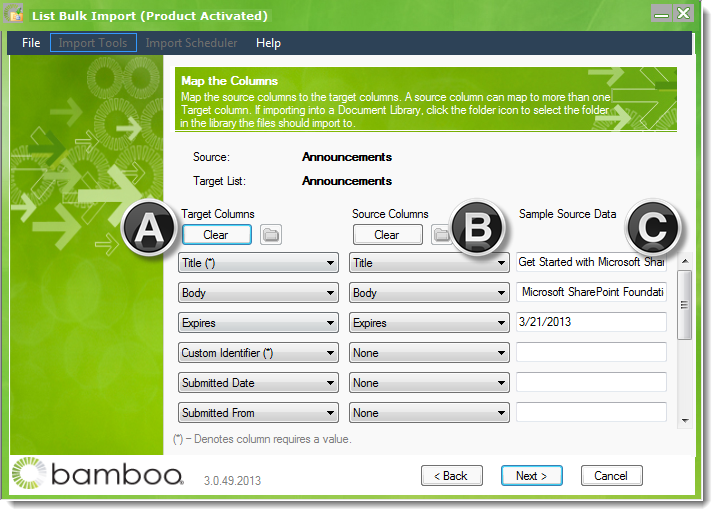
- In the Target Columns column, all the fields from the selected target list are shown. Required columns are marked with an (*). Click Clear to clear all the selections in this column if you prefer to select them individually.
-
The Source Columns column shows the fields from the source data file. If you have noted that the first row contains column headings, you will see the heading name. Otherwise, you will see generic names for the fields. Choose the Source Column from the drop down that you want imported to the corresponding Target Column.
NOTE: If you do not have data for a particular Target Column, leave the selection set to None. List Bulk Import will map fields with the same names automatically (see the Title column in the screen shot above). You can choose to keep these maps or change them.
-
The Sample Source Data will show the Source Column value for the first row to be imported. Use this information to ensure that you chose the correct Source Column.
NOTE: This page usually has a vertical scroll bar to accommodate all the fields.
When finished, click Next.
|
| 7. |
If you are importing any data to a Lookup column, the next page will allow you to map values from your source data to the available choices in your target list. See How to Map Values to Lookup or Choice Columns. |
| 8. |
Check for duplicates. If you have existing information in your target list and are concerned that you may have duplicate information, see How to Check for Duplicate Records. Otherwise, don’t bother checking for duplicates; it slows down the import. |
| 9. |
Review and Import. If you think you may want to run this import again, save your configuration parameters in a template file. See Save the Import Configuration for more information.
Otherwise, click Import to start the import.
|
| 10. |
When the import completes, click View Log to review the import. See How to Review the Log File for more information. |