 The Request Feedback widget assigns one or more users or groups a task to review an item in a list or library. Assigned feedback tasks are completed using a Workflow Conductor task form.
Below, the various sections of the widget properties are separated so that you can quickly jump to the area that is of particular interest to you.
This widget has the following features:
- Individual users, groups, or both can be assigned tasks, either explicitly or using lookups.
- Specify how many reviewers must respond for the task to be complete.
- Reviewers can be notified of their tasks by e-mail.
- Notification e-mails sent by the widget can be fully customized or can use global e-mail templates.
- If you are using SharePoint 2010 and the server has InfoPath Forms Services, feedback tasks automatically use customizable InfoPath forms (Workflow Conductor 2.5 for SharePoint 2010 and higher).
- Assigned feedback tasks are visible in associated Microsoft Office 2007 and 2010 applications*.
- Task Due Dates can be assigned using explicit values or lookups.
- Reviewers can delegate tasks or create new tasks for other users from the task form.
-
Reviewers can enter comments in the task form, which can be saved to a workflow variable for use later in the workflow.
* Workflow task integration with Microsoft Outlook (the “Edit this Task” or “Open this Task” button) is only available in SharePoint Server 2010 or Microsoft Office SharePoint Server 2007. Task integration with Microsoft Office applications does not currently work with InfoPath task forms.
 Widget Limitation: If the Approver property is a lookup to another SharePoint column, the following SharePoint column type and data format limitations apply for the lookup value:
- For Person or Group columns, person or group data can be displayed using any user information field, as long as that field has data. For example: Users displayed as Name, Account, Work e-mail, User name, etc., can all be used as approvers. Multiple entries are supported for Person or Group columns.
- For Single line of text columns, the value must be an account name (DOMAINUsername) or SharePoint group name (e-mail addresses are not supported). Multiple entries are supported for Single line of text columns, separated by semicolons (;).
- Calculated columns are supported with the same format limitations as Single line of text columns.
- A lookup to a Choice column with the option Checkboxes (allow multiple selections) selected will only work if a single entry is checked.
- Lookups to SharePoint Lookup columns are not supported.
General Settings
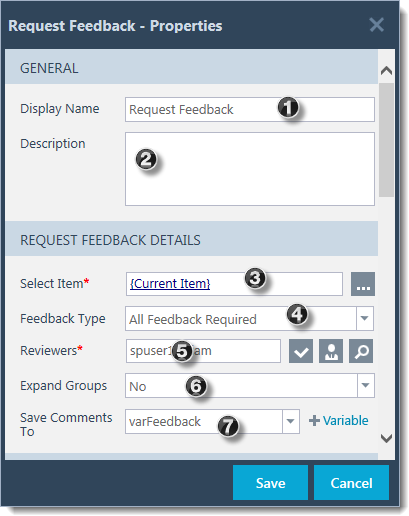
The image at the top of this page contains numeric reference points for the content of the widget properties. Each number is referenced in the table below.
| No. | Column | Description |
| 1. | Display Name | This property will default to the generic widget name, but you can change it to something specific on your workflow to better describe what that widget is configured to do. When you update a widget Display Name property, the widget in the Studio diagram is updated after you click Save. |
| 2. | Description | This is an optional setting that allows you to add a short description for the widget to explain the purpose of it in the workflow. It is only displayed in Conductor Studio, and is not used anywhere in the workflow. |
| 3. | Select Item* This is a required column indicated by the red asterisk. |
Select the item on which you want the reviewers to provide feedback. This can be the item that triggered the workflow (the current item), or it can be an item in another list. The default selection is the Current Item.
|
| 4. | Feedback Type |
Specify the number of reviewers who must respond for the feedback task to be complete.
|
| 5. | Reviewers(Required) |
Enter one or more users or groups who need to review the item. Each reviewer is assigned a task when the widget runs, and all tasks must be completed for the widget to finish. Reviewer names can be entered using any of the following methods:
|
| 6. | Expand Groups |
If a SharePoint group is entered in the Reviewers property, the Expand Groups setting determines whether a single task is assigned to the entire group or if a separate task is assigned to each member of the group.
|
| 7. | Save Comments To | Each reviewer has the opportunity to enter comments when completing a feedback task as shown here. 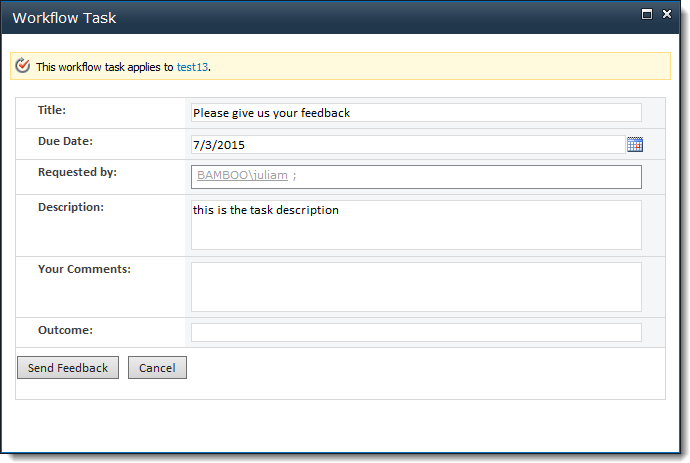 You can view task comments in the completed task. You can view task comments in the completed task. |
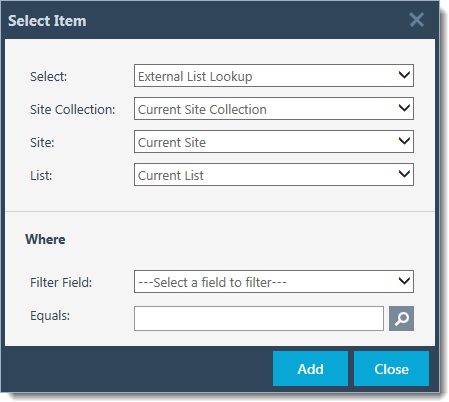 If you need to choose a different item, click the ellipsis icon (
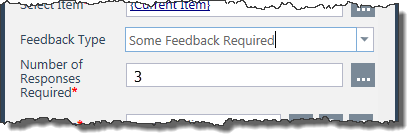
 in the User Lookup form.
Task Details
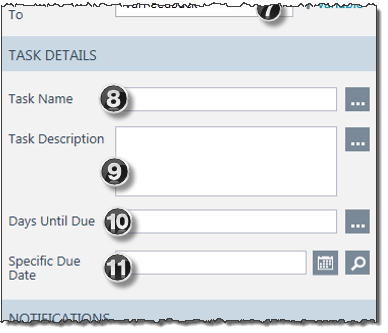 Continuing to look at more of the widget’s properties, the screenshot here shows the Task Details of the widget properties:
| No. | Column | Description |
| 8. | Task Name | Enter a custom task name for the approver task (e.g., “Review Marketing Guidelines”). This task name is how the task is displayed in SharePoint and Microsoft Office Workflow Task forms. If you do not enter a Task Name, a default name of “Some Feedback Required” is assigned when the widget runs. The task name, and other task properties, can be referenced in notification e-mails using the Current Task Easy References. |
| 9. | Task Description | Enter an optional task description for the approver task (e.g., “Please review and approve this expense report.”). This task description is displayed in task forms. To add a hyperlink in the task description that has a display name different from the URL (e.g., Bamboo instead of http://www.bamboosolutions.com, enter the hyperlink in the following format, including the surrounding brackets: [URL(http://url.com) ,_Text(Text to display)] (See Lookups and Variables for more information). The task description, and other task properties, can be referenced in notification e-mails using the Current Task Easy Reference Lookups. |
| 10. | Days Until Due | Enter the number of days until the task is due. You can enter a specific number or use a lookup. The number of days is added to the current date at the time the widget is run to determine the Due Date for each approver task. The calculated task Due Date is included in the task notification e-mail. If you do not enter a Days Until Due value, the Due Date property will be used, if there is one, or the task Due Date will be empty. |
| 11. | Specific Due Date |
Enter a Specific Due Date for the task. You can enter a specific date using the calendar control or use a lookup. Unlike the Days Until Due property, this property sets a specific Due Date for the task. This is useful in situations where a particular deadline must be met. The task Due Date is included in the task notification e-mail. If you do not enter a Due Date, the value in the Days Until Due property will be used, if there is one, or the task Due Date will be empty.
|
Notifications
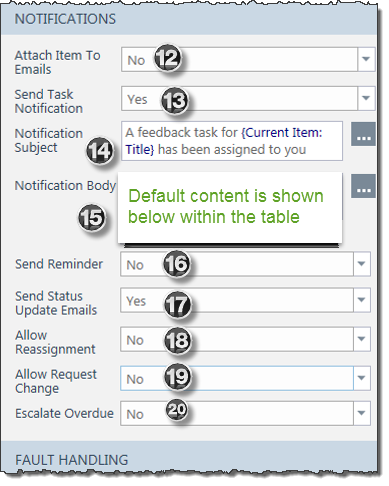 The next section of the widget properties covers the Notifications section:
| No. | Column | Description |
| 12. | Attach Item to Emails | 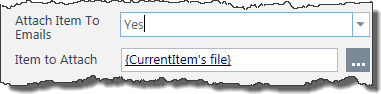 It is possible to attach an electronic file to the email notifications (this option was added in WFC R3.5). When this option is set to Yes, the Item to Attach property appears. It is possible to attach an electronic file to the email notifications (this option was added in WFC R3.5). When this option is set to Yes, the Item to Attach property appears.By default, the file attached/associated with the current item is used. To attach a different file, click to open the Select List dialog to select an item in another list. This is the same dialog used to specify an item to review earlier in the widget configuration. |
| 13. | Send Task Notification |
Select an option, Yes or No, to determine if the widget will send notification e-mails to reviewers when tasks are assigned.
|
| 14. | Notification Subject | Customize the subject and body for the notification e-mail sent for the original Request Feedback task. Default text can be specified in the Request Feedback Task Notification sections of the Workflow Conductor Control Panel E-mail Settings. |
| 15. | Notification Body | 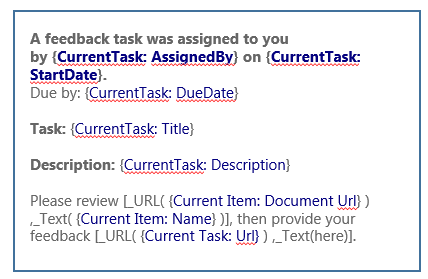 The default notification body contains a few tokens that may be of interest to you. Every item shown in blue is a lookup that looks up the actual data in the list. The default notification body contains a few tokens that may be of interest to you. Every item shown in blue is a lookup that looks up the actual data in the list.Refer to Easy Reference Lookups for more details. |
| 16. | Send Reminder | Select an option, Yes or No, to determine if the widget will send a reminder email to the task assignee some number of days before a task’s due date is reached. The default is No. |
| 17. | Send Status Update Emails | Select an option, Yes or No, to determine if the widget will send status update e-mails to the workflow initiator. The default is Yes. The status update emails CANNOT be specifically configured so no other parameters appear when set to Yes. |
| 18. | Allow Reassignment | Select an option, Yes or No, to allow assigned users to delegate their task to another user. If reassignment is allowed, a Reassign Task button is displayed at the bottom of the task form next to Save and Cancel. The default is No.
|
| 19. | Allow Request Change |
The user must then assign the new task to someone, specify a due date, and add a specific description which will overwrite the description from the original task. |
| 20. | Escalate Overdue | Select an option, Yes or No, to determine if the widget will automatically reassign a task to a specified person if the Due Date for a task passes without the task being completed. The default is No. |
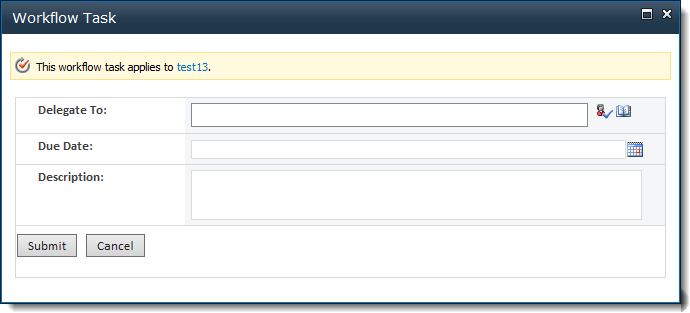 When a task assignee clicks Reassign Task, a new task form appears (See below). The original task assignee enters a person to delegate the task to (Delegate To), a Due Date for the delegated task, a Description, and then clicks Submit. Another task is created for the workflow instance and the status of the original task is set to Completed.
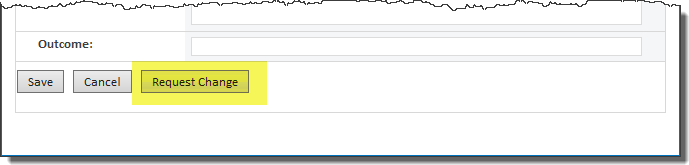 When a task assignee clicks the Request Change button on the task form, a form for a new task appears.
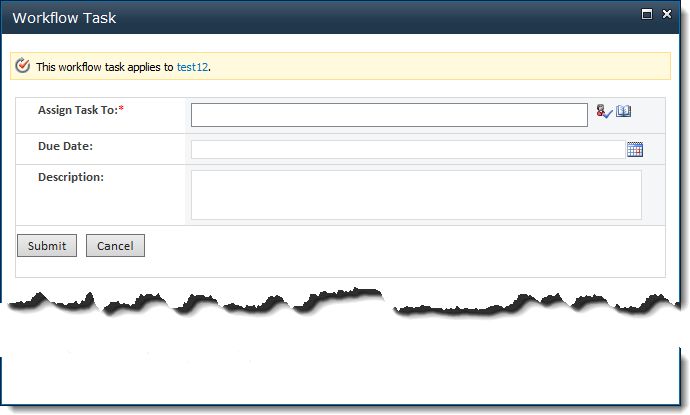
Fault Handling
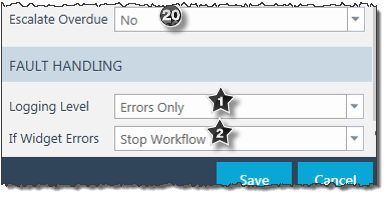 Workflow designers have the option to override the logging level configured for widgets and specify a new logging level for all widgets for that workflow instance as described below:
| No. | Column | Description |
| Star 1. | Logging Level | The level of detail for workflow run-time logs is based on the Logging Level selected for each widget in the workflow. |
| Star 2. | If Widget Errors |
By default, a workflow will stop if any errors are encountered. You can customize this behavior for each widget by selecting one of the following options:
|
Sample Request Feedback Workflow and Tasks
Return to User Interaction Widgets List
See Also: