| Return to Configuration Overview |
|---|
Select the File Share Library option to store media files in a Bamboo File Share Library (sold separately). By connecting Video Library to an existing File Share Library, your media files are stored on the network file share configured in the File Share Library settings. Links to those files are created in Video Library, and thumbnails images and media file metadata are stored with the links. You can access and manage your media directly in Video Library, but files are stored in an external file system instead of the SharePoint content database.
Use this option when your Video Library will contain a lot of content or when it needs to support large files.
For important details about configuring the File Share Library storage option, including more information about configuring required settings and instructions to enable large file support, see Storing Media in a Bamboo File Share Library. This page also discusses how File Share Library and Video Library work together, best practices for using this storage option, and limitations you need to be aware of.
Read Storing Media in a Bamboo File Share Library before configuring a connection to a File Share Library.
NOTE: You must have Video Library R2.0 or higher and File Share Library R2.0 or higher to connect Video Library to a File Share Library.
When you select the File Share Library option, you also need to configure the following settings:
| Step | Action | Result |
| 1. |
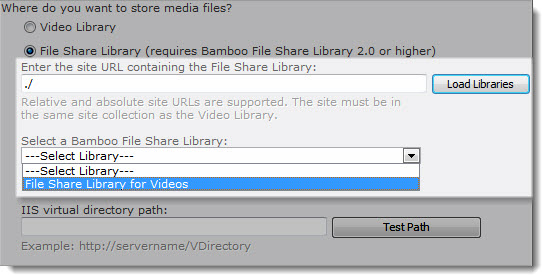
Select a Bamboo File Share Library:
|
 When you click the Load Libraries button, available File Share Libraries in that site are populated in the Select a Bamboo File Share Library drop-down list. Select the library you want to connect to. |
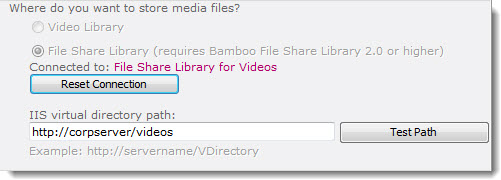
| 2. | Enter an IIS virtual directory path that serves content from the network file share configured in File Share Library. |  To view content from a File Share Library in Video Library, you must enter an IIS virtual directory path. This path serves content from the network file share configured in File Share Library. Configure the virtual directory in IIS, and then enter it in the IIS virtual directory path box. To view content from a File Share Library in Video Library, you must enter an IIS virtual directory path. This path serves content from the network file share configured in File Share Library. Configure the virtual directory in IIS, and then enter it in the IIS virtual directory path box. |
| 3. |
Click the Test Path button to test the IIS virtual directory path you configured. Enter the path to a video file in the IIS virtual directory (the file must already exist), and click Play. If the video plays, your IIS virtual directory is configured properly. Click OK to return to the Video Library Settings page. |
|
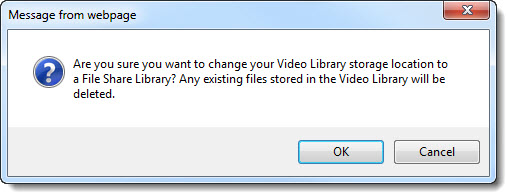
| 4. | Review the rest of your Video Library settings, and then click OK. You will be warned that any existing files in your Video Library will be deleted. Click OK to confirm. |  The contents of the File Share Library will be synchronized to the Video Library. This process may take a few minutes to complete. While it is running, the Video Library page will display an informational message. When the process is complete, you can start using Video Library to play and manage media files. |
