| TTM Configuration Overview | Time Tracking Checklist |
|---|
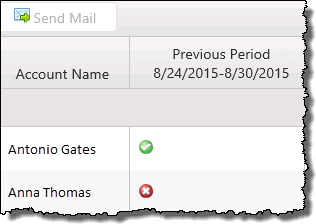
The TTM Send Message Web Part on the Status and Notifications page lets Timesheet Managers see their resources’ timesheet submission status for the previous and current time periods.
 When configuring the TTM Send Message Web Part keep in mind:
-
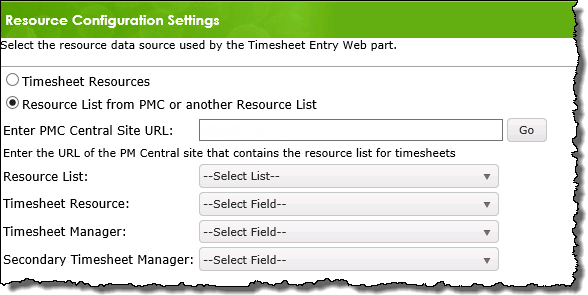
Configuration of the web part is a recommended step in the Time Tracking configuration checklist however, if TTM is not configured to use the Timesheet Resources list, you will need to change Web Part’s default resource configuration
-
For information on using the Web Part, click here
- The Status and Notifications page was added in TTM 2.5
To configure the TTM Send Message Web Part:
| Step | Action | ||||||||||
|---|---|---|---|---|---|---|---|---|---|---|---|
| 1. | 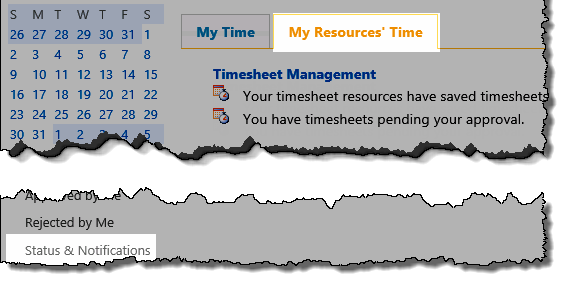 From the TTM site, click the Status Timesheet Entry link in the My Resources’ Time quick launch OR Use the link in the Time Tracking configuration checklist. |
||||||||||
| 2. |
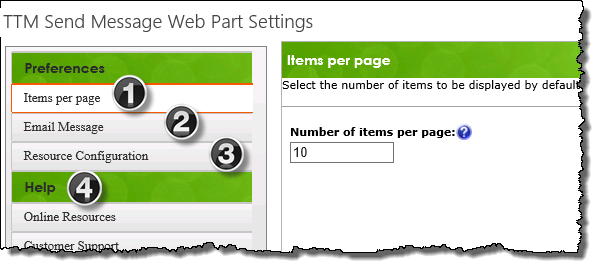
Edit the Web Part on page and click the Send Message Web Part Settings button to access the pop-up configuration window
|
||||||||||
| 3. |
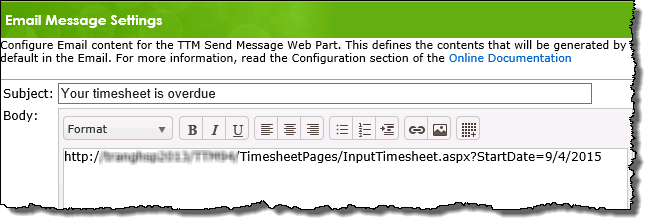
Use the left hand navigation to access the appropriate configuration screens:
|
||||||||||
| 4. | Click Save & Close to commit the changes and exit pop-up configuration screen.
To return to the Time Tracking configuration checklist, use the Time Tracking link in the TTM quick launch menu
|
 button for the item.
| TTM Configuration Overview | Time Tracking Checklist |
|---|