Viewing Team Calendar Event Information

Viewing Team Calendar Event Information

Calendar event labels and tooltips display the information from selected columns of the connected data source.
HW34_CalendarFinal.jpg

  • Event Label: The event label displays information from one column (usually a title column) and provides a quick summary about a calendar event.
  • Event Tooltip: The event tooltip displays more information about a calendar event when you mouse-over the event label. The tooltip contents are obtained from columns in the Exchange calendar or SharePoint list.
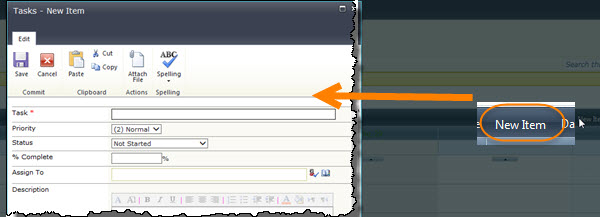
  • Event Details: If you are using a SharePoint list as your data source, you can click on an event to display the full list item details in a pop-up window. If you have the appropriate permissions, you can edit the event by clicking the Edit Item button in the pop-up window.

The event label can be customized to help you recognize the status, creator, or type of calendar event.

  • Show color legend: You can choose to display a color legend to explain your color-coding options. See Configuring Team Calendar for more details.
  • Allow text wrap: Normally, calendar event labels display one line of descriptive text. If the information displayed in the event label does not fit on one line, the text is cut off. You can choose to allow calendar event label text to wrap to a second line if you want to display more information about events. See Configuring Team Calendar for more details.

Compare Calendar Views

Compare Calendar Views

Even if your administrator has configured your Team Calendar for a particular view as the default, you have a toolbar you can click to change the view you want to display. Although the view will return to the configured default view when you leave the page, it is helpful when working within a calendar to switch views in order see more data or less.

At the top right of Team Calendar you will see the Toolbar with several clickable options. Toolbar.jpg

Option Action Result
Go to Date Click this button and a small dialog box opens where you can enter a particular date; after you . ViewGoToDate.jpg
New Item Included in the toolbar is a “New Item” feature so you can create a new event without leaving the web part. ViewNew.jpg
Day To zero in on just a day’s worth of data, you can click the Day button. ViewDay.jpg
Week To see a week’s worth of data, click this option. ViewWeek.jpg
Month This view shows a full month of calendar data. ViewMonth.jpg
Year When you click this option, the annual view of your Team Calendar appears. ViewYear.jpg
At the bottom left of Team Calendar, there is a toggle to switch between business hours and a 24-hour format. Biz.jpg
Normal business hours are defined as 8AM to 5PM.
BixHr.jpg
24.jpg
Selecting the 24-hour format will increase the amount of scrolling you will have to do, but is helpful if you have events that happen outside normal business hours. You will also notice that when you select an event within the calendar, the 24-hour format will automatically open to display all events within that day.
24Hr.jpg