How to Work With the User Account Setup Web Part
User Account Setup is typically added to a blank Web Part page. When a user who is a Site Collection Administrator visits the page, s/he is presented with an interface to which new users can be added to both SharePoint and Active Directory or local NT, depending on how User Account Setup was configured.
| Step |
Action |
Result |
| 1. |
The Site Collection Administrator can click the Clear button to clear text in all the fields on the Web Part and enter the contents into each column. |

Columns marked with a red asterisk are required fields meaning they require content in them. |
|
See Configuration topics for further details.
Selecting Account Options
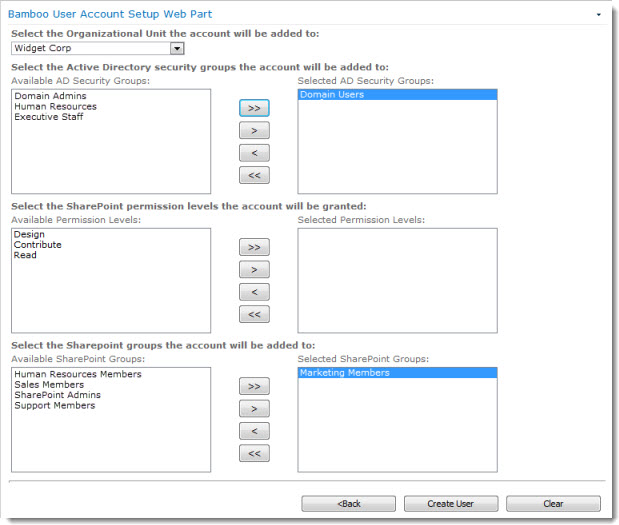
 Your administrator can configure options that allow you to add new accounts to security groups and grant SharePoint permissions at the same time the account is created. These settings can be predefined, or a list of options can be provided in the User Account Setup form.
The options you see in the new account form will vary depending on how the administrator configured the Web Part.
In the example here, the web part is configured to provide a list of options for Active Directory group membership, SharePoint group membership, and SharePoint site permission levels. The requestor can define which group memberships and site permissions to grant.
About the Account Approval Process
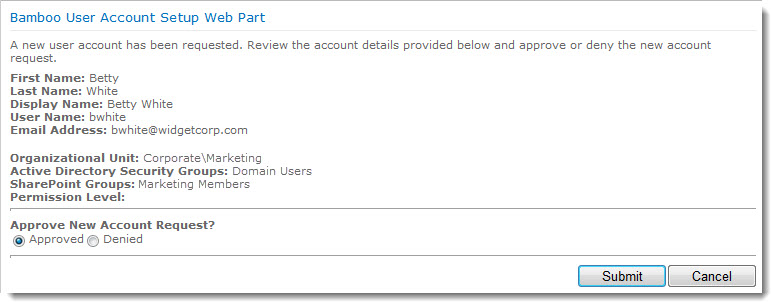
If an approval process is configured for new accounts, requests are forwarded to one or more approvers for review. If the reviewer approves the request, the account is created.
A step-by-step example of the approval process is provided below.
| Step |
Action |
Result |
| 1. |
After the account request is submitted, all approvers configured in the Account Approval settings receive an email with a link to approve the request. |

NOTE: This email template can be customized in the web part settings.
If you are an approver, click on the link provided in the email to review the request.
|
| 2. |
Make a selection to approve or deny the new account. |
 |
| 3. |
Click the Submit button. |

NOTE: If multiple approvers click on the request, only the first response is accepted.
|
| 4. |
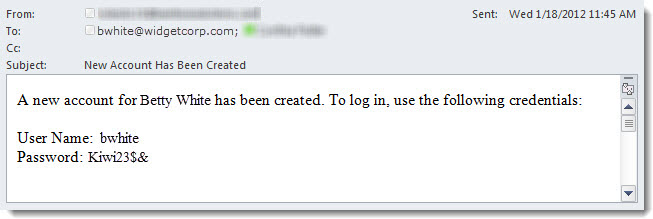
If a request is approved, the account is created. A verification email is sent to the new account. |

NOTE: The verification email template can be customized.
An email can also be sent to the original requestor, if that option is selected in the web part settings.
|
|

 Your administrator can configure options that allow you to add new accounts to security groups and grant SharePoint permissions at the same time the account is created. These settings can be predefined, or a list of options can be provided in the User Account Setup form.


