You can also access the Create a user feature from the New button on the tool bar depending on what node you have selected in the Sites view pane. Depending on how you have configured the Web Part, you may see up to 5 different screens that cover the following information:
| Step | Action | Result |
| 1. | Entering Active Directory user property information. |  Fill in the required columns denoted with a red asterisk {*) beside the field and click Next. |
| 2. | Assigning organizational units and security groups. |  Pull down the drop-down arrow to select the organizational unit and click on a security group. Then click Next. |
| 3. | Assigning the user to one or more SharePoint groups. (This is an optional step that is configured in the tool pane.) |  In this step, select the group to which this user will belong and click Next. |
| 4. | Assigning SharePoint permission levels to the user. (This is an optional step that is configured in the tool pane.) |  In this step you choose the permission level for the user by clicking on a check box or boxes and then click Next. |
| 5. | Review the user information you have entered before clicking the Create button and creating the account. | 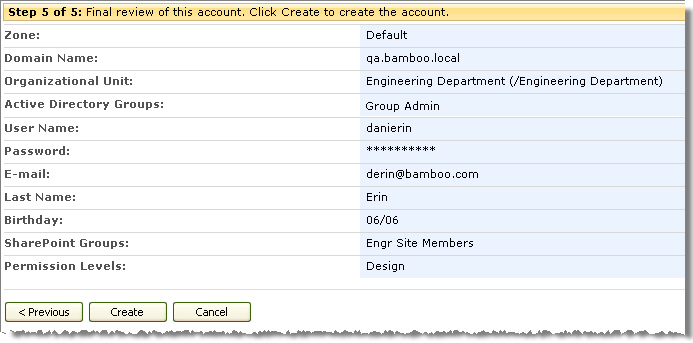 In this last step take a look at your choices and decide if they are what you meant to pick. If not, click the < Previous button to go back to the screen you need to change. When you are satisfied with your selections, click the Create button to create a user. |
See also: