How to Manage Poll Answers
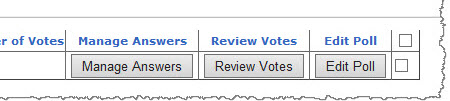 To create, edit, delete, or export possible answers for a poll, click the Manage Answers button of the poll you want to manage.
Add Poll Answer
| Step |
Action |
Result |
| 1. |
Click the Add Answer button, and follow these steps: |
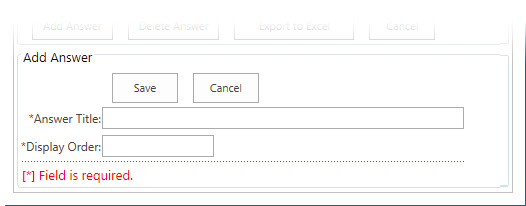
Note: The Add Answer box displays at the bottom of the Web Part.
|
| 2. |
Answer Title: |
Enter the title of one of the possible answers for the poll question. For example, a possible answer for the poll question “Why do you use SharePoint?” can be “Document Management”. |
| 3. |
Display Order: |
Enter the order number in which you want to display the possible answer when the poll question is presented to the voter. |
| 4. |
Click Save. |
|
Edit a Poll Answer
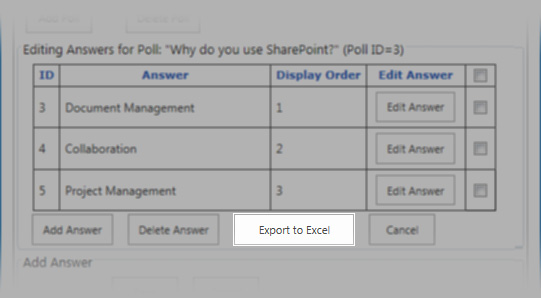
To edit the answer properties, click the Edit Answer button for the answer you want to edit.
Delete a Poll Answer
| Step |
Action |
Result |
| 1. |
Select the check box at the far right of the answer you want to delete, then click the Delete Answer button. |
 |
|
Export Poll Answers to Microsoft Excel
| Step |
Action |
Result |
| 1. |
Click the Export to Excel button when managing answers. |
 |
|
How to Vote with Poll Web Part
 You can place multiple Poll voting web parts on a page to display a series of results from separate polls in one place. Just create a Web Part page that has multiple zones and add one or more Poll web parts to the page in different zones.
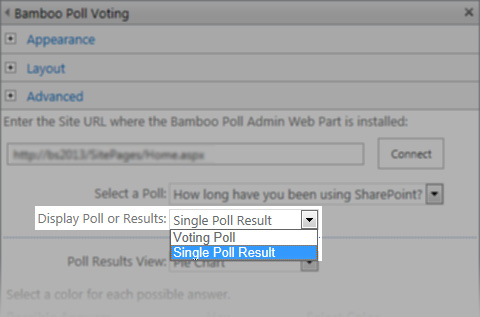
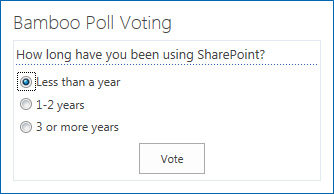
To allow users to vote, set each Poll voting web part to display the Voting Poll under Display Poll or Results in the tool pane. To display a bar or pie chart of the voting results, choose Single Poll Result in the tool pane.
| Step |
Action |
Result |
| 1. |
Enter the Site URL to navigate to the page where the Poll has been added. |
 |
| 2. |
Make sure that the Web Part tool pane setting for Display Poll or Results is Voting Poll, and click Apply. |
| 3. |
The voting poll is displayed on the page. |
| 4. |
Make your selection and click Vote. |
Note: If the page is configured for anonymous access and you have chosen to allow anonymous voting, then the page will display the voting poll again. If you did not select anonymous voting, Poll displays the results with the total number of votes submitted.
|
|
How to View Poll Results
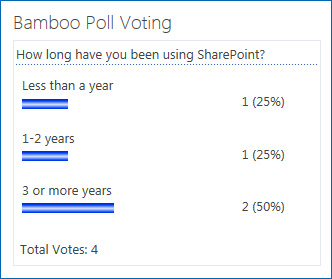
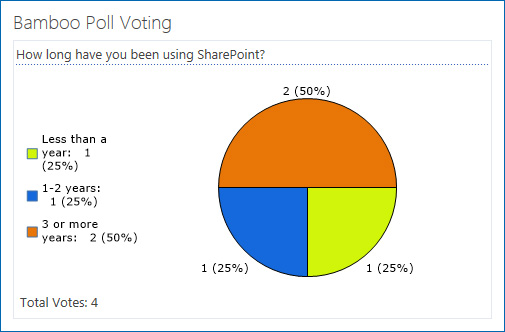
Poll results can be displayed on a bar graph or pie chart. To choose how the results will be displayed, follow these steps:
| Step |
Action |
Result |
| 1. |
Edit Poll as described in the Configuring section. |
| 2. |
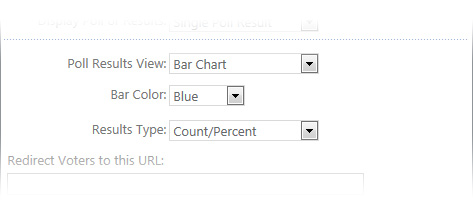
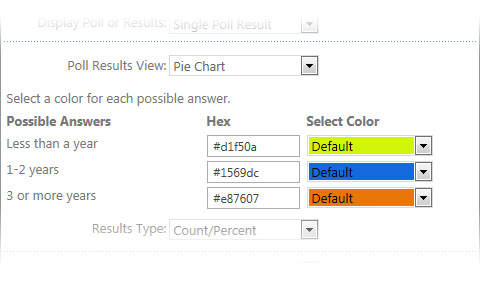
The Bamboo Poll Voting tool pane is displayed on the right side of the screen. In the tool pane under Poll Results View, choose Bar Chart or Pie Chart for the type of chart. |
| 3. |
Depending on the selected type of chart, follow these steps: |
If you selected Bar Chart:
|
| 4. |
Click Apply and OK to save your changes. |
|
How to Create Poll Questions for Voters
Poll consist of two Web Parts:
- Poll Admin Web Part: allows you to create, edit and delete poll questions, review poll responses and export poll responses to Microsoft Excel. Poll questions can be configured to allow anonymous users to vote, to set expiration dates for poll questions, and to allow users to select more than one answer (check boxes) vs. only one answer (radio buttons) to a poll question. You can also set the order in which the possible answers to a poll question are displayed.
- Poll Voting Web Part: this is where end users vote on the poll questions you enter in the Poll Admin web part.
Add the Poll Admin web part to a page.
Create a poll
| Step |
Action |
Result |
| 1. |
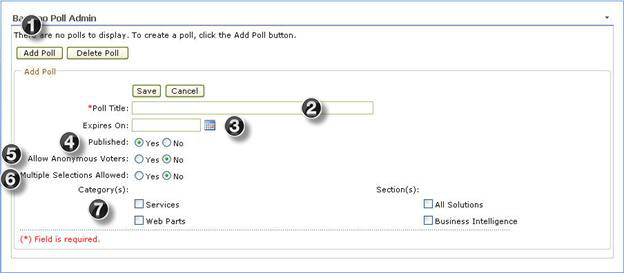
Click the button Add Poll. |
The Add Poll section opens. |
| 2. |
Enter data in the Poll Title (this is your poll question). This is the only column on the web part required to have data in it. |
The question is saved into the poll admin web part. |
| 3. |
Select an expires date from the date picker or simply type the date into the text box in MM/DD/YYYY format. |
The Expires On date is saved into the poll admin web part. |
| 4. |
Click the Yes or No radio button to set the poll as either published or not; setting it to No allows you to work on the poll until you are satisfied it is ready to be published. |
The radio button next to your selection has a dot in the center. |
|
| 5. |
Click the Yes or No radio button to choose whether to allow anonymous voters or not. |
The radio button next to your selection has a dot in the center.
If you selected ‘Yes’, anonymous users can vote on the poll.
If you selected ‘No’, then
only authenticated SharePoint users can vote. |
| 6. |
Click the Yes or No radio button to choose whether to allow multiple selections or not. Multiple selections means voters may vote more than once. |
The radio button next to your selection has a dot in the center. |
| 7. |
You can ignore the Category(s) and the Section(s) options as these are reserved for future functionality. |
Nothing at all happens even if you click any of the boxes. |
|
You can add more poll questions by following steps 1-7 for each question.
Things to consider:
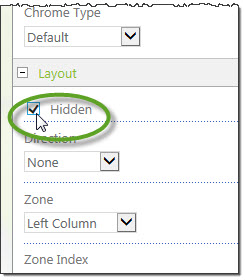
You might want to hide your Poll Admin web part from your voters to eliminate confusion.
You can use the Hide option within the web part tool pane
Or you may choose to add this web part to a page or even a different site that your voters won’t see it. If you decide to do this, you will reference the other site’s URL within the Poll Voting web part to make the connection to the poll questions.