How to Use Grants Management Project Site
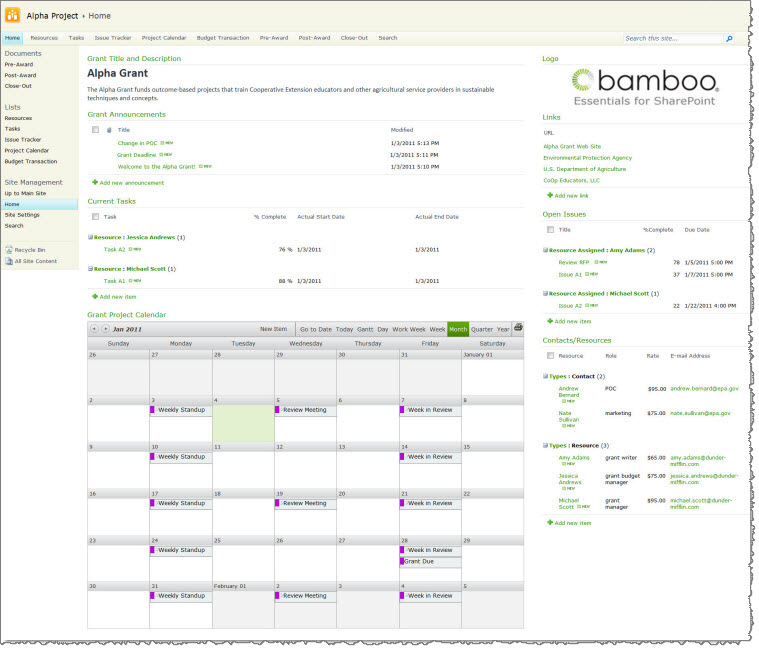 Grants Management
project sites allow you to manage and monitor all of the information related to your grant. Each grant project site is a subsite of the master site.
You can do the following in the grant project site:
- Create new resources, tasks and issues. Manage and track existing resources, tasks and issues.
- View grant-related documents
- View grant-related events via the calendar
- View announcements.
- And more
Create a Grants Management Project Site
| Step |
Action |
Result |
| 1. |
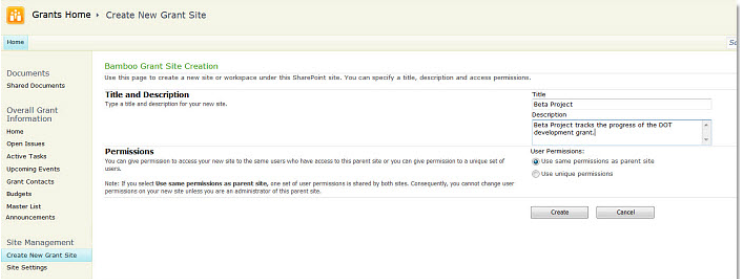
From the Quick Launch under Site Management, click Create New Grant Site. |
 |
| 2. |
Enter a Title and an optional Description for the grant project site. Choose your permissions. |
| 3. |
Click Create. Wait while the project site is created. |
Now that your Grants Management Project Site has been created, you can add new items to any of the lists that come with the application. See how to work with the Grants Management Project site content items below:
Create a New Grants Management Master Site
The master site serves as the landing page where users can view all grant information in one location. You only need to create one master site. The master site allows you to do the following:
- Upload documents
- View overall grant information
- Create new grant project sites
- View upcoming events
- Track grant budgets
- View open issues
- And more
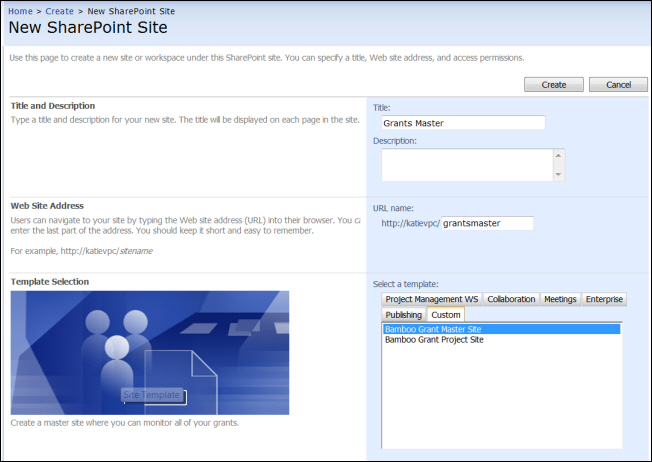
To create the master site:
| Step |
Description |
| 1. |
Navigate to the top site in the site collection where you want to create the master site. Select Site Actions > New Site. |
| 2. |
Give the site a Title. The title is the overall name of the collection of grants you’ll be tracking within this master site. |
| 3. |
You can input a description, but that is optional. |
| 4. |
Provide a URL name for your site. We recommend you keep the name short and do not use spaces in the name.
Click Create and wait for the site to be created. |
| 5. |
From the Custom tab, select the Bamboo Grant Master Site template. |
| 6. |
Choose the permissions for this site and how you want navigation to be handled. |
| 7. |
Click OK and wait for the site creation to complete. |
How to Use the Grants Management Budget Transaction List
To add a new item to the Budget Transaction List:
| Step |
Action |
Result |
| 1. |
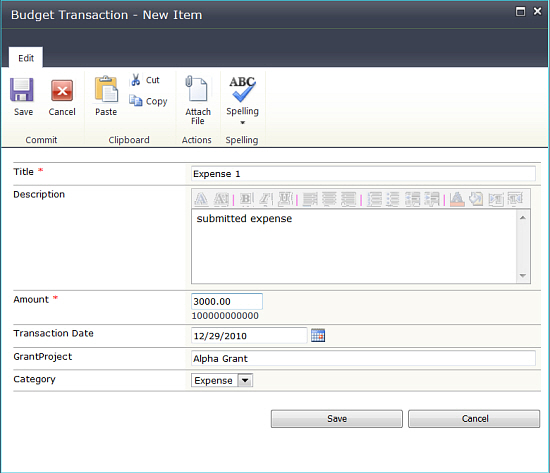
Click Budget Transaction List from the Quick Launch. |
 |
| 2. |
Click Add new item. |
| 3. |
Enter a Title, an optional Description, the amount, the transaction date, the name of the grant project, and the category (Payment or Expense). |
| 4. |
Click Save. |
|
Grants Management Project Calendar
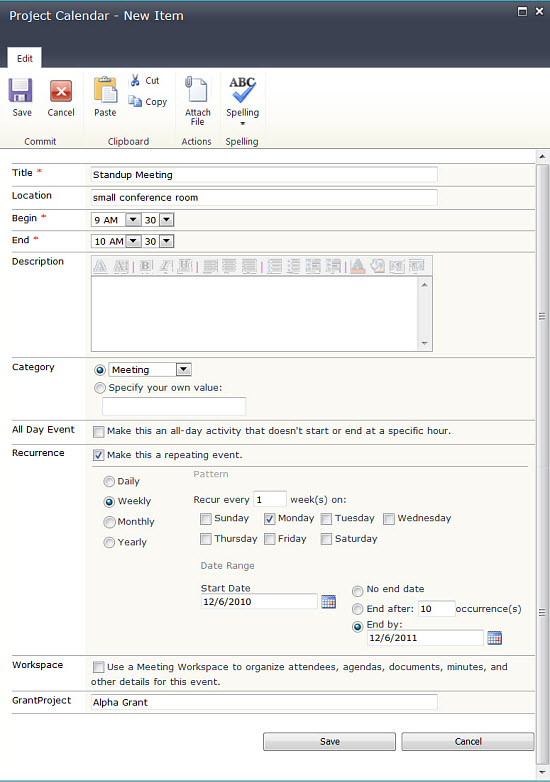
The Upcoming Events page under Overall Grant Information rolls up data from the Project Calendar Lists from each grant project site. This provides you with great flexibility to manage events and milestones relating to each grant in its Project site, yet also see a comprehensive roll-up of all grant project information at the Master site level.
To add a new item to the Project Calendar List:
| Step |
Action |
Result |
| 1. |
Click Project Calendar List from the Quick Launch menu. |
 |
| 2. |
Click Add new event. |
| 3. |
Enter in the information for the event. |
| 4. |
Click Save. |
|
How to Use the Grants Management Project Contacts List
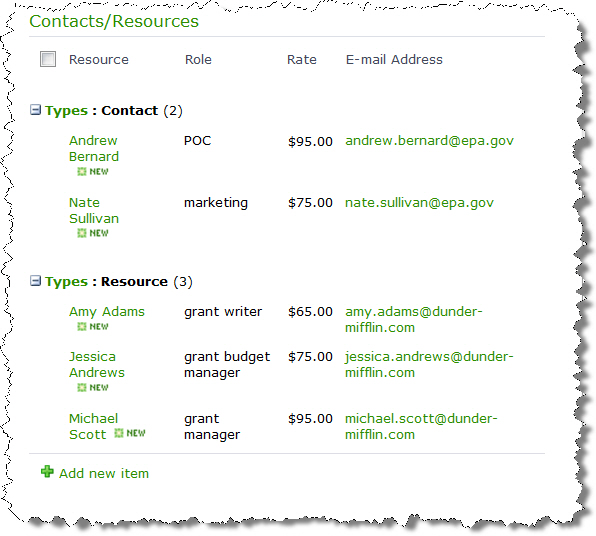
Add resources who work on your grant, or add contacts who are important to your grant’s life cycle. Use the following as a guide to determine who is a contact vs. who is a resource within Grants Management.
- Resources: People in your organization who work on the grant. Resources are assigned to tasks.
- Contacts: People in other organizations (i.e., grantor organization, sub-grantees) who are involved with the grant. Contacts are not assigned to tasks and therefore do not need access to the Grants Management portal.
| Step |
Action |
Result |
| 1. |
Click Add new item. |
| 2. |
Fill out the contact’s information. At a minimum, enter in the following information:
- Resource
- Role
- E-mail Address
- Phone Number
- Title
- Rate
- Start and End Dates
- Types
- Grant Project
|
 |
| 3. |
Click Save. |
|
How to Use the Grants Management Project Document Library
Use the Documents link in the Quick Launch to upload and edit documents that are related to your grant, such as Requests for Proposals (RFPs), grant progress reports, financial reports and more. Your project site comes with three libraries ready for you to use. To upload a document, click the desired library from the Quick Launch:
- Pre-Award
- Post-Award
- Close-Out
| Step |
Action |
Result |
| 1. |
Click Add document. |
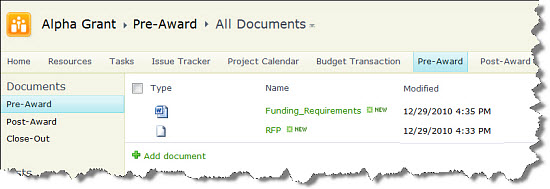
NOTE: This example is using the pre-built “Pre-Award” document library.
|
| 2. |
Select the desired file(s) from your hard drive or network location. |
| 3. |
Click OK. |
|
How to Use the Grants Management Project Issue Tracker List
The Open Issues page under Overall Grant Information in the Master site rolls up data from the Issue Tracker Lists from each grant Project site. This list is where you create and view open issues related to a grant.
| Step |
Action |
| 1. |
Click Add new item. |
| 2. |
Enter the information for the issue. At a minimum, enter the following information:
- Title
- Assigned To
- Issue Status
- Priority
- Related Issues
- Due Date
- Status
- Types
- Date Reported
- Date Assigned
- Area
- % Complete
- Resolution Date
- Resource Assigned
|
| 3. |
Click Save. |
|
Issues are displayed according to whom they are assigned.
How to Use the Grants Management Project Site Management
 Use Site Management within Grants Management to navigate to the master site (Main Site), return to the project site home page, access the Site Settings page, or search within the project site’s Lists.
Grants Management Project Tasks List
Create new task items related to your grant directly from the grant project site home.
Tasks are displayed according to whom they are assigned.
| Step |
Action |
Result |
| 1. |
Click Add new item. |
| 2. |
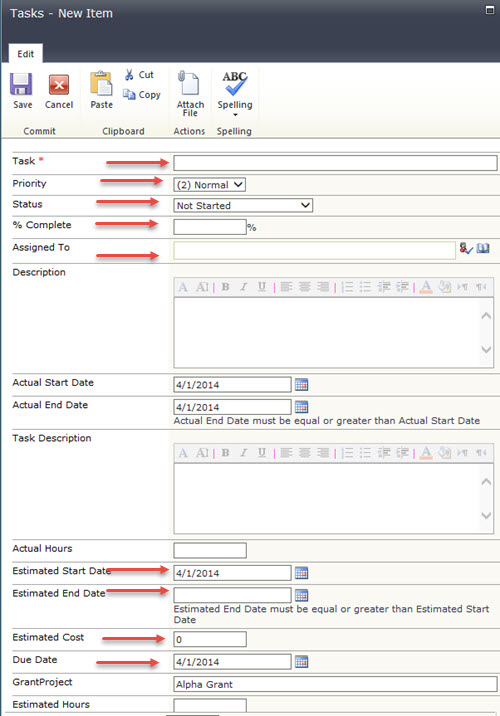
Enter in the task information. |
At a minimum, enter information for the following fields:
- Task
- Priority
- Status
- % Complete
- Assigned To
- Estimated Start and End Dates
- Estimated Cost
- Due Date
- Predecessors
- Successor Tasks
- Predecessor Tasks
- Resource

|
| 3. |
Click Save. |
|
How to Use the Grants Management Announcements List
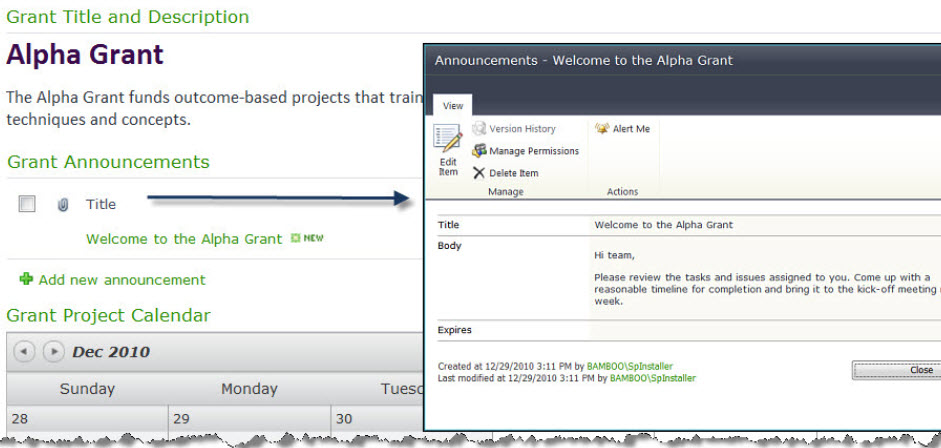
Within the Grants project site, Bamboo uses the List Rotator web part to display announcements related to the development and progress of your grant. See configure the List Rotator web part to understand how to configure this web part on your project site.
Adding a new announcement is conducted in the same manner as you would add announcements in a normal SharePoint site.
| Step |
Action |
Result |
| 1. |
Click Add new announcement to create a new announcement |
 |
| 2. |
Enter the announcement information in the Body column and an expiration date if needed. |
| 3. |
Click Save. |
|
 Grants Management


 Use Site Management within Grants Management to navigate to the master site (Main Site), return to the project site home page, access the Site Settings page, or search within the project site’s Lists.

