Using the Auto Approved Timesheet group in TTM
Users who are added to the Auto Approved Timesheets group bypass the manual timesheet approval process and have their timesheets automatically approved on submission.
When using the Auto Approved option, keep in mind:
- A Primary Timesheet Manager will still need to be identified for each user
- Timesheet Managers cannot modify an approved timesheet
- You can configure working hour validation to require a minimum number of hours to be entered into timesheets.
- The Auto Approved Users group is automatically created with the TTM site
Using the Auto Approved Timesheet group:
| Add Users to the Auto Approved Timesheets group |
| 1. |
Click the link in the Time Tracking configuration checklist,
OR
Navigate to SharePoint’s Site Permissions page
NOTE: Accessing Site Permissions requires you to have Full Control permission the TTM site.
|
| 2. |
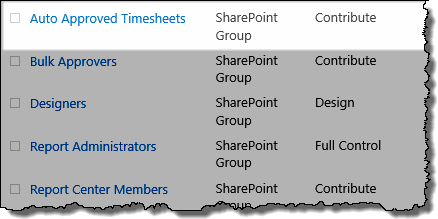 Add the appropriate users to the Auto Approved Timesheets group Add the appropriate users to the Auto Approved Timesheets group
NOTES:
1.The Auto Approved Timesheets group was added in TTM 2.0
2.This group has contribute permissions on the site by default
|
| What happens when users in this group submit a timesheet? |
| 1. |
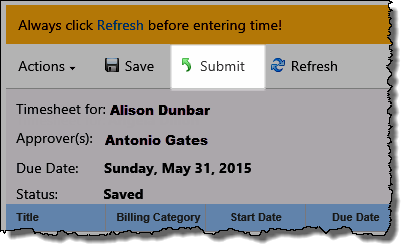 When members of this group submit a timesheet, the status of the timesheet will immediately be changed to Approved When members of this group submit a timesheet, the status of the timesheet will immediately be changed to Approved |
| 2. |
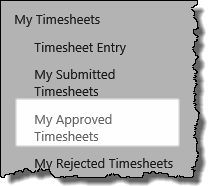 The timesheet will be available in the resource’s My Approved Timesheets display, and in the Timesheet Manager’s Approved by Me display. The timesheet will be available in the resource’s My Approved Timesheets display, and in the Timesheet Manager’s Approved by Me display. |
How to Submit Timesheets for Approval
During the timesheet reporting period, you can enter hours each day and save your timesheet. At the end of the timesheet period, submit it to your timesheet manager for review and approval. To be able to submit a timesheet, your account must be configured with a Timesheet Manager.
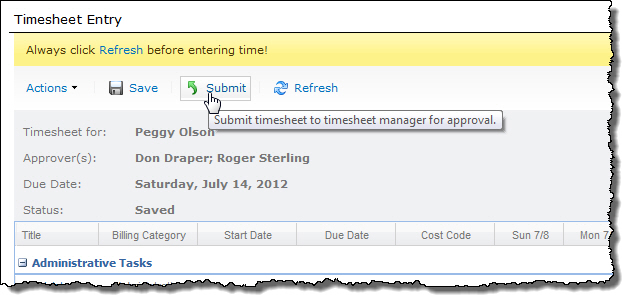 When you are ready to submit your time for approval, click the Submit button at the top of the timesheet. You will be prompted to enter comments for this timesheet period (optional).
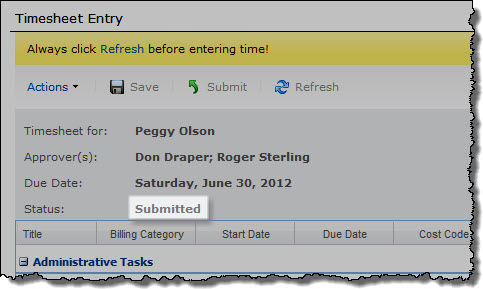
Submitting a timesheet triggers the following actions:
- If working hours validation is configured, the number of hours you entered per day or the total number of hours on the timesheet (whichever is configured for validation) will be verified.
- If the number of hours you entered exceeds the number of hours allowed, you must correct your error before the timesheet can be submitted.
NOTE: If you are allowed to work overtime, this step is skipped.
- If validation succeeds (or is not required), the timesheet Status is updated to Submitted.
- The timesheet is routed to your timesheet manager. If you have a secondary timesheet manager, your timesheet is submitted to that person as well; either manager can approve your timesheet.
- If alerts are enabled, your timesheet manager(s) will be notified by email that there is a new timesheet for review.
- On your home page, the number of submitted timesheets is updated.
 You can also view submitted timesheets that are waiting for approval by clicking the My Submitted Timesheets link in the Quick Launch menu. This view displays a summary for each timesheet that was submitted. To view timesheet details, click the Period link at the top of the timesheet.
To learn how to approve timesheets as a timesheet manager, see Approving and Rejecting Timesheets.
How to Enter Time in TTM
Time Tracking and Management allows you to enter hours spent on administrative and project tasks. You can save time entered in your timesheet each day, or enter time all at once. When you are ready, submit your timesheet to your timesheet manager for approval. To be able to enter time in a timesheet, the following requirements must be met:
- Your account must be configured in the Timesheet Resources list or in the Project Management Central resources list.
- A timesheet reporting period must exist for the dates you want to enter time for.
Once these requirements are met, simply browse to the timesheet you want to complete and enter time. Details about browsing to timesheets, entering time, and saving timesheets are provided below.
For information about submitting your timesheet for approval after you have entered all time for a timesheet period, see How to Submit Timesheets for Approval.
Browse to Your Timesheet
| Step |
Action |
Result |
| 1. |
Click the Timesheet Entry link in the Quick Launch menu to display the timesheet that includes today’s date. |
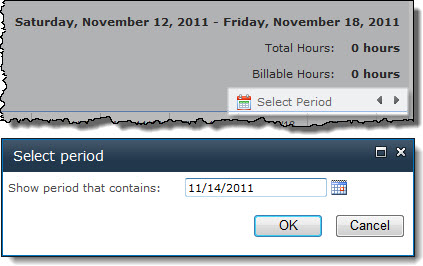
If you want to enter time for a different time period, access it using one of these methods:
- Browse to the time period using the arrow buttons on the right side of the timesheet.
- Click the Select Period link and enter the date you want to enter time for. The timesheet that includes that date will be displayed.
|
| 2. |
Your timesheet automatically includes administrative time categories, like vacation and sick time (if configured), and any tasks you are assigned to. |
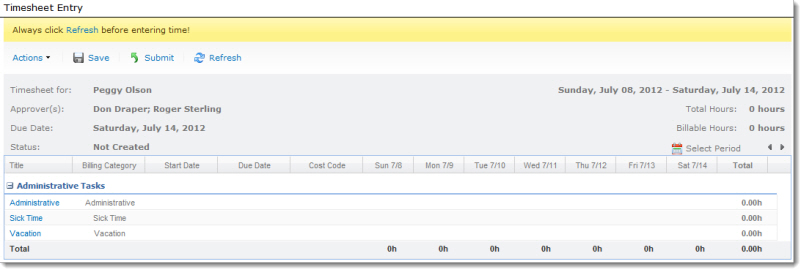
The header of the timesheet includes the following information:
- Your name
- Your primary and secondary timesheet manager (the people who can approve your timesheet)
- The date your timesheet is due (the last day in the timesheet reporting period)
- The time period for this timesheet
- The total hours entered for the timesheet period
- The total billable hours
- Action buttons to save, submit, refresh, print, or export the timesheet
|
| 3. |
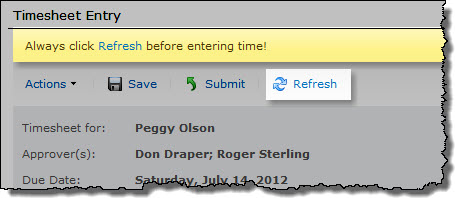
Refresh tasks: Before entering time, click the Refresh button at the top of the task list to refresh your list of tasks, available cost codes, and other timesheet data. |
 |
| 4. |
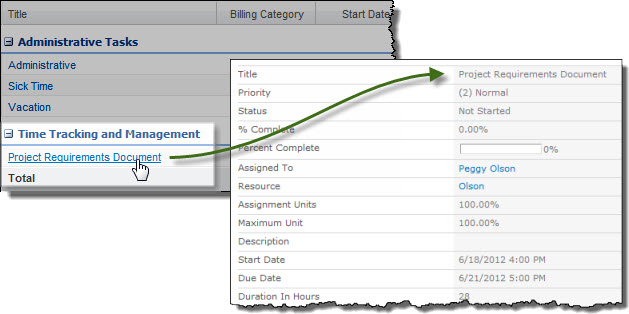
View task details: If you need more information about a task listed on your timesheet, click the task name to view its details. If the task is from a PM Central project, the task information from PM Central is displayed, as shown in the example here. |
 |
| 5. |
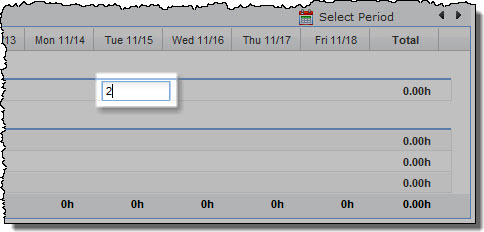
Enter hours: To enter time for any task, click inside the box for the day you want to enter time for, in the same row as the task you worked on. Enter the time you worked in hours. Hit the Enter key or click another time entry box to continue. Repeat for each day and task you want to enter time for. |
 |
| 6. |
Select cost codes: If your administrator has configured cost codes, you will see a Cost Code column in the timesheet. Cost codes allow you to attribute time to specific cost centers or budgets. To assign a cost code to a task in your timesheet, click in the Cost Code box and select the appropriate cost code from the list. |
 |
| 7. |
As you enter time, you will see your per-task and per-day totals accumulate at the right and bottom of the timesheet, with the combined total in the lower-right corner. |
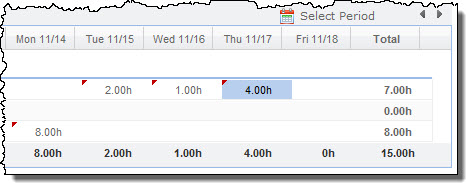
Note: You cannot enter time for timesheets that have been submitted. If you need to modify time for a submitted timesheet, your timesheet manager must reject it back to you.
|
Save your timesheet
|
| 1. |
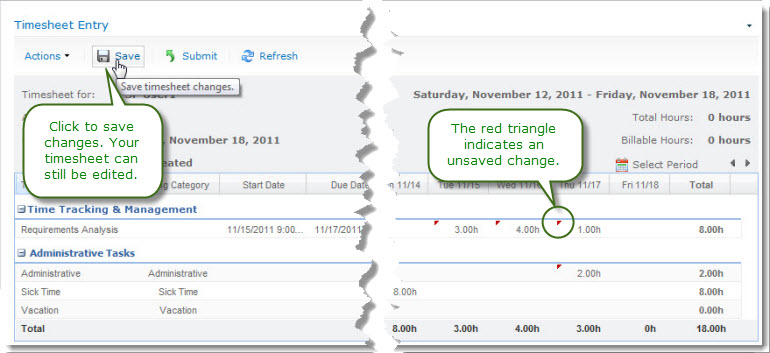
Unsaved changes to your timesheet are displayed with a red triangle in the upper-left corner of the changed timesheet box. To save all timesheet changes, click the Save button at the top of the timesheet. |
 |
| 2. |
When you save your timesheet, the Total and Billable hours are updated in the timesheet header, and the timesheet Status changes to Saved. |

WARNING: Your timesheet is not automatically saved! If you enter time and browse away from the timesheet before saving it, any changes you made will be lost.
|
|
Enter Time
Click the Timesheet Entry link in the Quick Launch menu to display the timesheet that includes today’s date. If you want to enter time for a different time period, access it using one of these methods:
| Step |
Action |
Result |
| 1. |
Browse to the time period using the arrow buttons on the right side of the timesheet. |
 |
| 2. |
Click the Select Period link and enter the date you want to enter time for. The timesheet that includes that date will be displayed. |
 |
|
 Your timesheet automatically includes administrative time categories, like vacation and sick time (if configured), and any tasks you are assigned to.
The header of the timesheet includes the following information:
- Your name
- Your primary and secondary timesheet manager (the people who can approve your timesheet)
- The date your timesheet is due (the last day in the timesheet reporting period)
- The time period for this timesheet
- The total hours entered for the timesheet period
- The total billable hours
- Action buttons to save, submit, refresh, print, or export the timesheet
Approving and Rejecting Timesheets
Approving a Single Timesheet
 If you are configured as a timesheet manager for one or more resources, you have the ability to approve (and reject) timesheets for those resources. You cannot approve or reject time for a resource if you are not the timesheet manager (or secondary timesheet manager) for that resource.
When one of your resources submits a timesheet for approval, the following actions occur:
- If alerts are enabled, you will be notified by email that you have a timesheet to approve. The email will include a link to the timesheet.
- On your home page, the number of timesheets you have waiting for approval is updated.
- The timesheet is available in the Pending My Approval section of the site.
To approve a timesheet:
| Step |
Action |
Result |
| 1. |
Click the Pending My Approval link in the Quick Launch menu to view submitted timesheets waiting for your approval. |
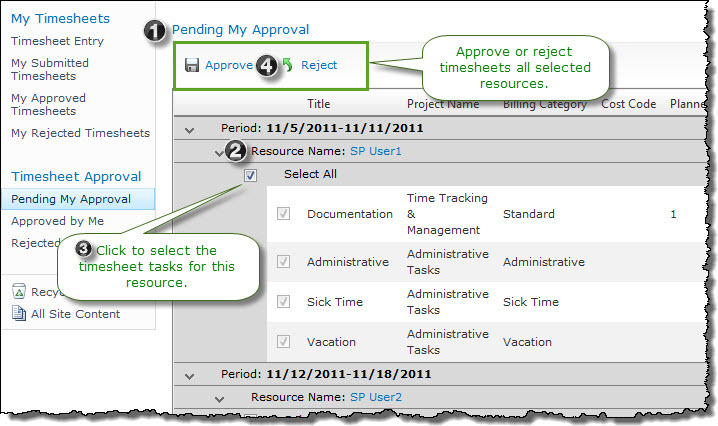
Timesheets are grouped by time period and by resource. You will see timesheets for any resource for whom you are the primary or secondary timesheet manager. |
| 2. |
Locate the timesheet you want to approve and review it. The timesheet will include the list of tasks assigned to the resource, task details, and a summary of the hours worked each day. The timesheet also includes a link to view detailed work and cost information. Any comments the resource entered for the timesheet are displayed below the timesheet details. |
| 3. |
When you are ready to approve the timesheet, check the Select All box below the resource name to select all tasks on that timesheet.
NOTE: You must approve all timesheet tasks at once; line-item approval is currently not available.
|
| 4. |
Click the Approve button at the top of the page. You will be prompted to enter comments for the timesheet (optional). |
|
Approving or Rejecting Multiple Timesheets
To review and approve (or reject) multiple timesheets at once, follow the same steps as above, checking Select All for each timesheet as you review it. When you click Approve or Reject, all timesheets you selected will be approved or rejected at the same time. You will not be prompted to enter comments.
Rejecting a timesheet
Follow the same steps as above for approval, but click the Reject button instead.
When you reject a timesheet:
- The timesheet Status is updated to Rejected.
- The timesheet is saved to the resource’s My Rejected Timesheets list.
- The timesheet is saved to your Rejected by Me list.
- If alerts are enabled, the resource will be notified by email that the timesheet was rejected.
- If you reject a timesheet, the resource can edit it again to make any required changes, and then resubmit the timesheet for approval.
 When members of this group submit a timesheet, the status of the timesheet will immediately be changed to Approved
 The timesheet will be available in the resource’s My Approved Timesheets display, and in the Timesheet Manager’s Approved by Me display.
 Add the appropriate users to the Auto Approved Timesheets group
 When you are ready to submit your time for approval, click the Submit button at the top of the timesheet. You will be prompted to enter comments for this timesheet period (optional).
 You can also view submitted timesheets that are waiting for approval by clicking the My Submitted Timesheets link in the Quick Launch menu. This view displays a summary for each timesheet that was submitted. To view timesheet details, click the Period link at the top of the timesheet.


 If you are configured as a